ref: 9398a533f92f66b9d9c68d674584cea57cc7110c
parent: 6b28f86cc43acdc046a2c2fe0e24d5ca96a6d3e7
author: halfwit <halfwit@hlfw.ca>
date: Thu Aug 22 12:41:33 PDT 2024
Add blog posts
--- a/gitrules
+++ b/gitrules
@@ -1,7 +1,6 @@
/git/index.html /bin/hlfw/list /usr/git
/git/([^'/]+)/usr.html /bin/hlfw/usr /usr/git '\1'
(/.well-known/acme-challenge/([^'/]+)) /bin/hlfw/well-known /usr/web/\1
-/git/([^'/]+)/static /bin/cat /usr/web/\1
/git/([^'/]+)/([^'/]+)/([^'/]+)/info.html /bin/hlfw/info /usr/git '\1' '\2' '\3'
/git/([^'/]+)/([^'/]+)/([^'/]+)/files.html /bin/hlfw/files /usr/git '\1' '\2' '\3'
/git/([^'/]+)/([^'/]+)/([^'/]+)/branches.html /bin/hlfw/branches /usr/git '\1' '\2' '\3'
--- /dev/null
+++ b/posts/2016-07-20-ii.md
@@ -1,0 +1,21 @@
+
+# Taking My Programs With Me
+
+## ii… Captain?
+I’ve always held a strange affinity for ii, the insanely simple filesystem-based irc program. I could never place it, nor could I ever fathom actually using such a thing - it has far fewer balls and whistles than anything I’d go for, out of the box. But filesystems. File servers, really - I’ve spent some time researching operating systems, and Bells Plan9 (from outer space ;p) uses file servers, union mounting, namespacing and a few other tricks to great success. It facilitates unprecedented levels of simplicity in program design, and runtime flexibility. That’s stuck with me, and ii has as well.
+
+Flash forward a year or two. This idea - this paradigm-shifting idea (in my mind) that I want to be able to use the same damn thing on my desktop, on my phone, on my tablet, on my laptop, on my fuckin' TV, on a toaster (you can see where I’m going) - pops in to my head. This should be possible, we’ve had x11 forwarding for years now. It’s really so very close to what I’d want, with one fundamental issue. We use all of the aforementioned devices differently; be it with a keyboard, remote control, gamepad, touch input, the list really doesn’t stop there. (voice control… trailing off in thought…) X11 forwarding somewhat stops being useful at that point. Touch control on the tiny, tiny buttons that are sent over from my desktop would be abysmal. Really. So I started iterating over ideas, and I think I’ve stumbled on to something that may very well do the thing, with the thing, to have the thing. (citation needed)
+
+
+## ii - It’s Not Just For Sadists, Anymore
+
+It’s been there all along - ii. It’s what’s for breakfast, it’s where babies come from, it’s why the sky is blue. I can serve a filesystem, over absolutely anything - specifically sshfs or 9p - to practically any Linux or Unix enabled device. (My toaster will be sore, but I don’t fucking pay it to think, I pay it to toast my bread.)
+
+So what the hell, who cares? ii is nothing, it’s literally just a filesystem (better, file server) representation of the current state of an irc session. What’s revolutionary about being able to serve that up to some other device?
+
+I can write programs to read that filesystem, for each of these devices, using a toolkit specifically designed for said paradigm (TV, desktop, phone) that will not have to be insanely complex. Then, I can write small clients to speak to the filesystem, draw up the buttons or the bells and whistles I require to get the shit done, and be able to go deftly between devices while I move through my day - from my phone, to my desktop, to my tablet - with all of the exact sessions of irc, coding, youtube videos, gaming, internet browsing, texting, all of the above seemlessly across multiple clients. Because, they’re all just drawing pretty boxes around data from a simple filesystem, with FIFOs. It’s handling raciness, it’s handling multiple clients attached, just by virtue of this being a single user solution.
+
+## ii - I Eye The Future
+So, how do you go from a tiling window manager, take those same programs, and connect them to a phone? You technically won’t at all. You’ll simply mount a filesystem. If you’re going to open or close or read a specific file, the underlying logic will send out the ssh requests for that file, (in the case of sshfs) which invokes little overhead. Your phone could simply list the open programs, and you’d select the one you want. (Like, from an icon on a homescreen, if you wanted. I’d prefer having a seperate way to handle sessions of things, personally.) Ideally, that’s all that need happen. The client would only write to the FIFO, which hopefully will not end up in some racy mess, but… I’m pathetically naive at this point, as this is so incredibly early into this journey - I’m sure much of the above will fail to hold true. Coding can be hard, and indeed what I assume may work one way will likely work another.
+
+So now, the journey begins. I’ll be working on writing frontends for ii, then working on other programs, one by one until I get what I want!
\ No newline at end of file
--- /dev/null
+++ b/posts/2017-05-08-keyboardblog.md
@@ -1,0 +1,102 @@
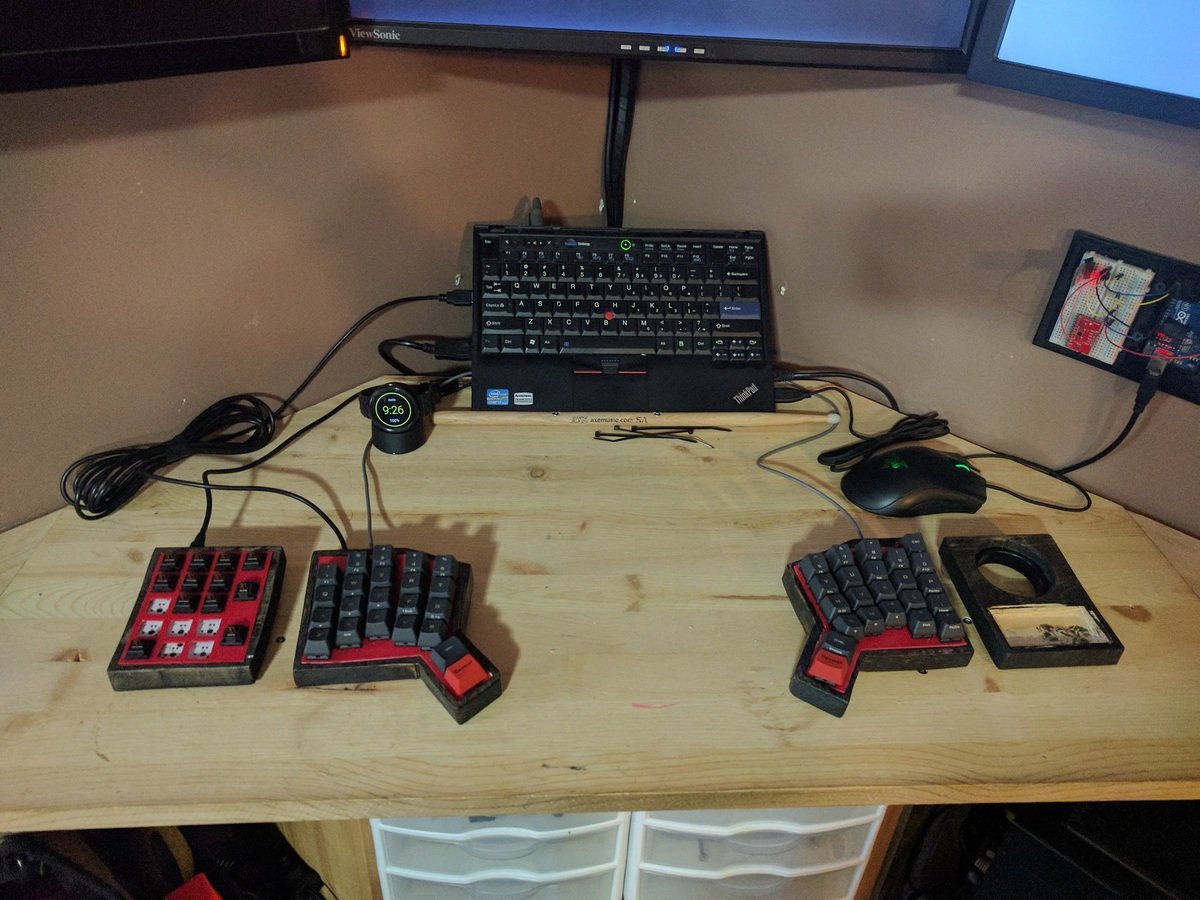
+# Keyboard Build Log
+
+>Imitation is the sincerest form of flattery - Charles Caleb Colton
+Inspired by the Ergodox and [Oobly](https://geekhack.org/index.php?topic=49721.0)
+
+## The Beginnings
+
+[Initial key layout plan](https://ptpb.pw/Objk) was born one night, during some discussion about discomfort while typing amongst some friends. A few days later, a secondary spark of inspiration hit, and this was born:
+
+And yes, it's a coffee can cut into pieces, with the keycaps arranged using blue poster-tack. Now, this is well and fine, but I can't seem to find the plugin anywhere, and it's certainly not connecting to bluetooth. So I fear I must go further.
+
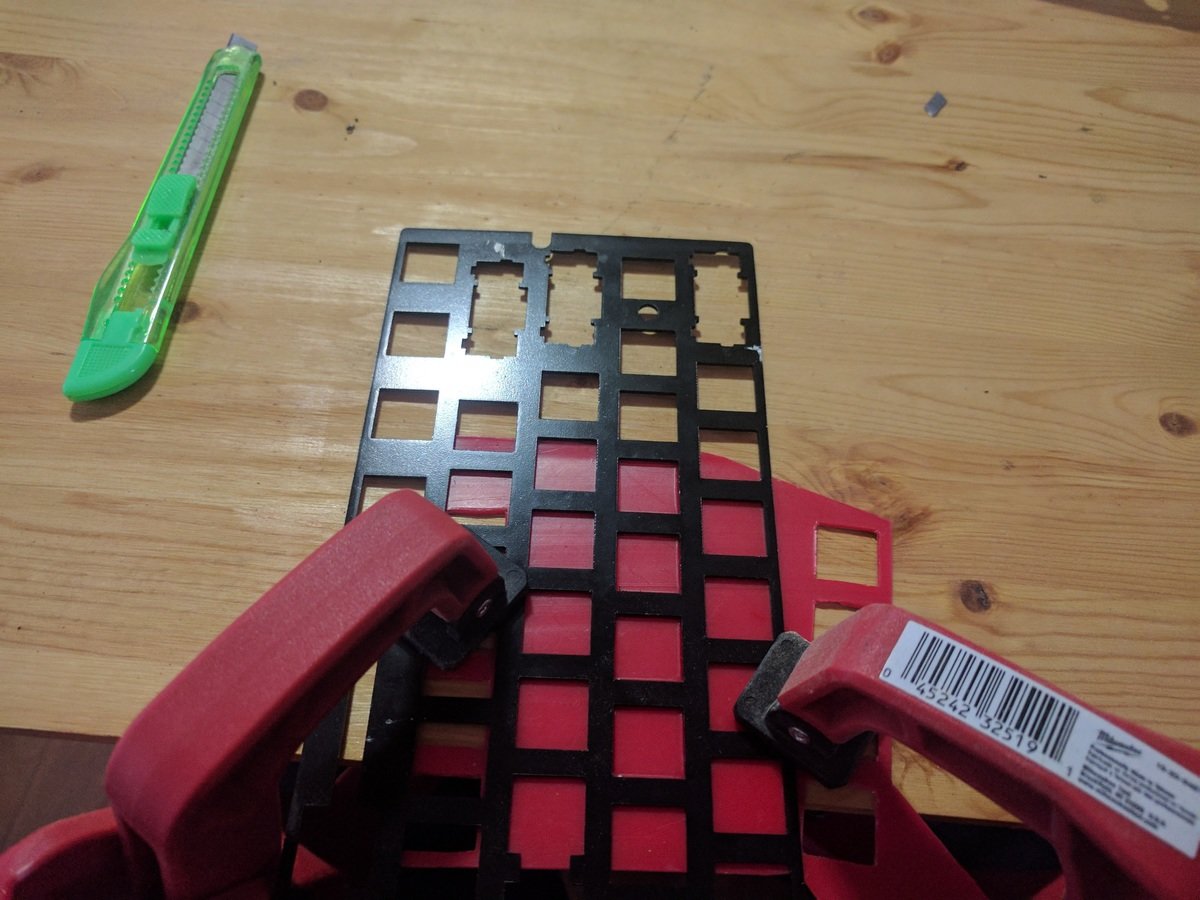
+This is my donor board, a Poker II that will be sacrificed for switches, and the metal will be repurposed to suit my needs.
+
+
+Stay tuned for updates!
+
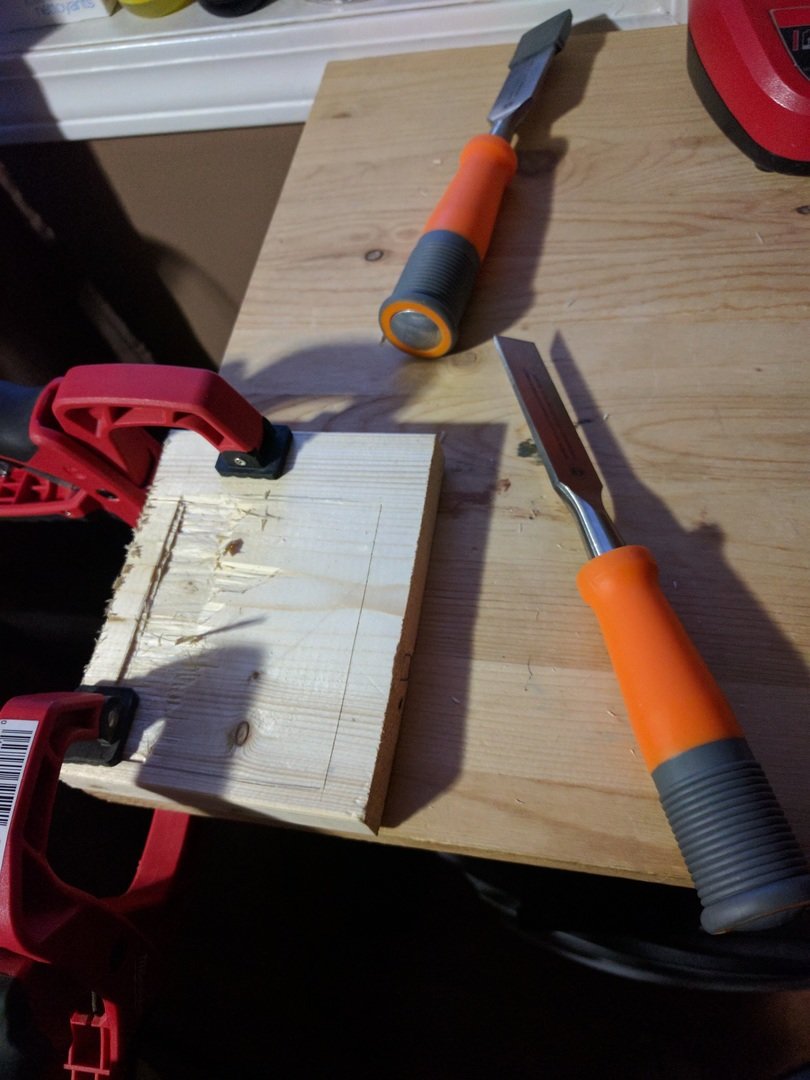
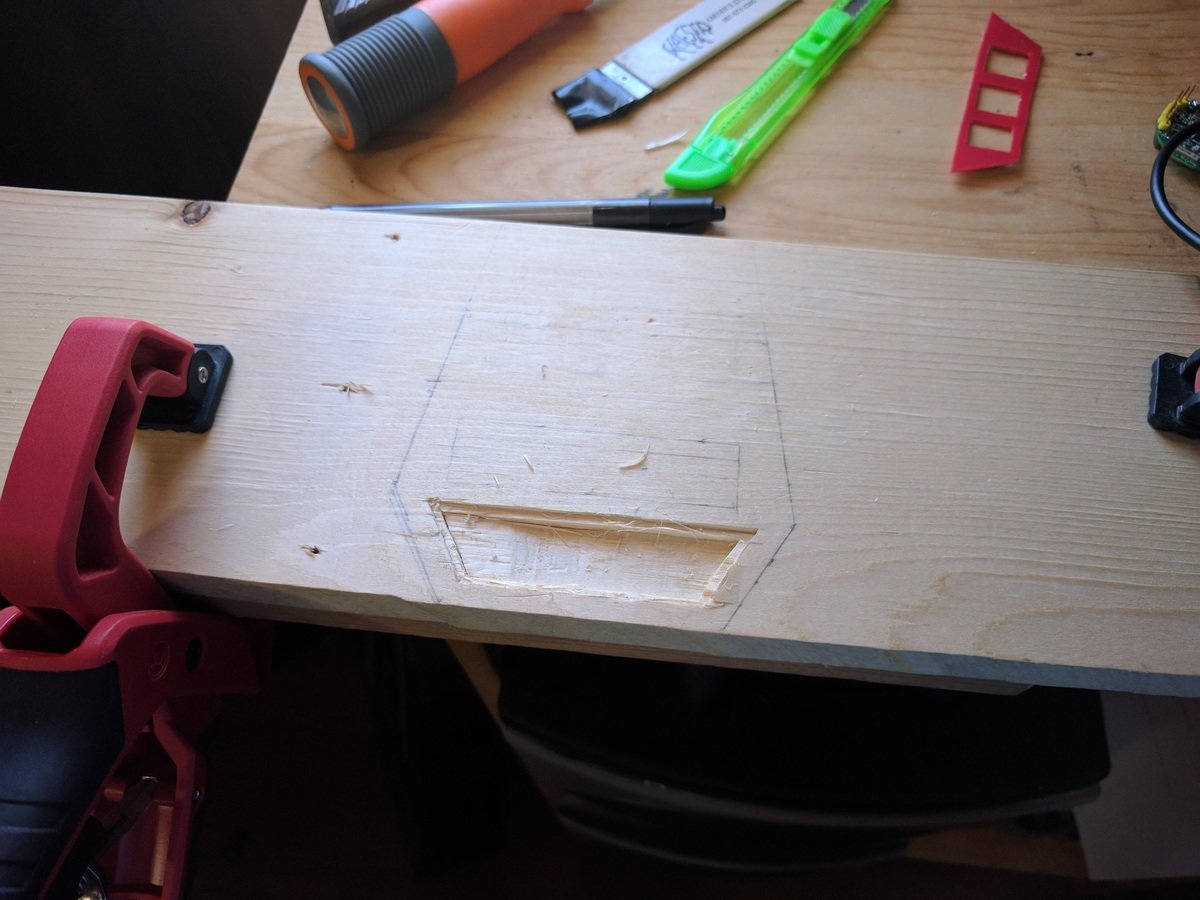
+## Carving My Place In The World
+
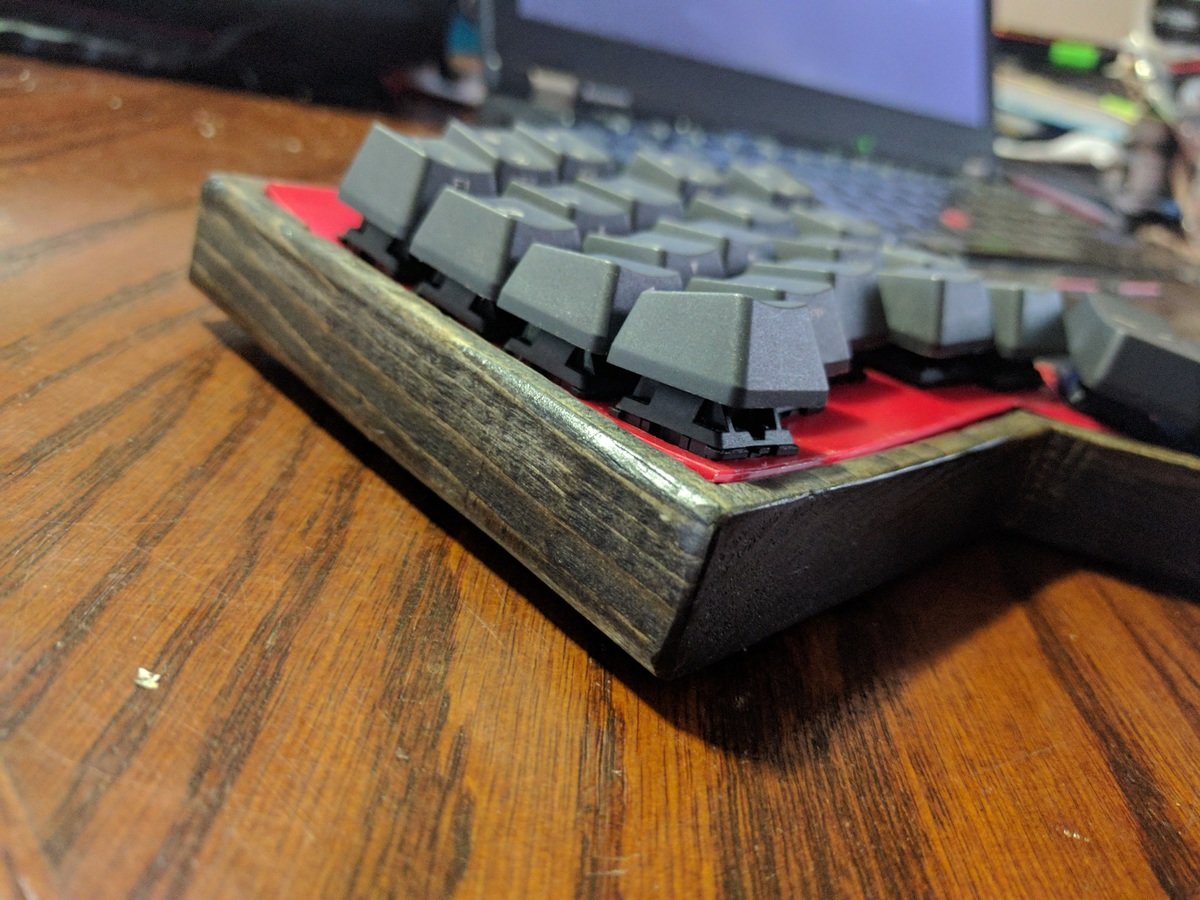
+I found a piece of curved wood at work that I'm going to attempt to use as a housing, for the initial version of this. (Future versions, some time in the future will end up as milled aluminum)
+
+
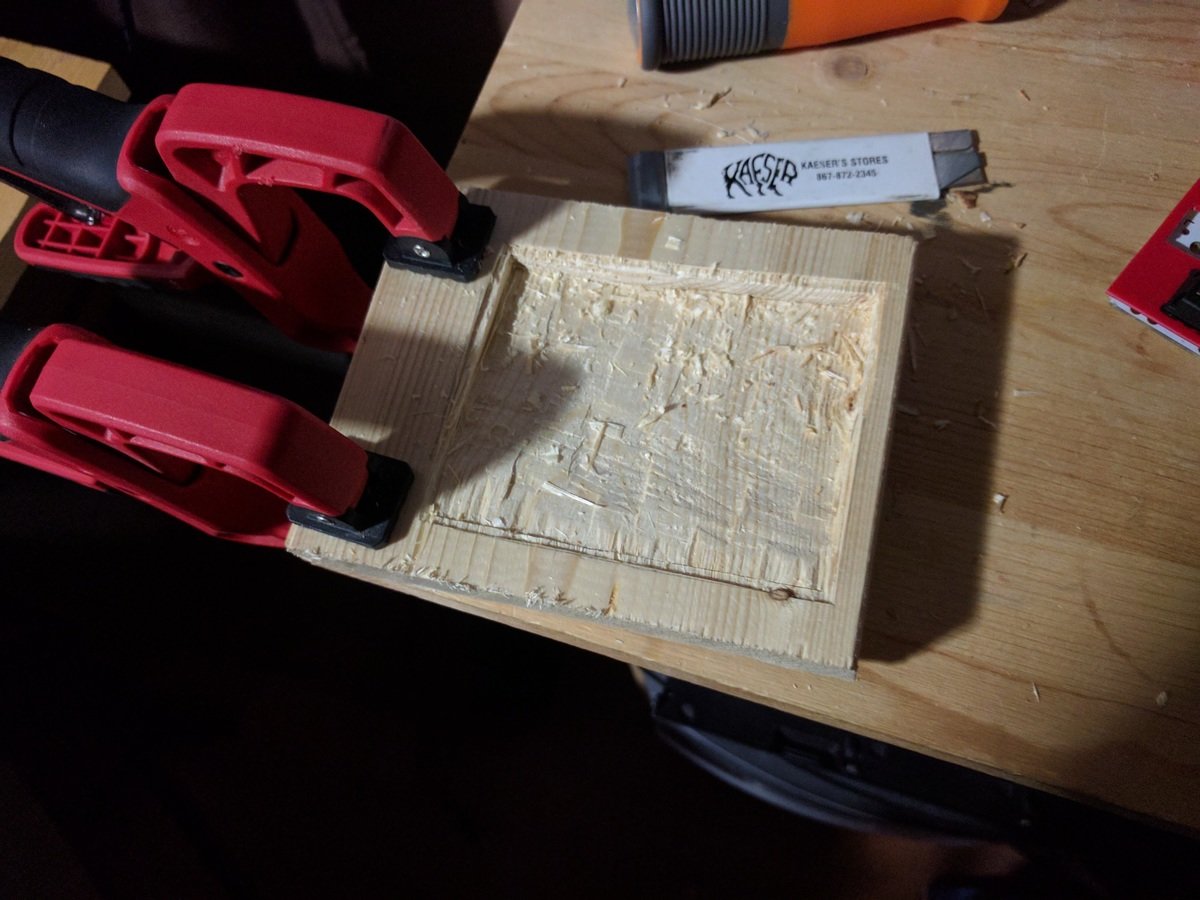
+My next step is desoldering my old keyboard, then start shaping the cases.
+
+Desoldering was held back for lack of a solder pump, so I've been working a bit on shaping out the cases. I did a test-fit of my keycaps into the wood - looks pretty good!
+
+
+
+
+
+
+
+
+
+## Well, This Is Interesting.
+
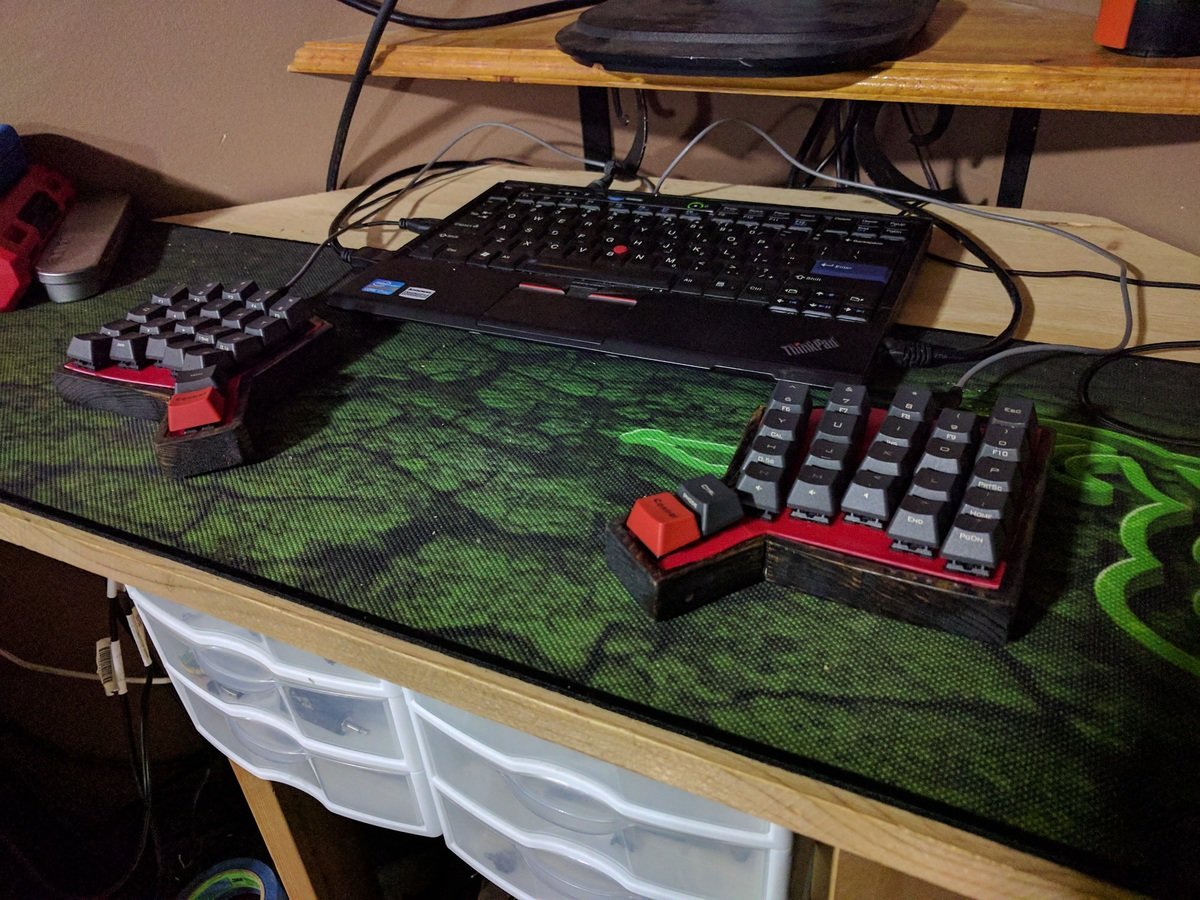
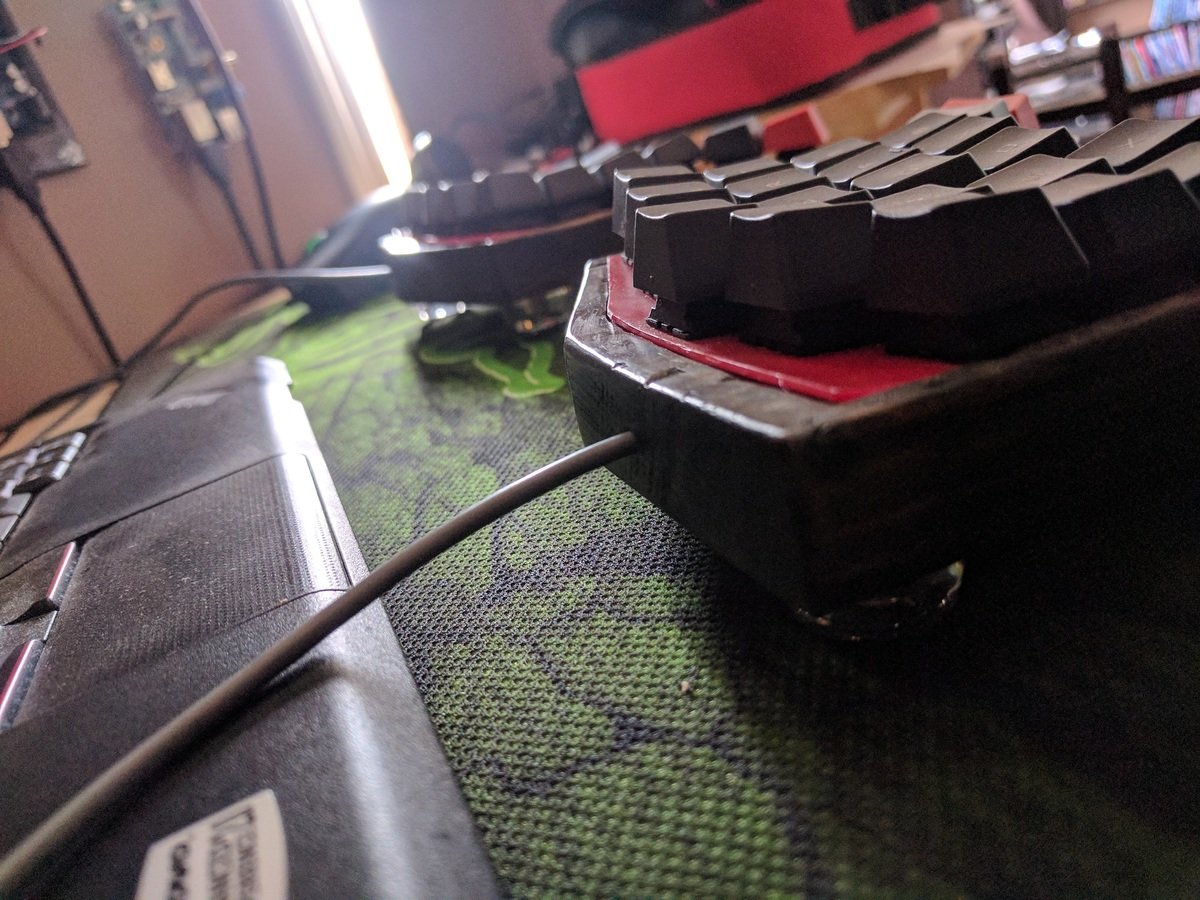
+We have a little bit of an update! I completed the left half... ok maybe not. I couldn't wait to see it together, still waiting on the electronics.
+
+
+
+
+
+
+
+
+
+## Update: Thu Jun 1
+
+
+
+Hopefully I see my Teensy, diodes, and I/O expander in the coming few days.
+
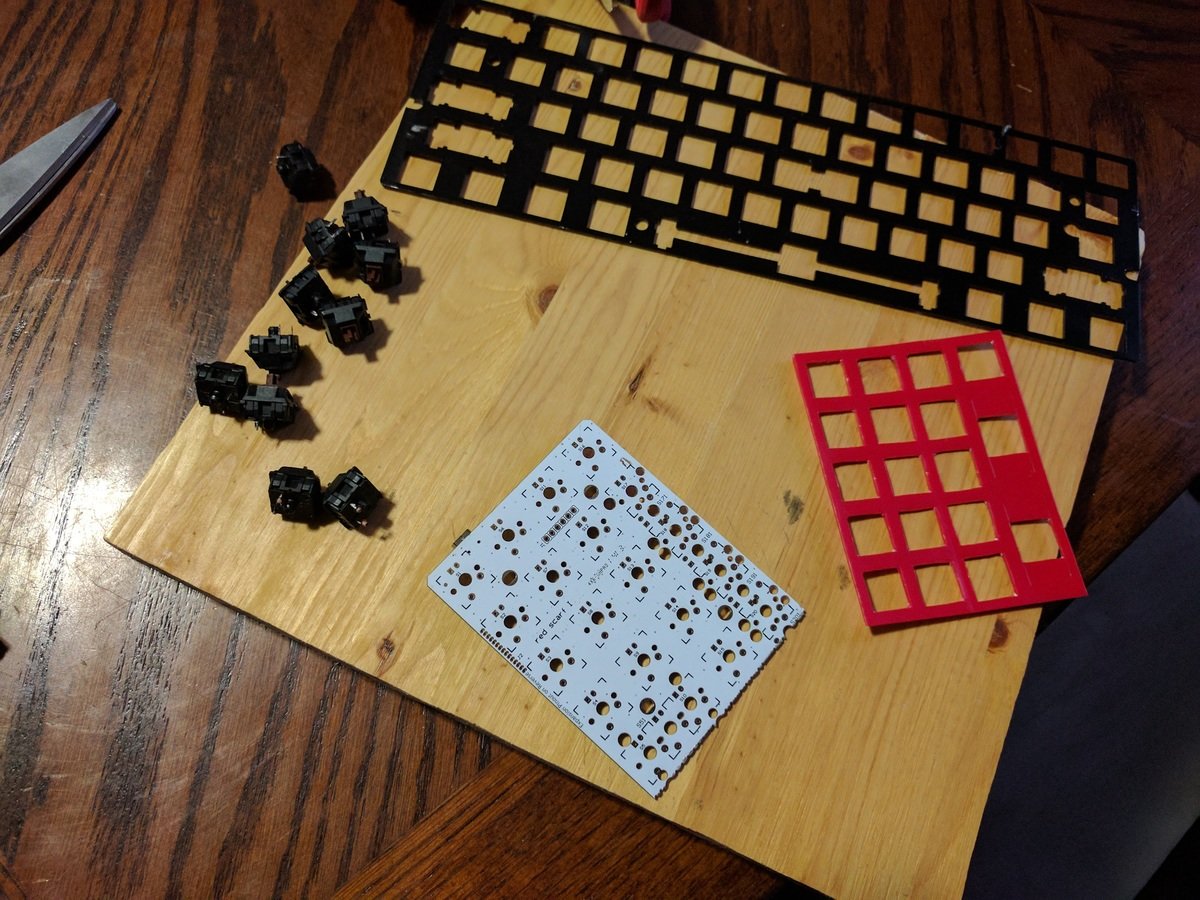
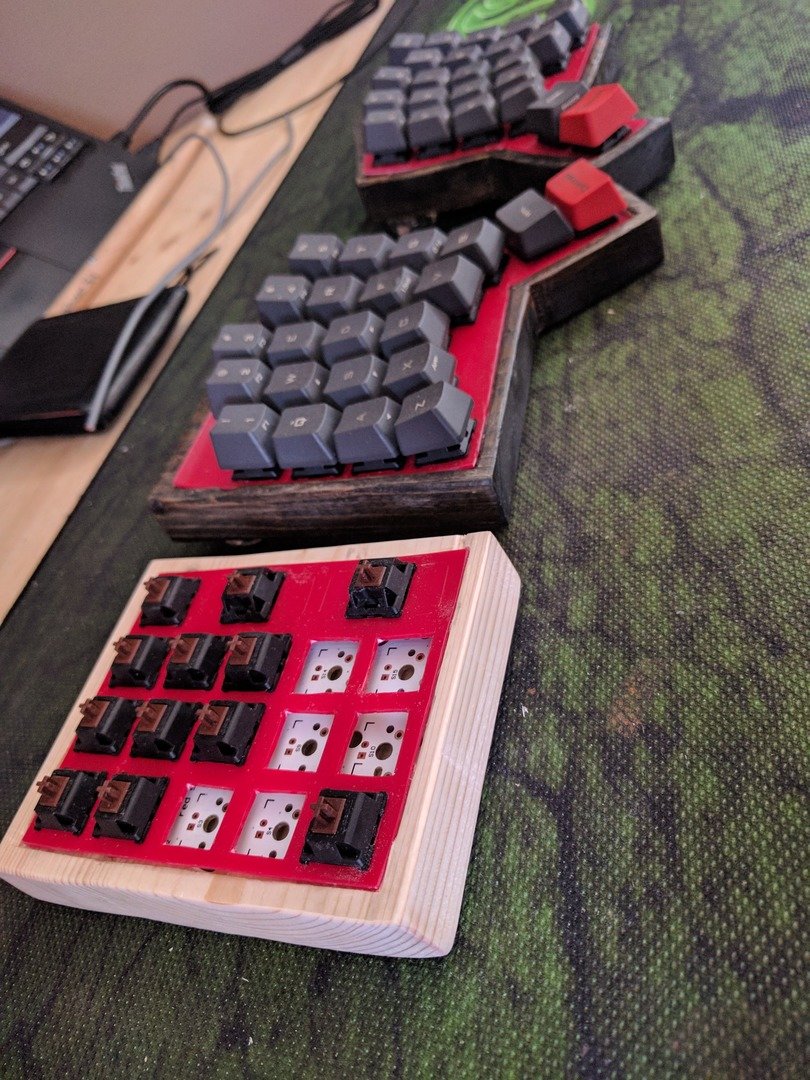
+## A Small Numpad Maybe?
+
+
+
+
+
+
+
+
+
+This will go on the left hand side of the split keyboard, for numeric input.
+I have been hanging on to this GH10 PCB for over a year. It's finally time to use it!
+
+
+
+I realised this was shockingly similar to the tools I used to build the keyboardin color.
+
+
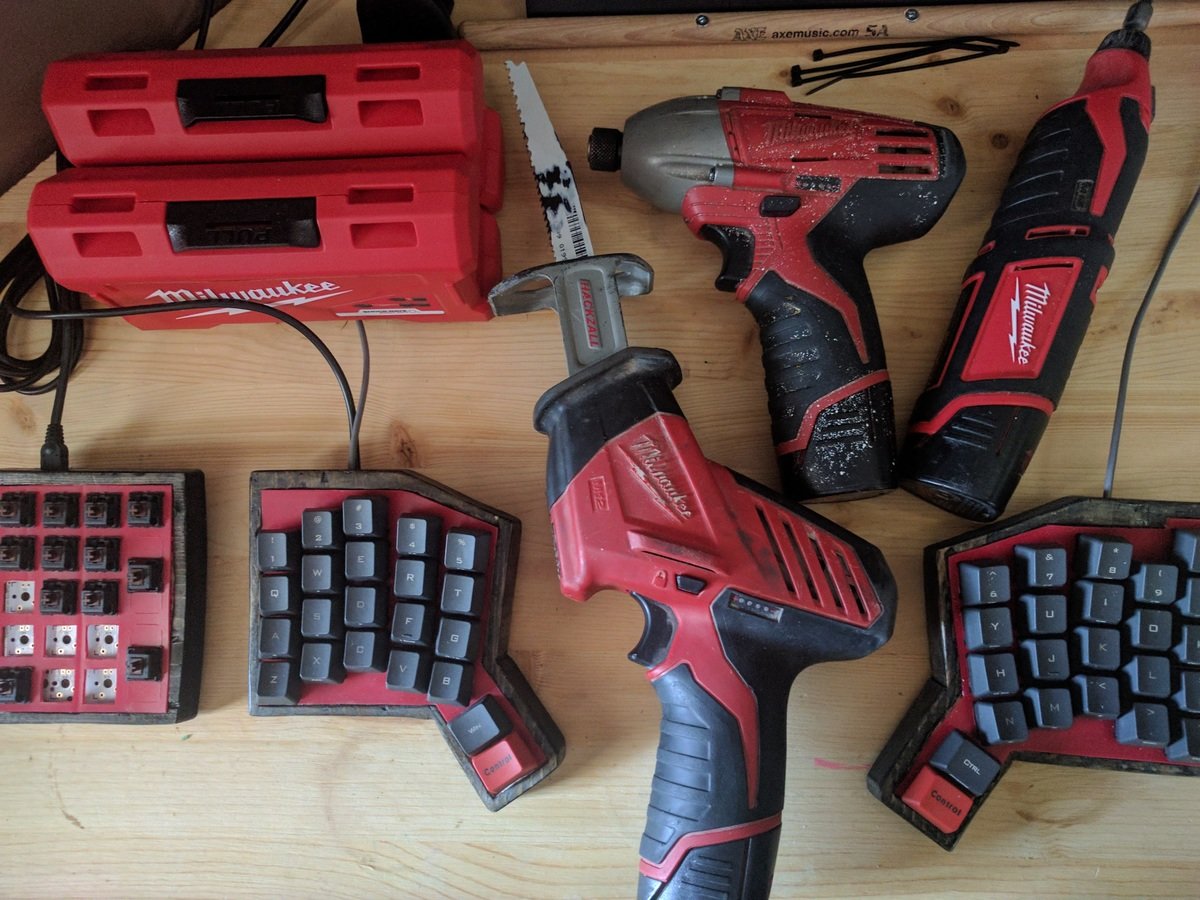
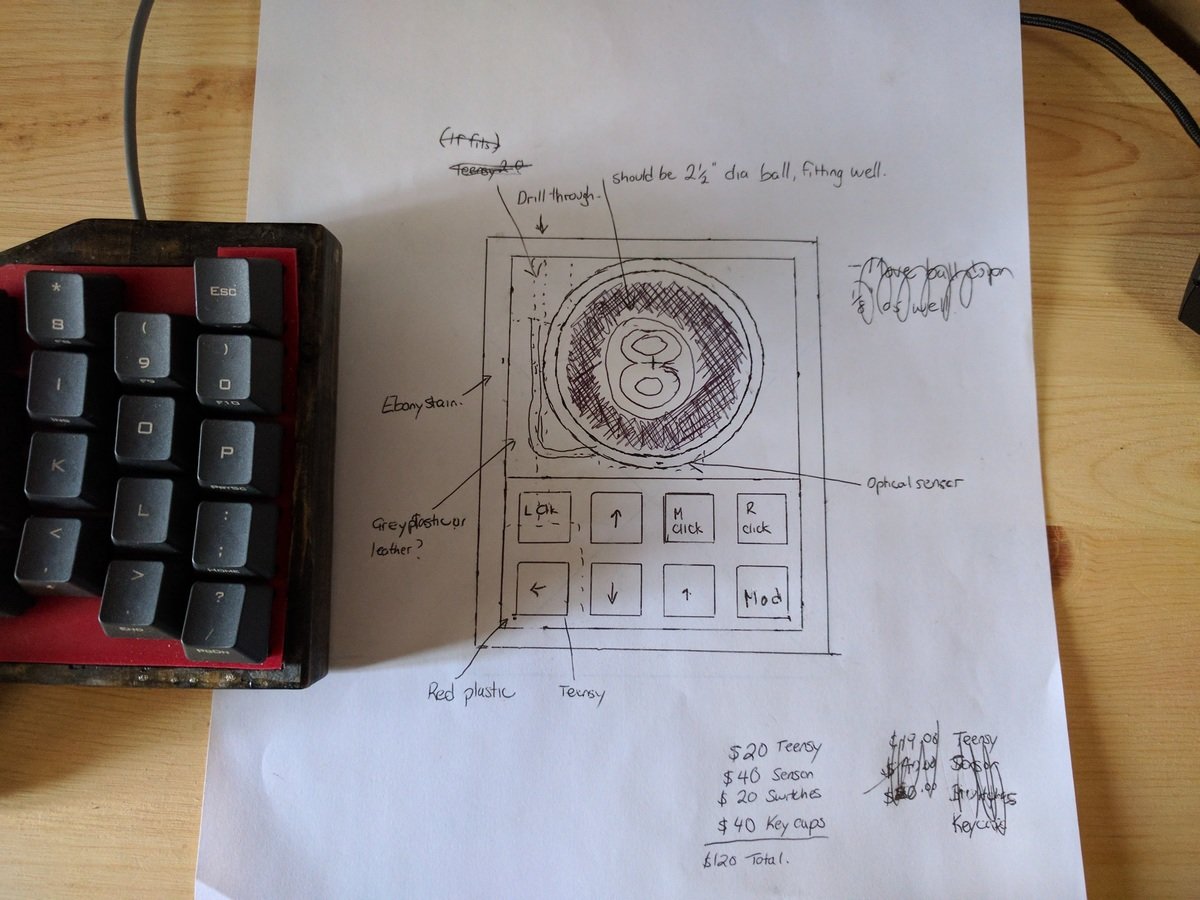
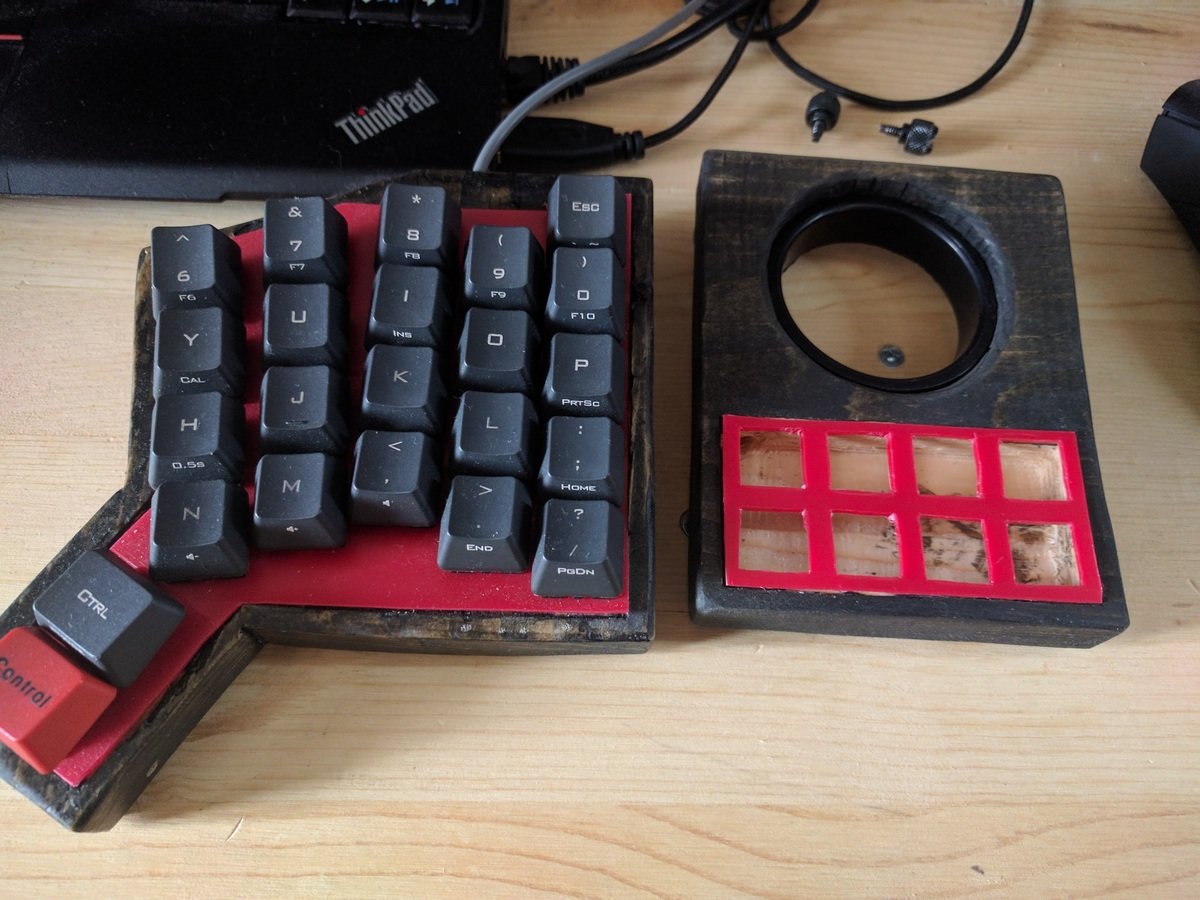
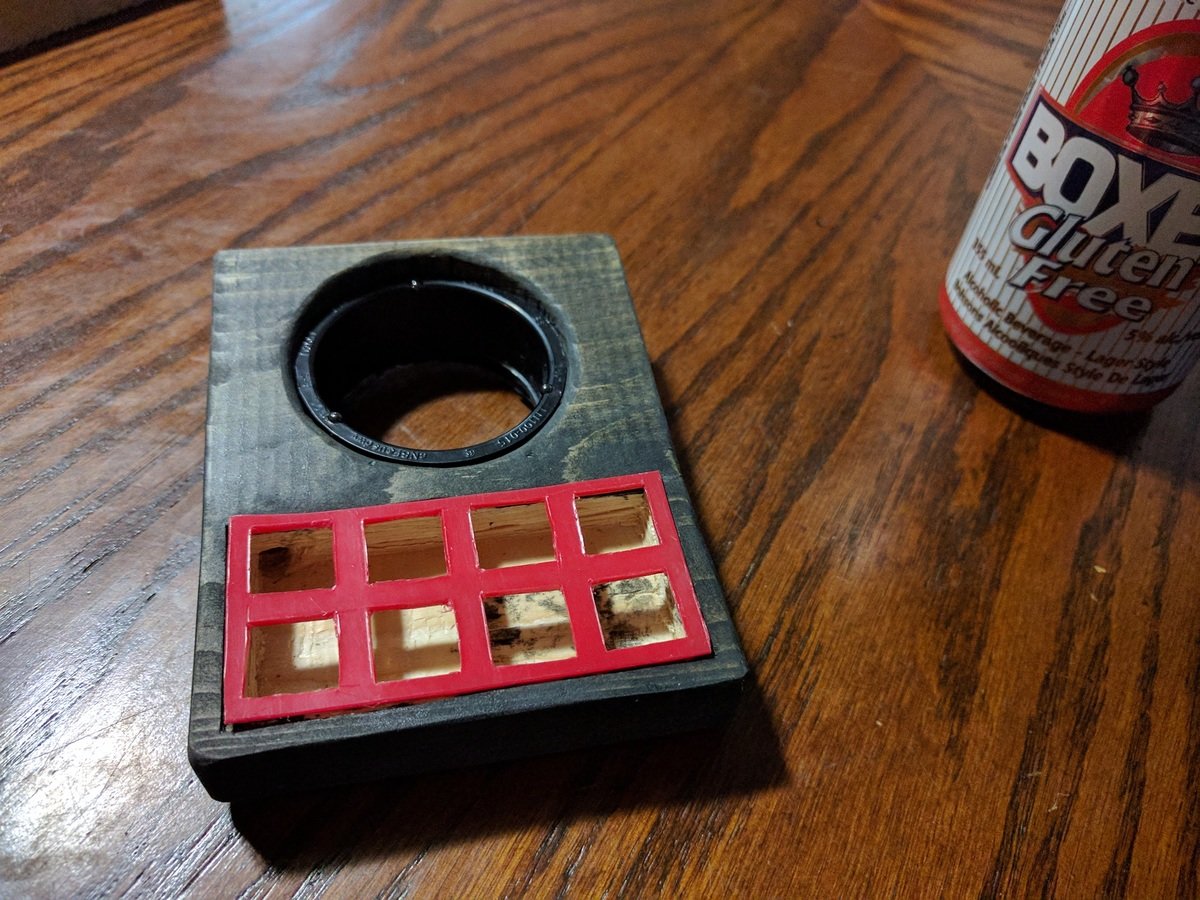
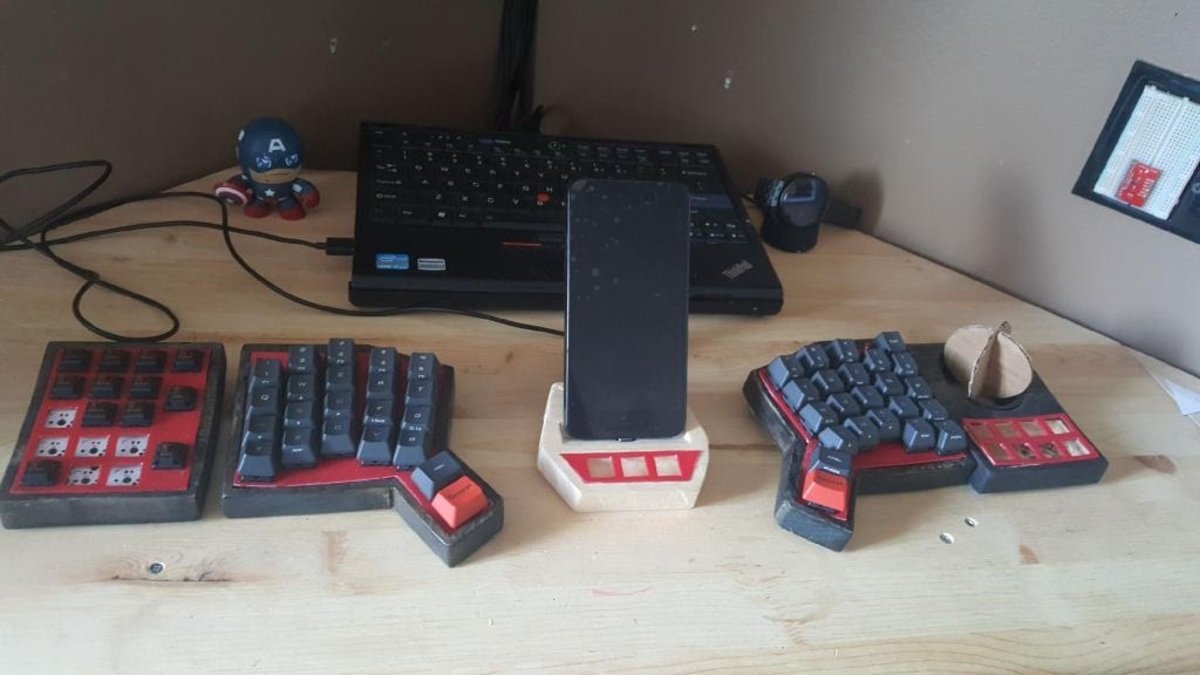
+## I Dream Of Eight-balls
+
+Having seen the three pieces, I was reaffirmed in my long-standing want for a trackball. It seems like it'll fit so well among the others - so I started planning one out.
+
+
+
+
+
+
+
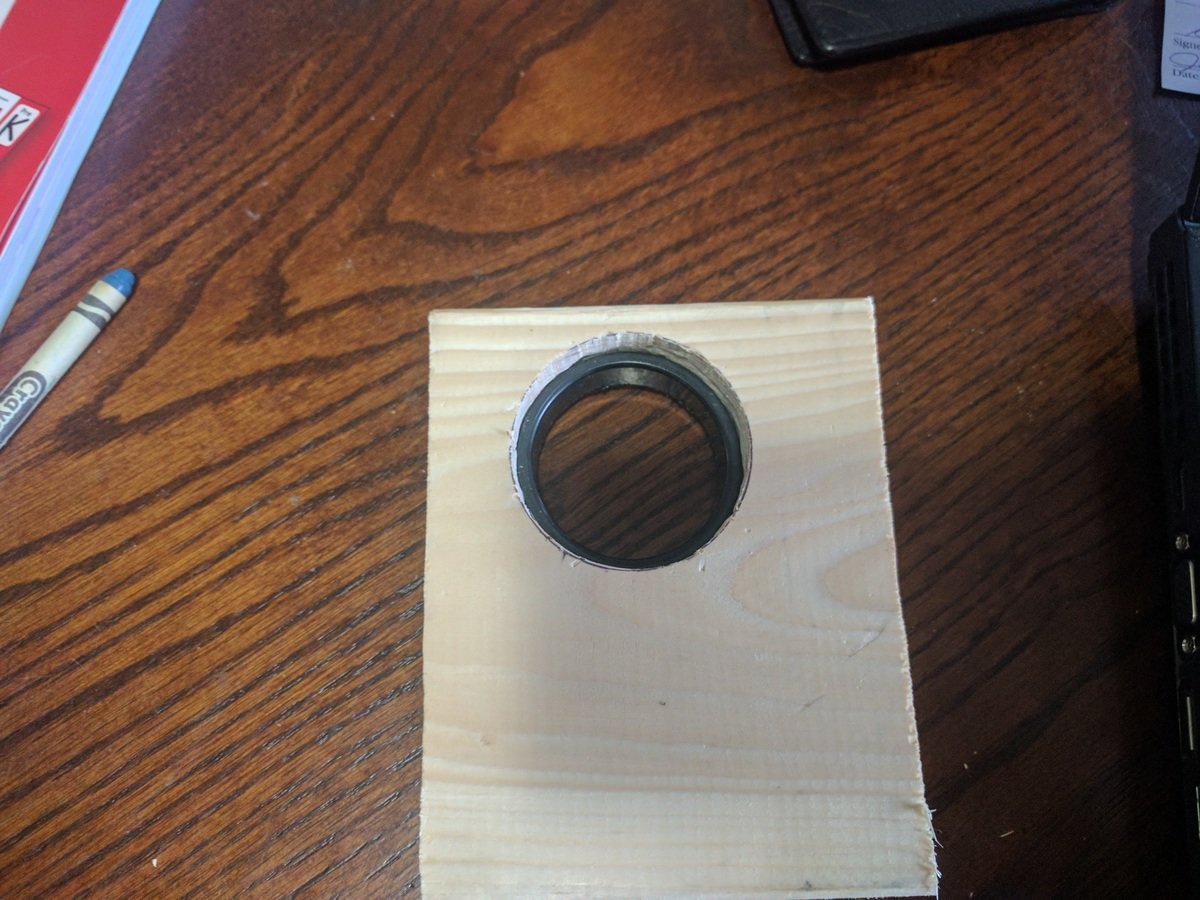
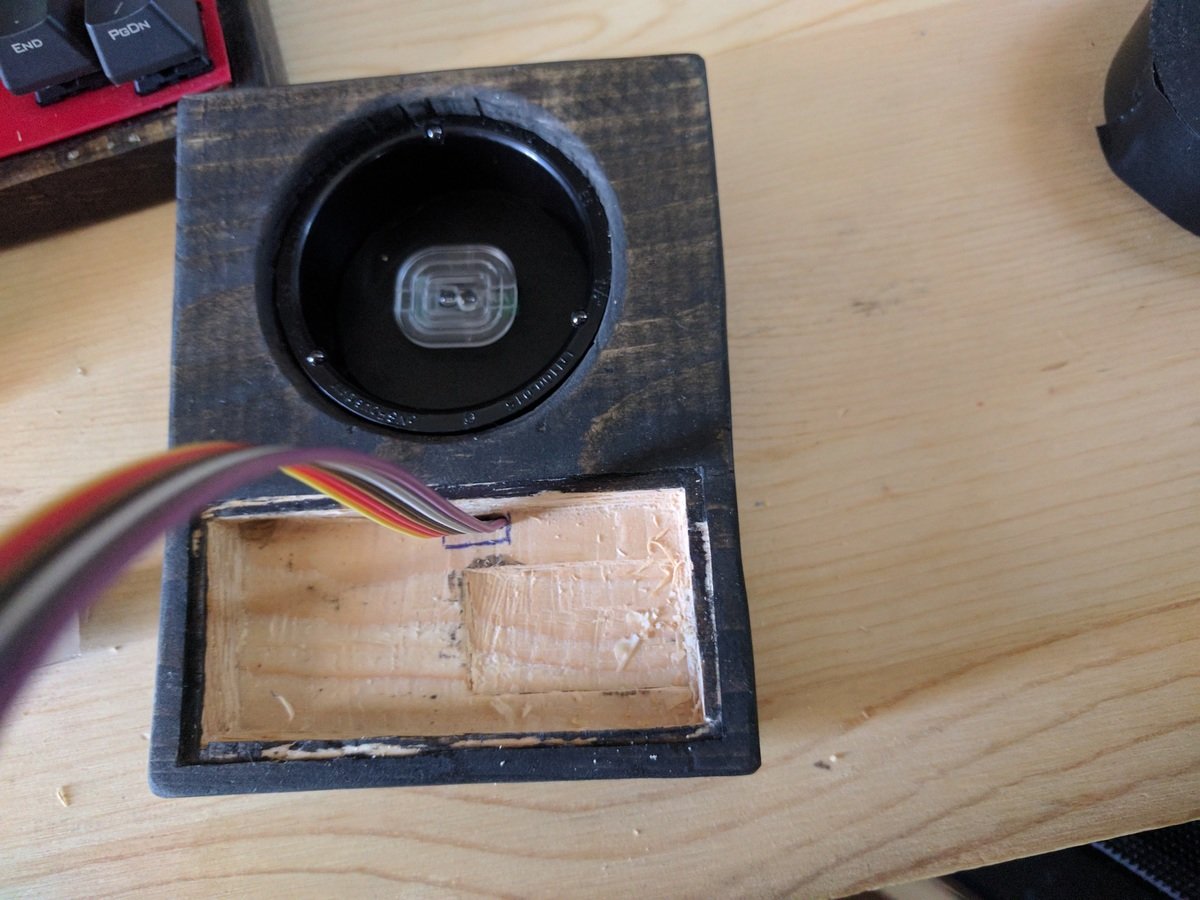
+## The Parts Are Trickling In!
+
+The ball bearings arrived, and are now installed:
+
+
+...And only the ball bearings. So... then I got bored.
+
+
+
+
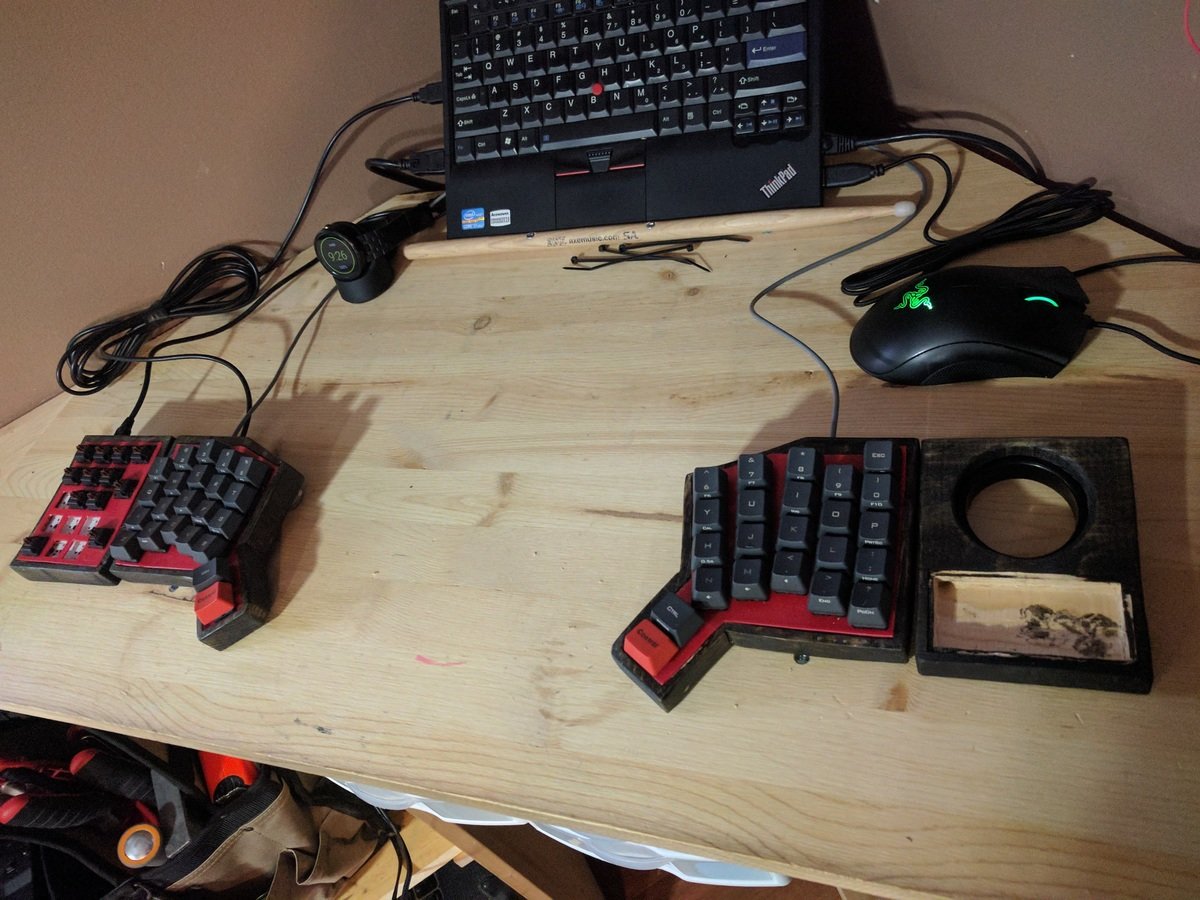
+## Keycaps Arrived
+
+And switches, and the I/O expander. My first Teensy came DOA, so I have to now wait for the next one to come in to finish wiring. Also waiting to buy some stain to finish the phone dock, but it still looks pretty good!
+
+
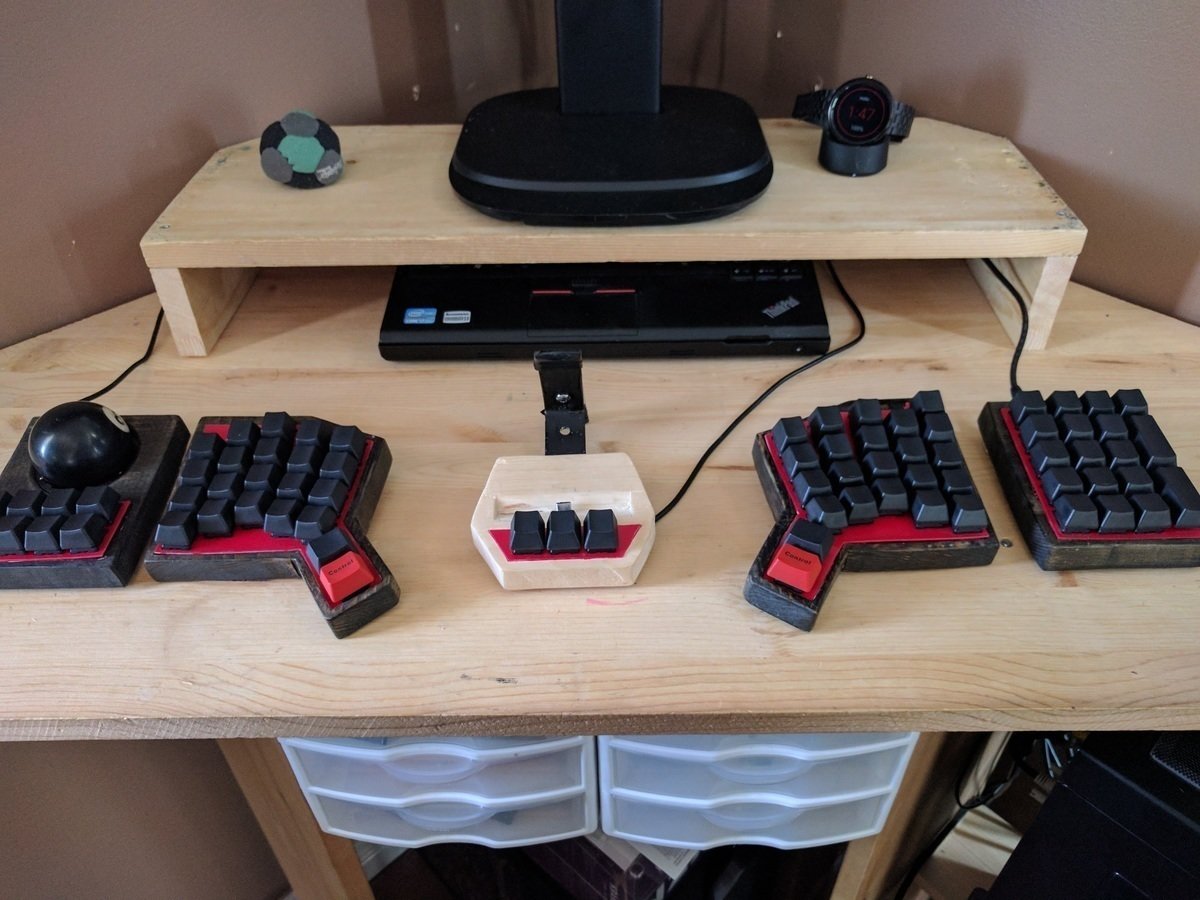
+## This Has Been A Painful Wait
+
+I still haven't received a working Teensy, so my keyboard is still in stasis. Painful, painful stasis. Though I did stain up everything, and it's all but done besides the electronics!
+
+
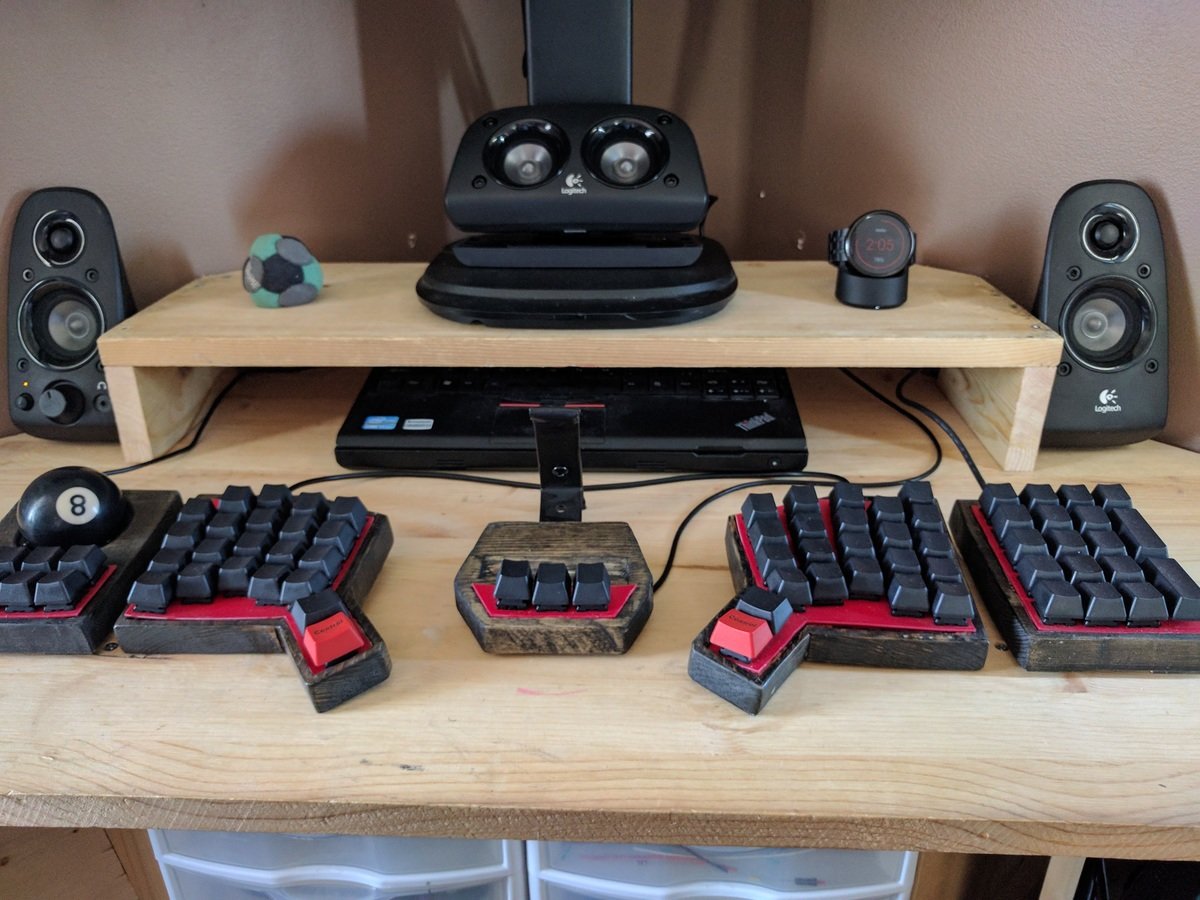
+## I Forgot To Mention...
+
+It works fine. I've been typing on it for over a year now, and it's just wonderful! I have some pictures of the wiring, and some schematics that I plan to write up about when I have more time (and money) to replace a dead optical sensor for the trackball - so there will be a follow up blog posting to look forward to specifically about the trackball, and a final posting about the wiring and programming involved to make this happen. Until then, thanks!
--- /dev/null
+++ b/posts/2017-07-30-deskblog.md
@@ -1,0 +1,118 @@
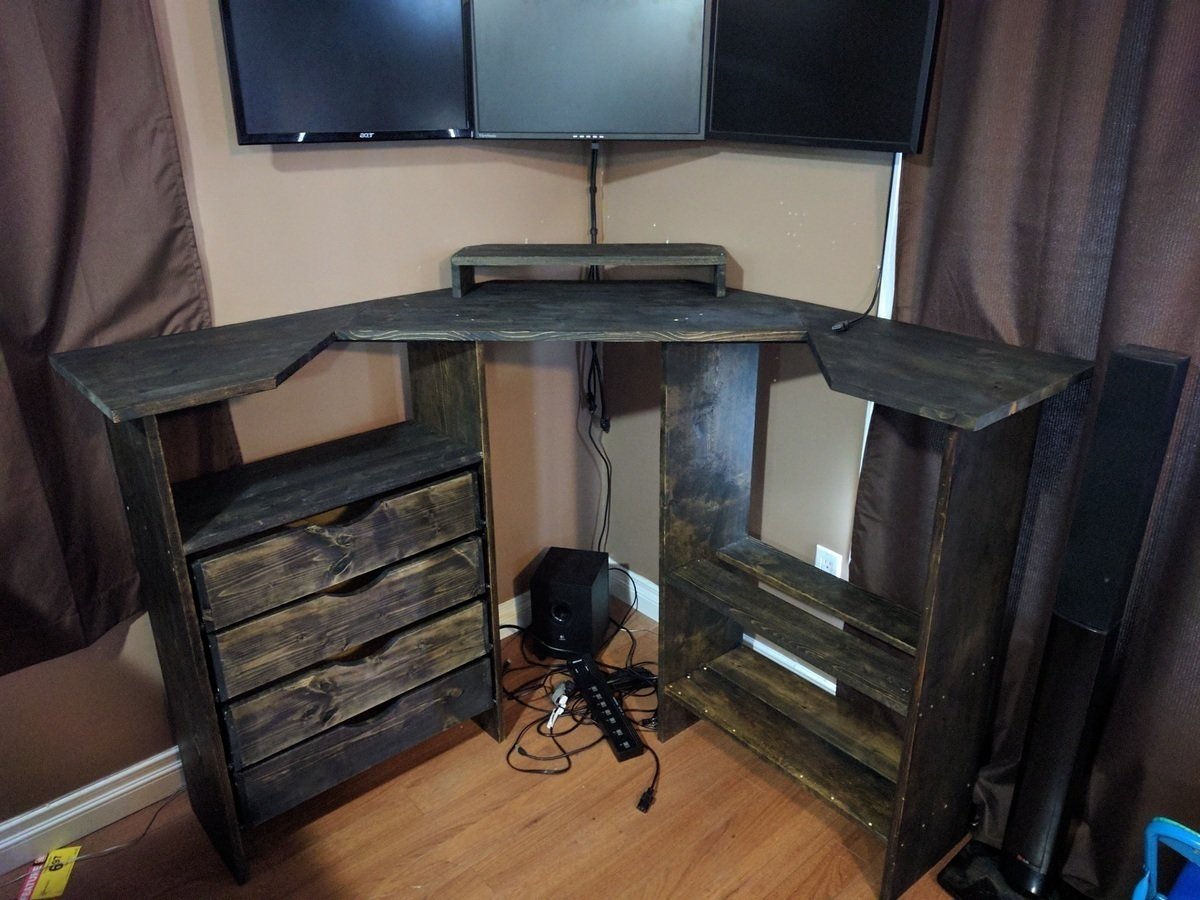
+# Desk Build Log
+
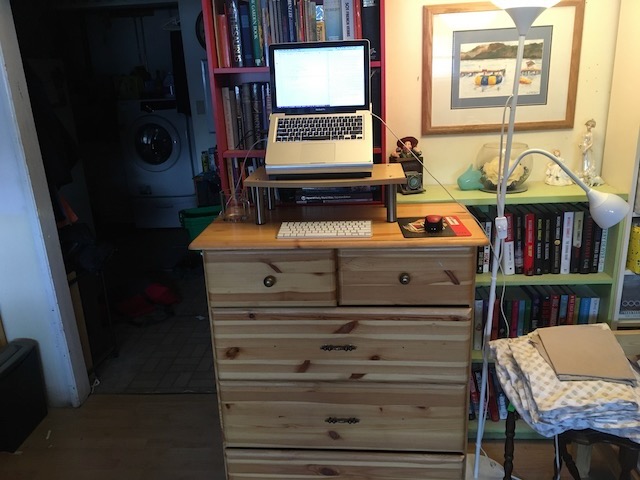
+## 2014
+
+I had been reading all of the various literature about standing desks. It all seemed too good, why weren't these more popular?
+Oh, right. That price tag. At the time, the sit-to-stand variants that I had found were > $1,000 CDN, which is well above anything I'd be willing to pay for a desk. (Which is funny, since all told this desk probably did cost me ~$300)
+So it came down to either buying an existing standing-only desk, non of which I really liked, or designing something of my own to fit exactly in the space I had.
+
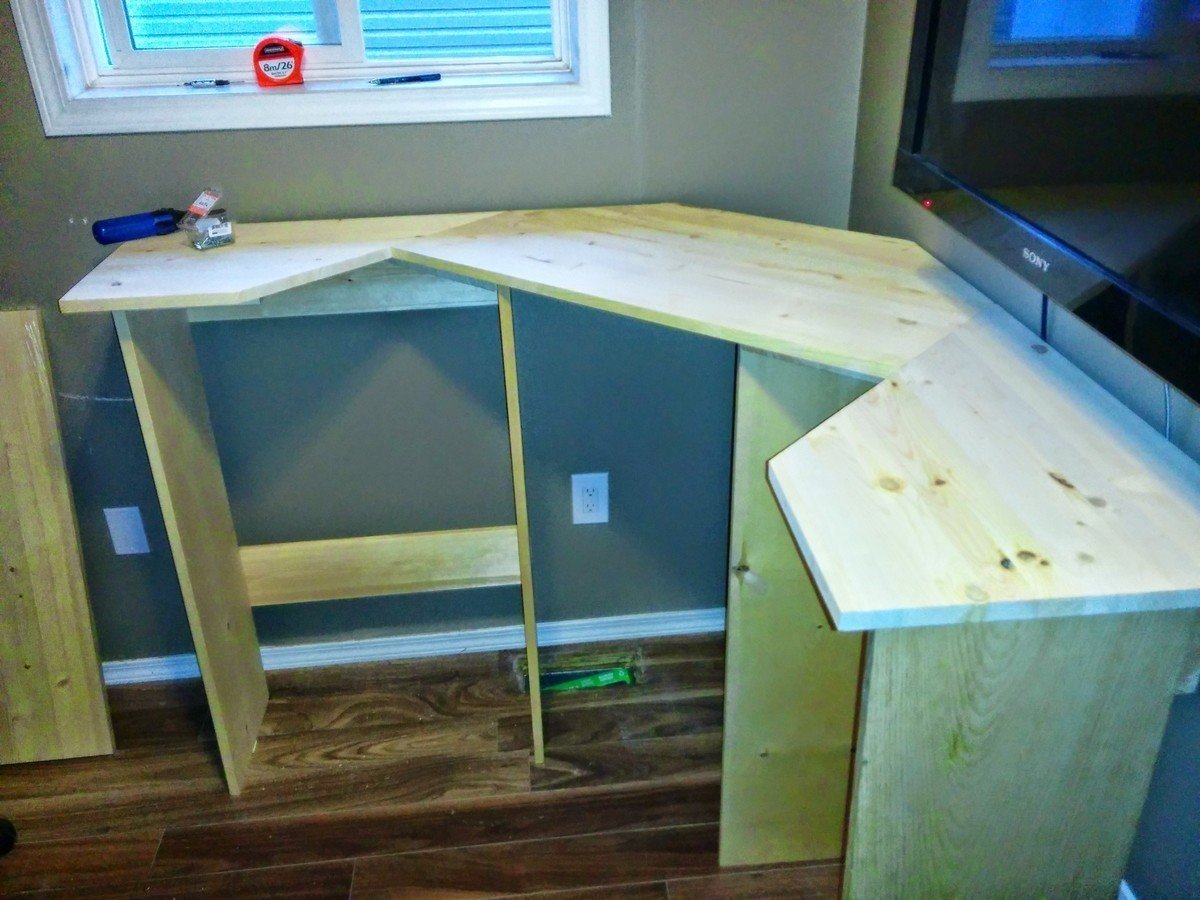
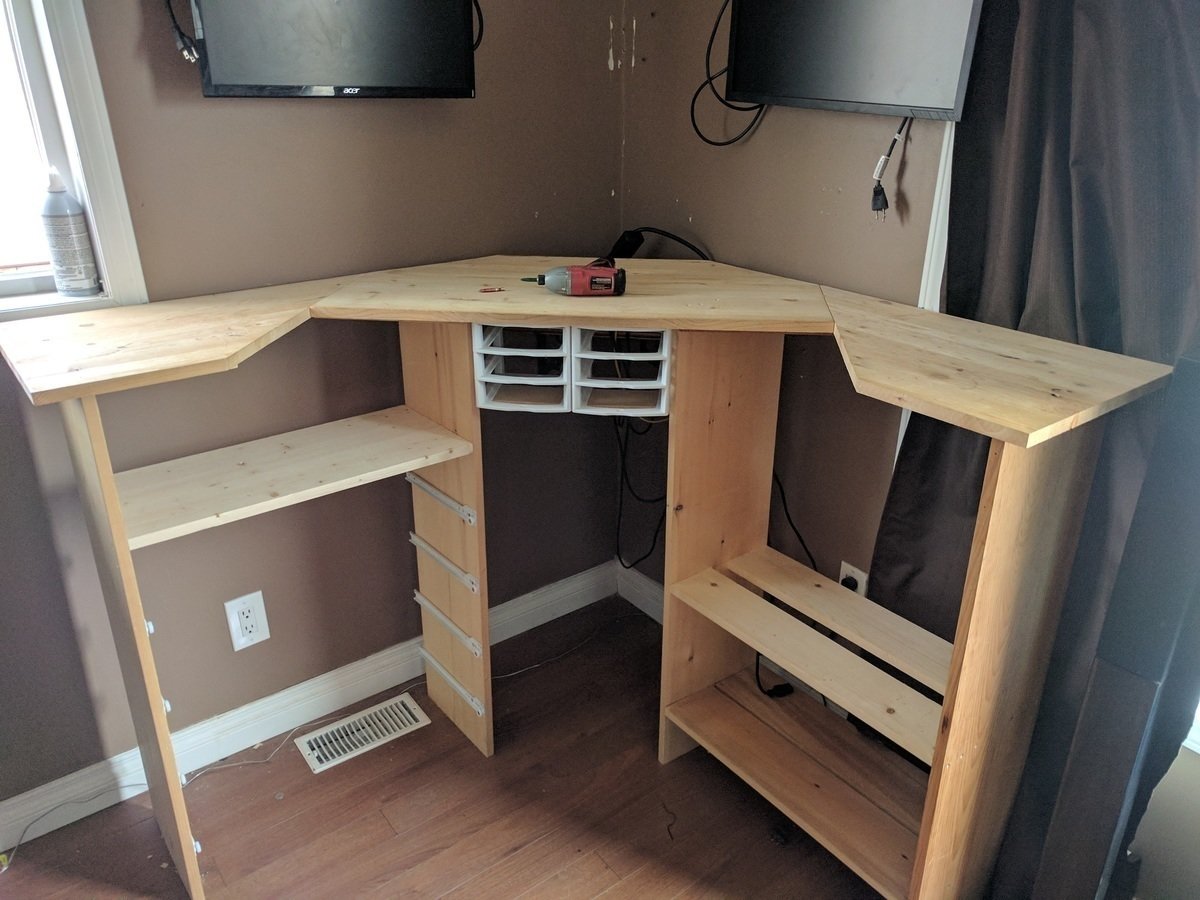
+## It Started On Paper
+
+I started with some dimensions, and some calculations of viewing distances from monitors, that ended up being wrong. (I've long since lost the drawings) I knew I wanted a corner desk, and to be (at the time) roughly 30" from my monitors. I had 52" from my wall to where the door opened, and in the spirit of symmetry I decided to have both wings of the corner desk extend out to that distance.
+Then, I was measuring from the floor to a more-or-less ideal height; I went with 40.5" tall, and had a tray that I could adjust height-wise to meet exactly.
+
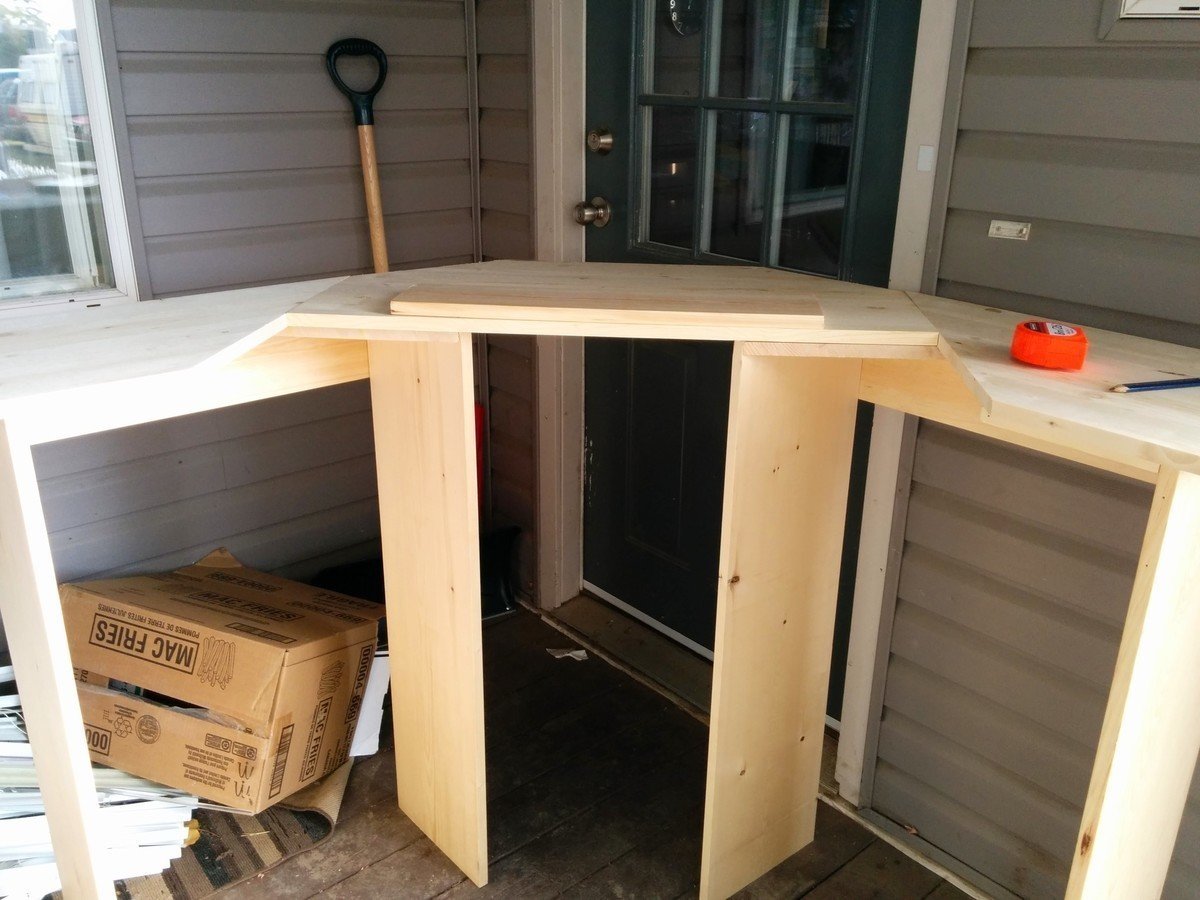
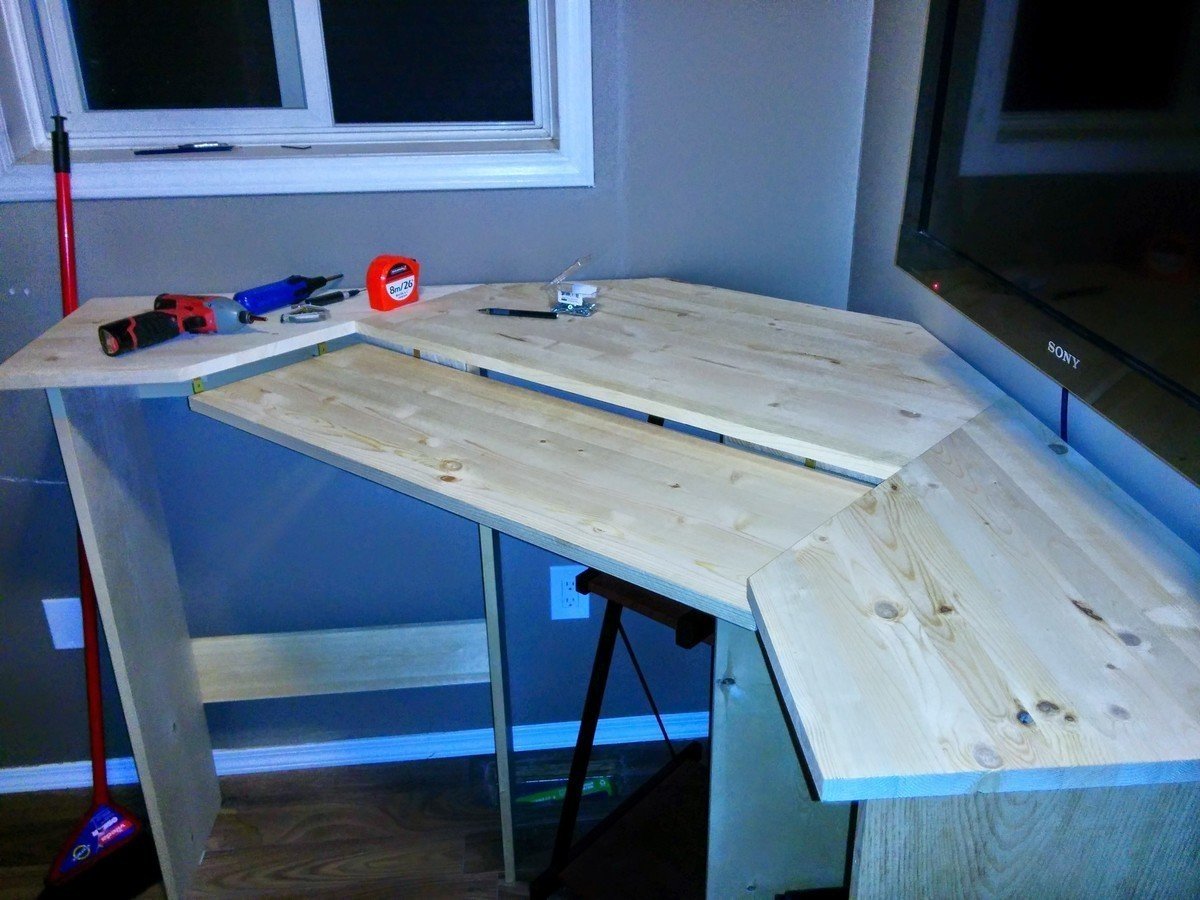
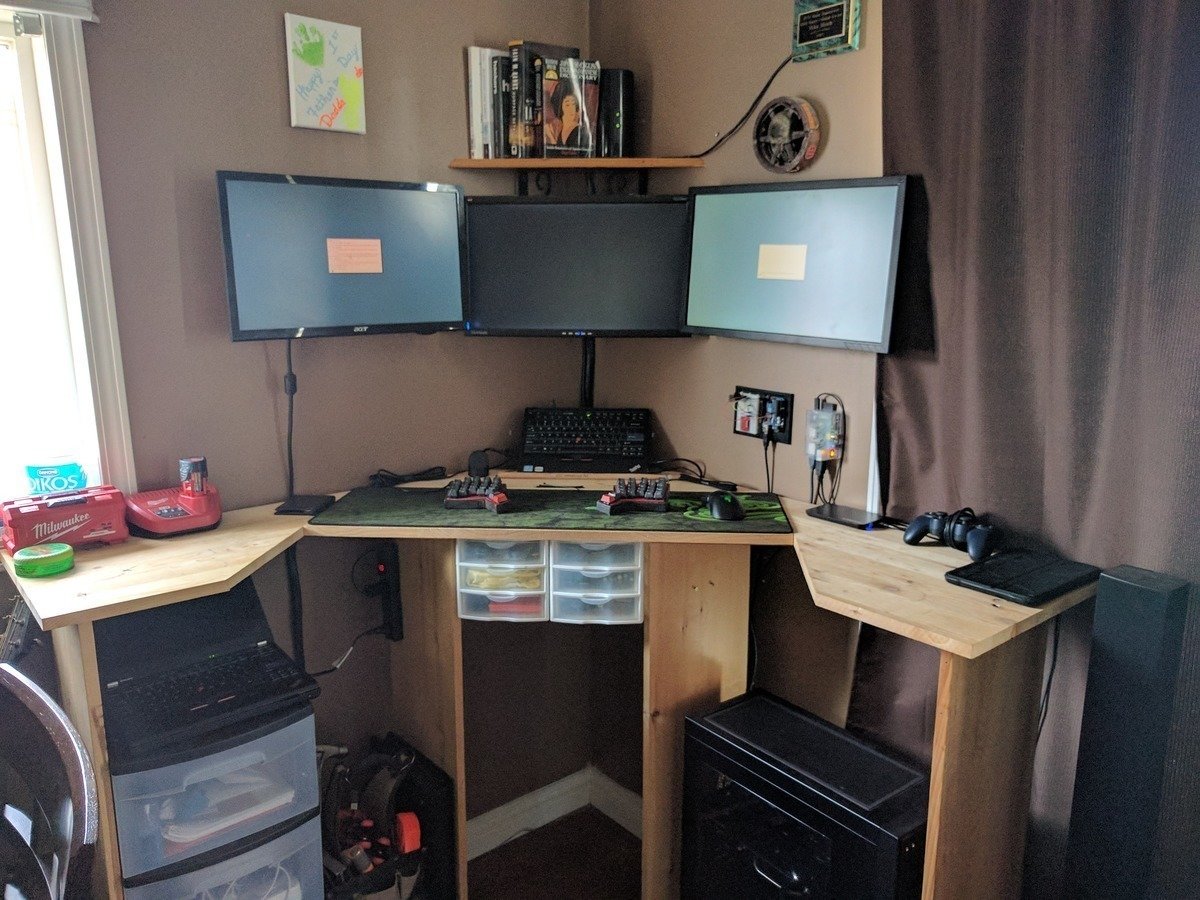
+## So, It Went A Little Something Like This.
+
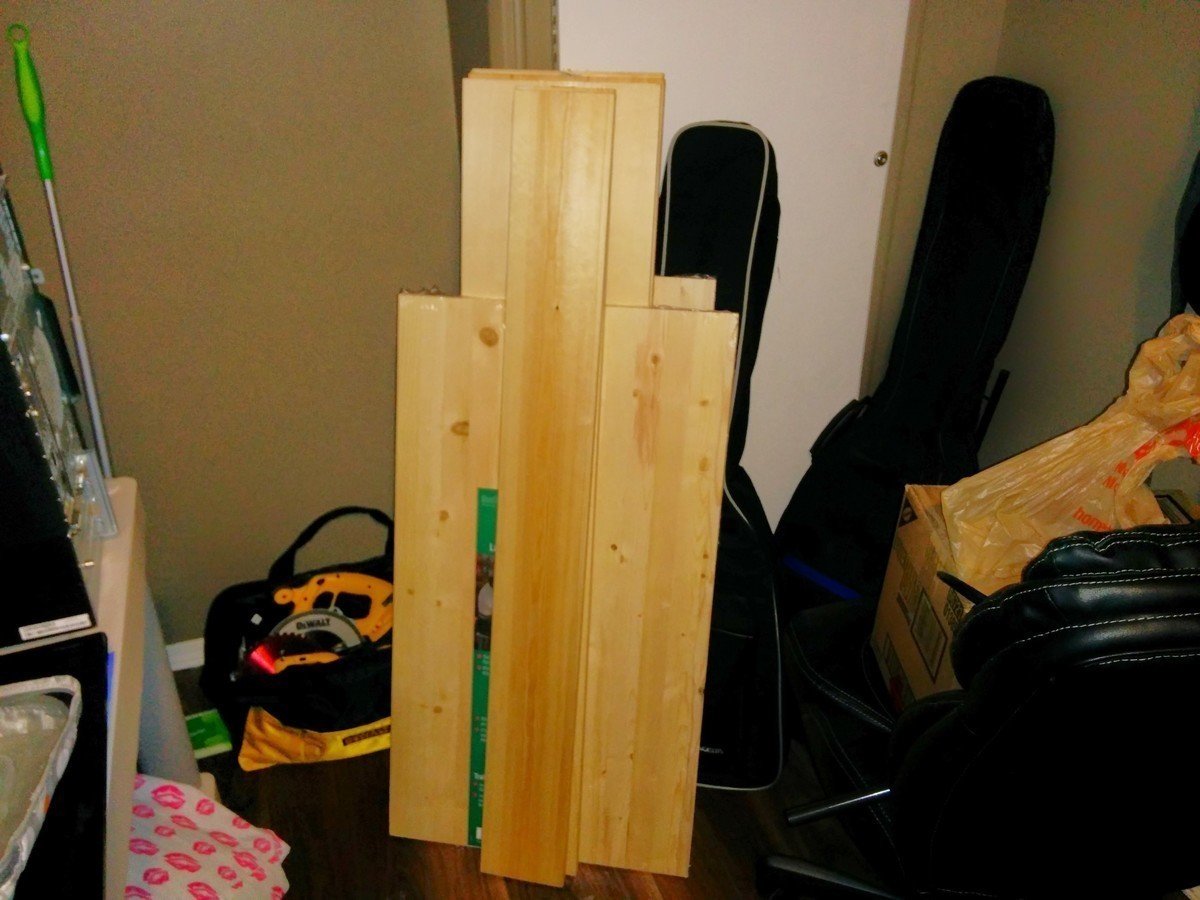
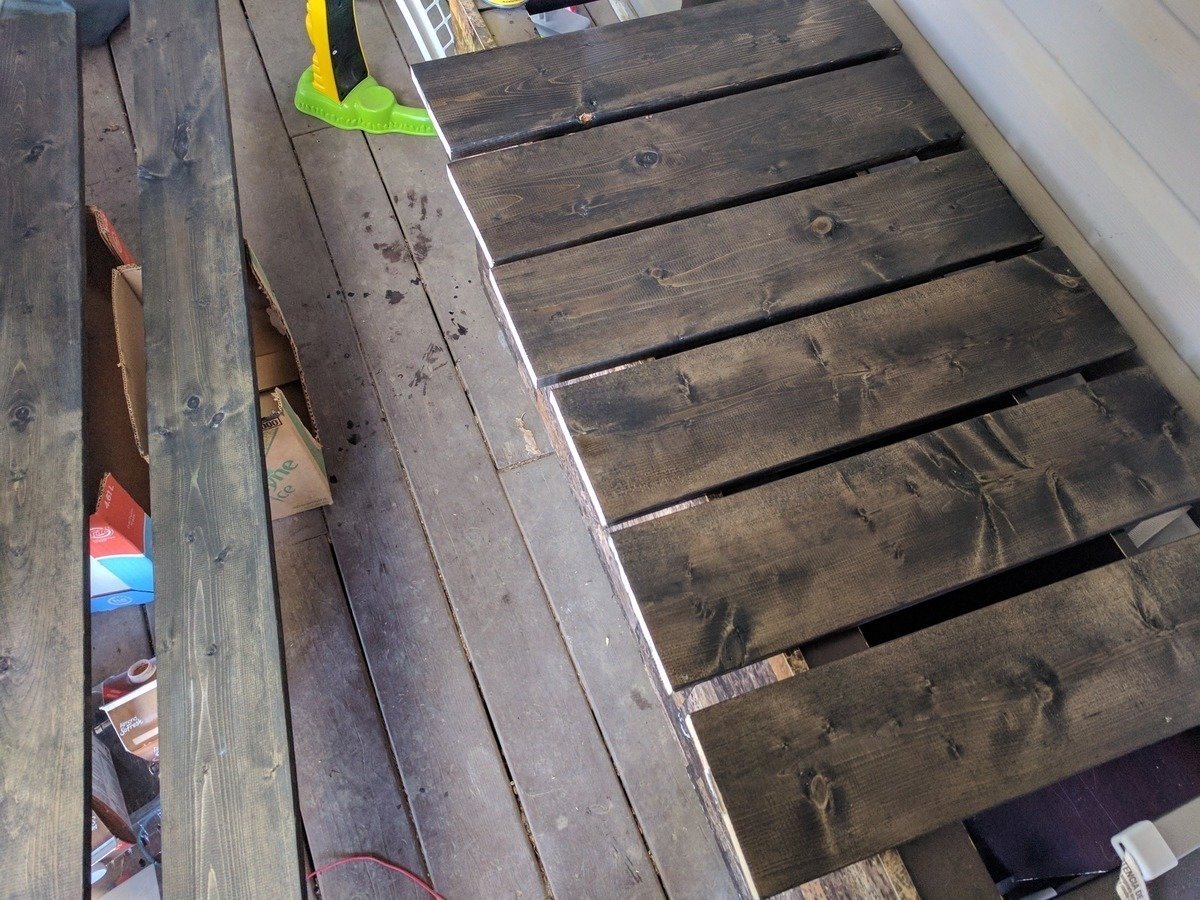
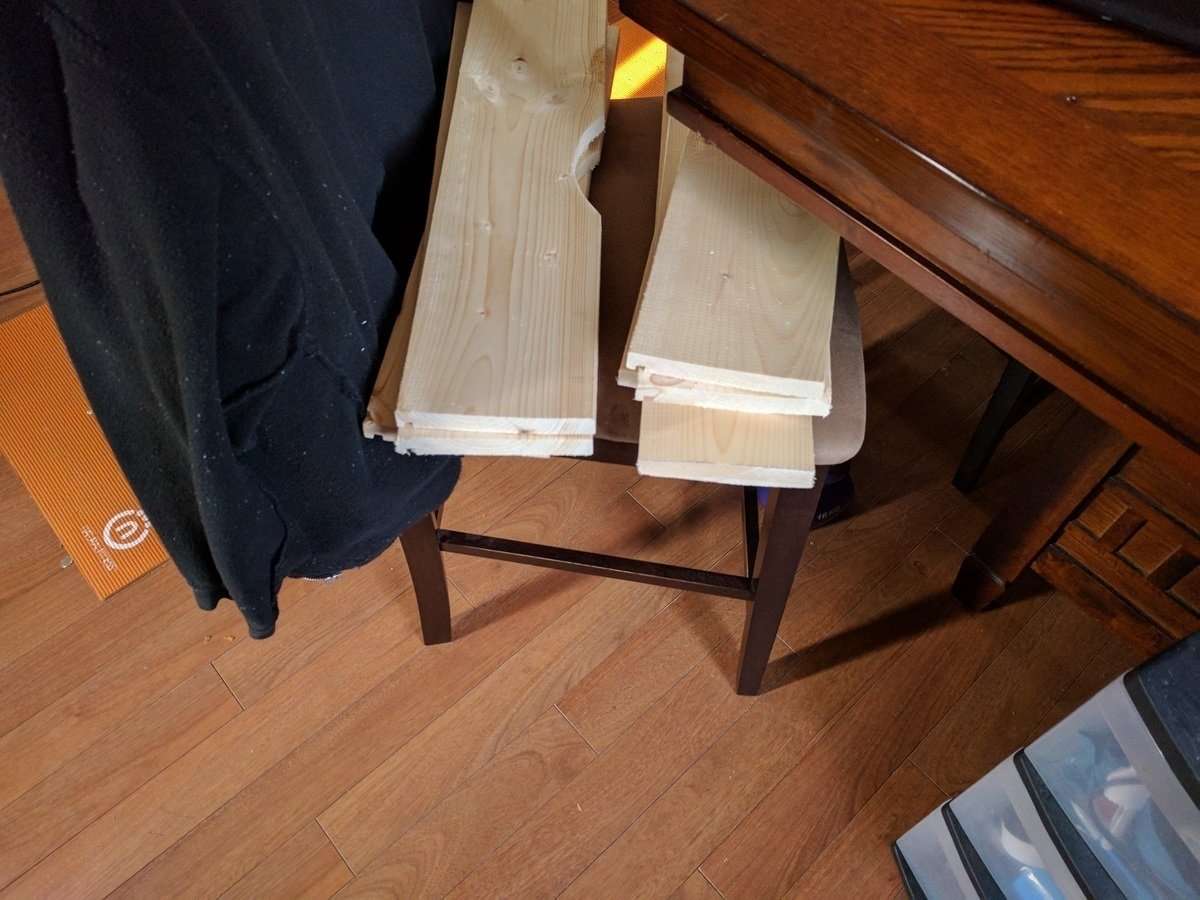
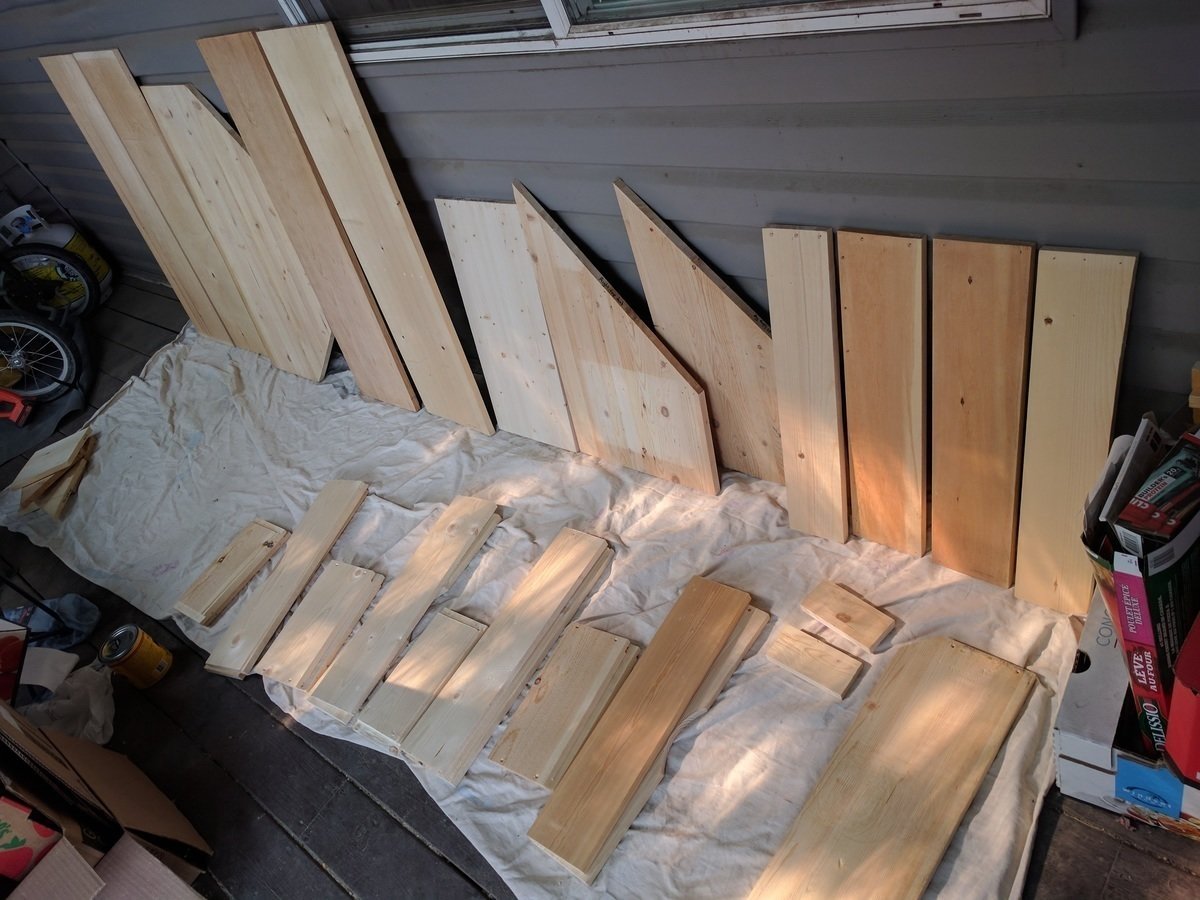
+The selection of wood I started with:
+
+
+
+
+
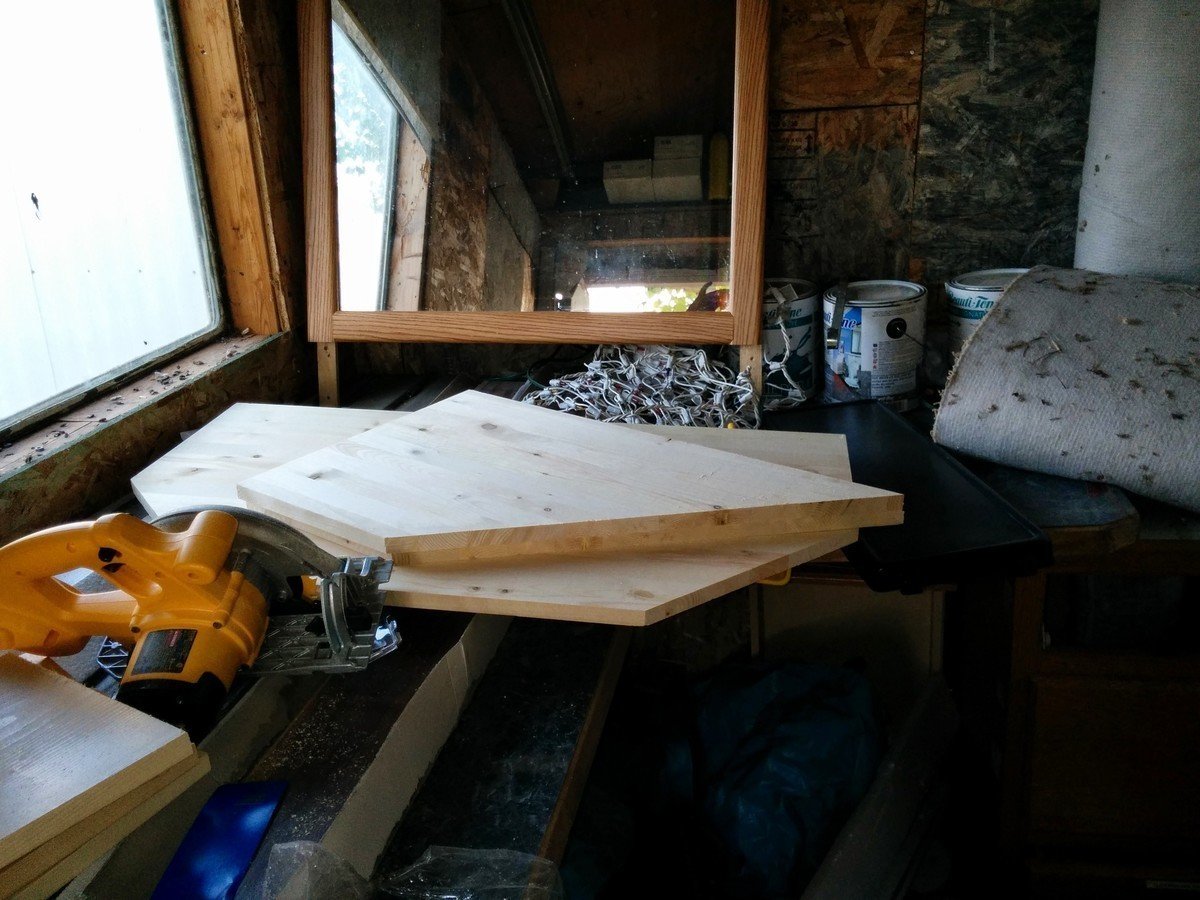
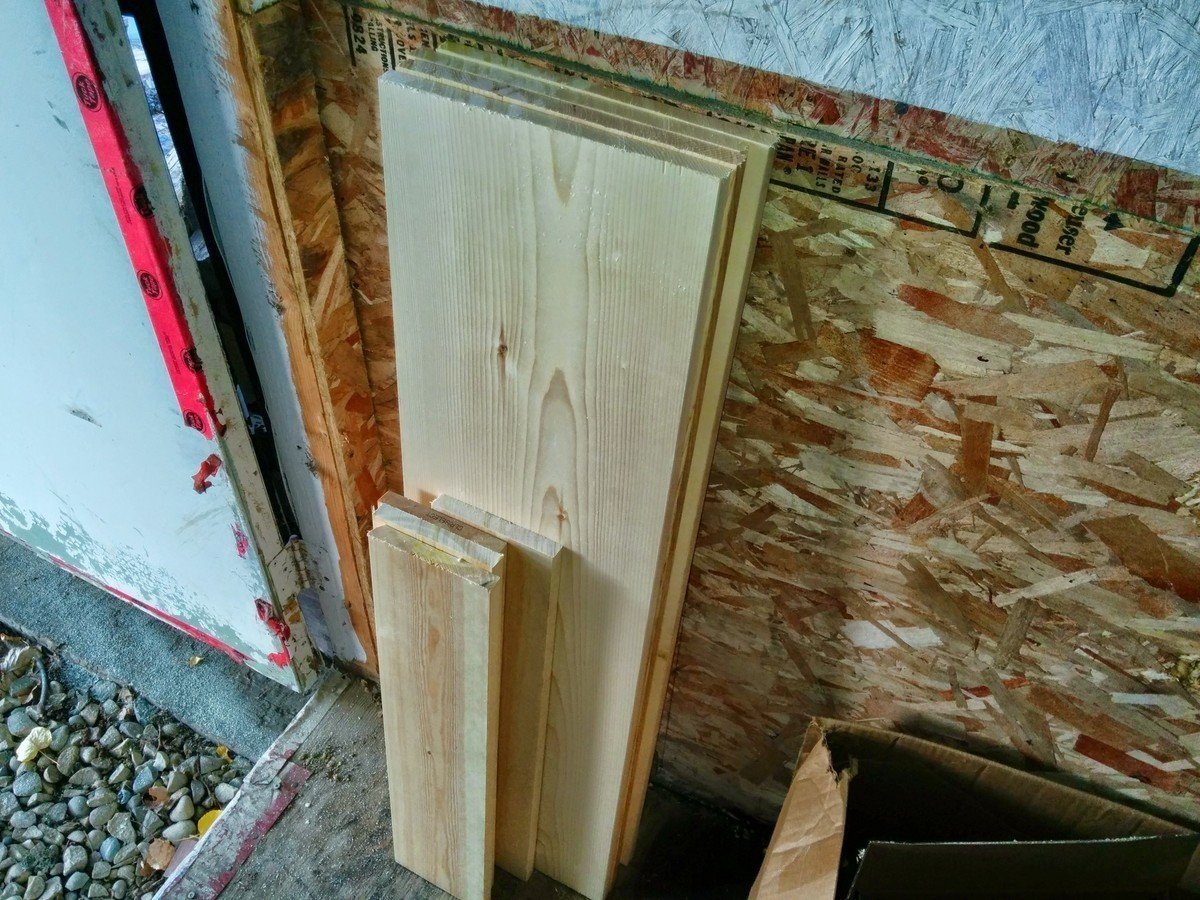
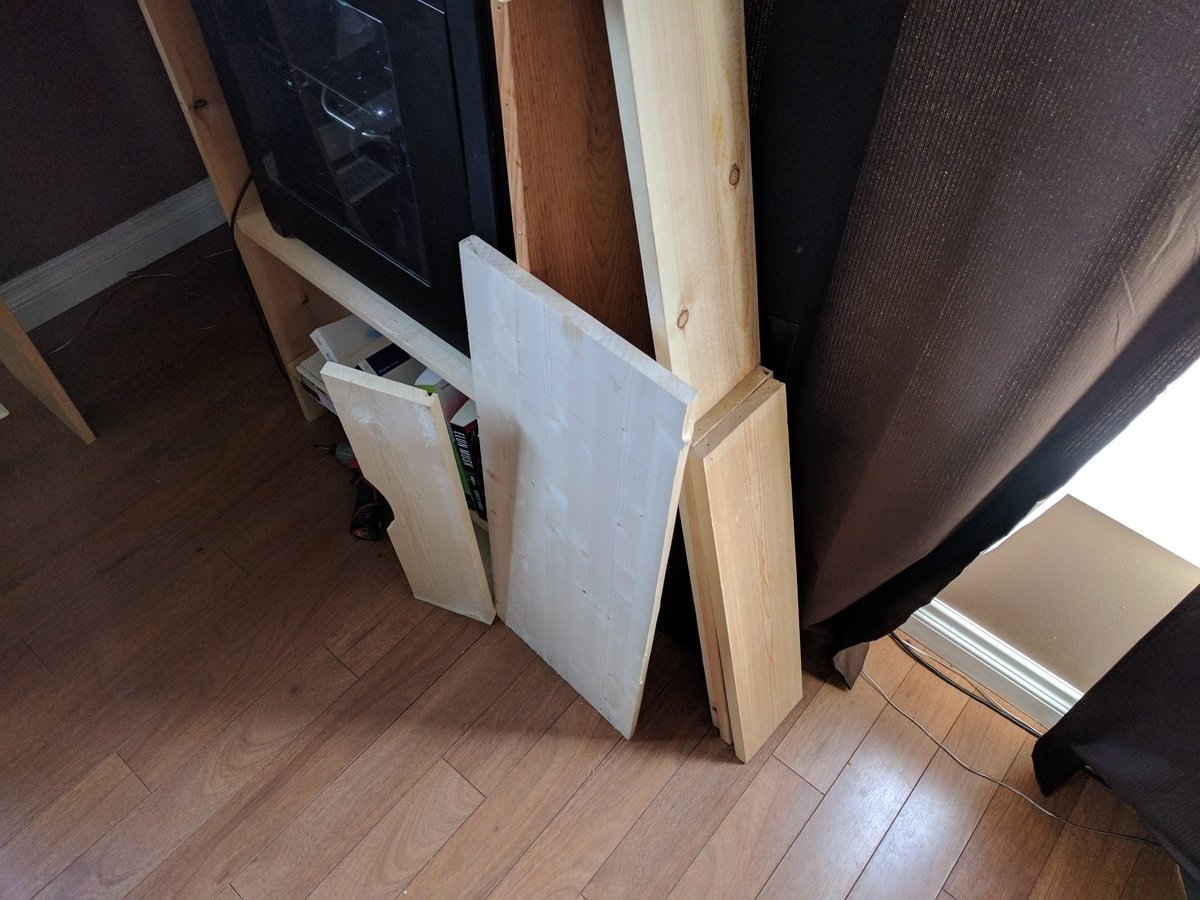
+Second batch of wood:
+
+
+
+
+
+
+
+
+
+
+
+
+
+## Not Too Bad (2015)
+
+Later on, we had to shuffle rooms, so I was shunned to the living room.
+
+
+
+
+
+What a damn mess, hah
+
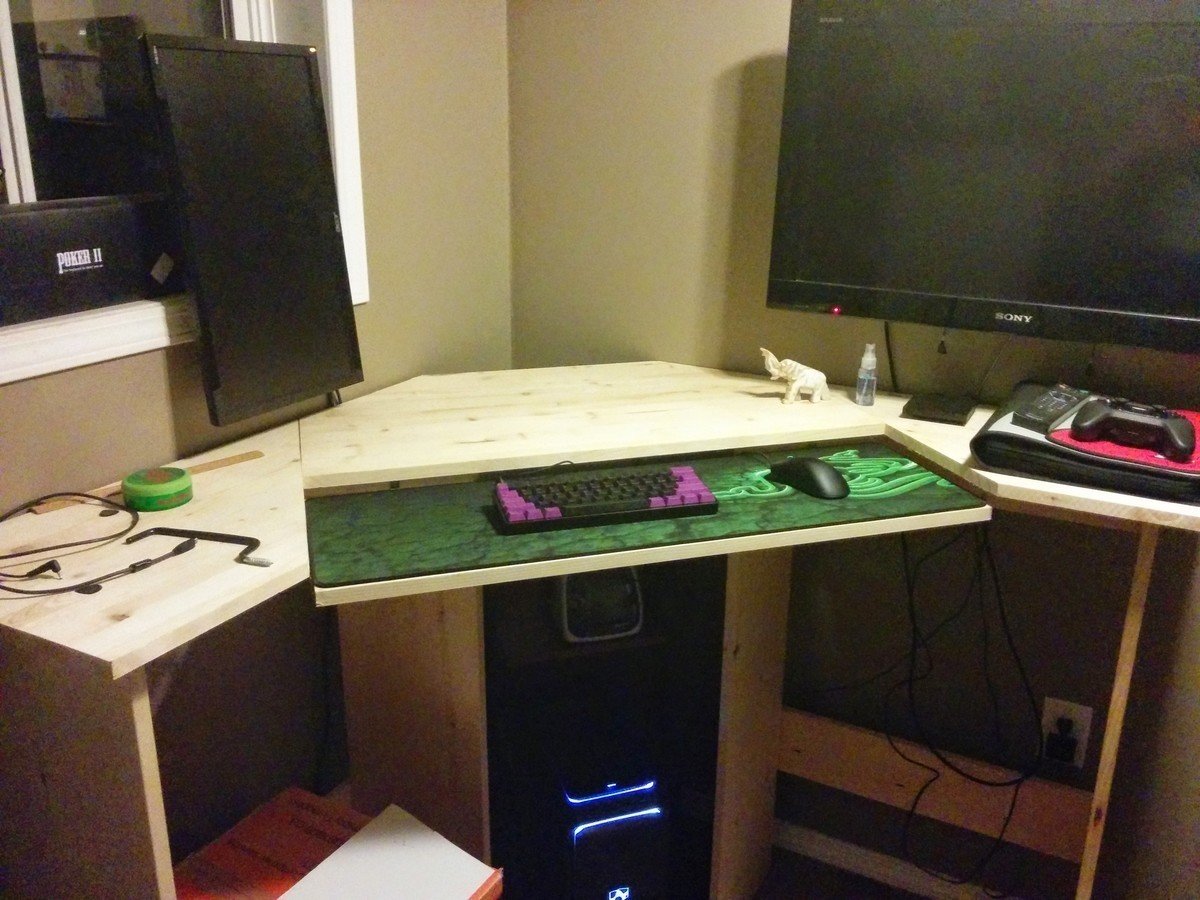
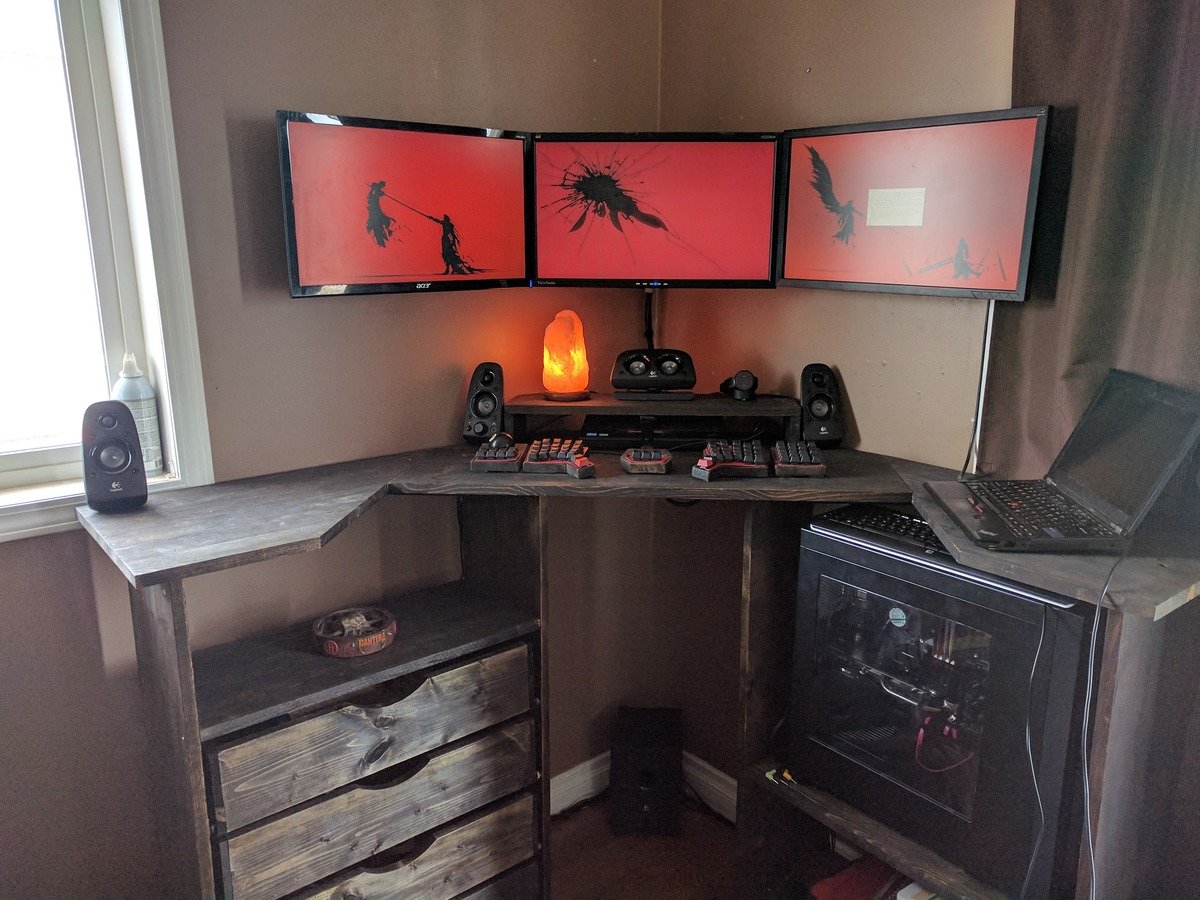
+## Changes (early 2017)
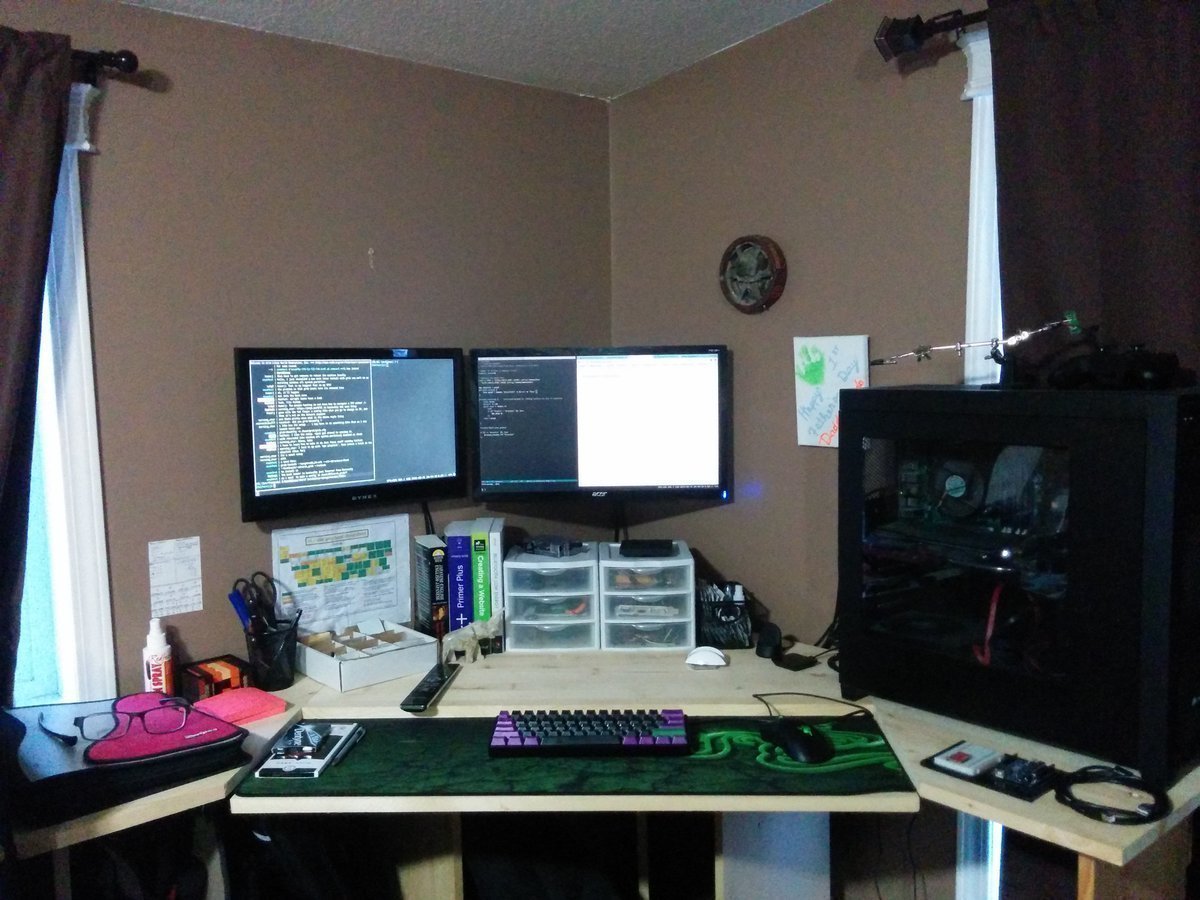
+So I mean, it looked rather nice, and it worked well for the time being. I eventually removed the floating shelf, as I was using either a wobble board of a standing mat after the first while, and the height of the desk proper was fine; as well my research led me to understand that I could/should be somewhat closer. Removing the board ended up putting me in an ideal location, ~22" from my monitors, with them centered around in sweet, sweet stereo.
+
+
+
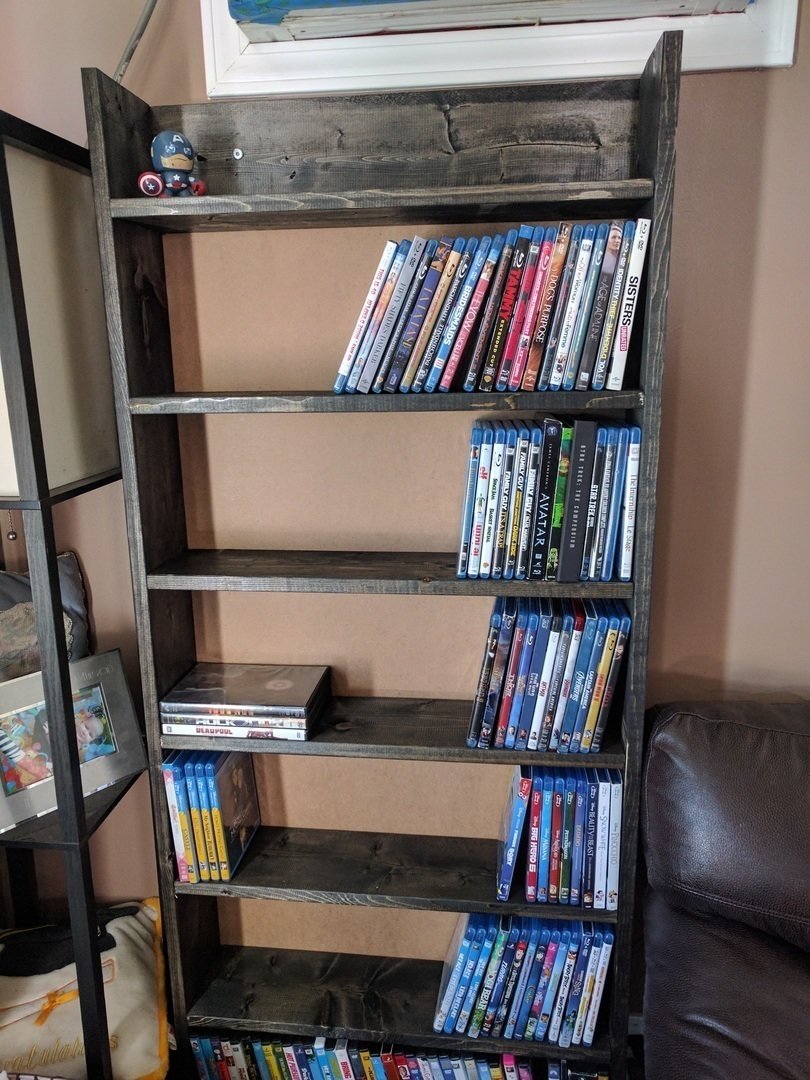
+Our Bluray situation was a bit out of hand, so I took it on a whim to build a simple stand, and really enjoyed the end result. The stain was just the right color for the living room.
+
+
+
+
+
+And that really sparked my want to finish the desk. That, and I had finally sourced a dirt-cheap third monitor, which looked pretty sharp with the rest.
+
+
+
+## I Started To Finish What I Started
+
+First bit was a cheap monitor riser
+
+
+
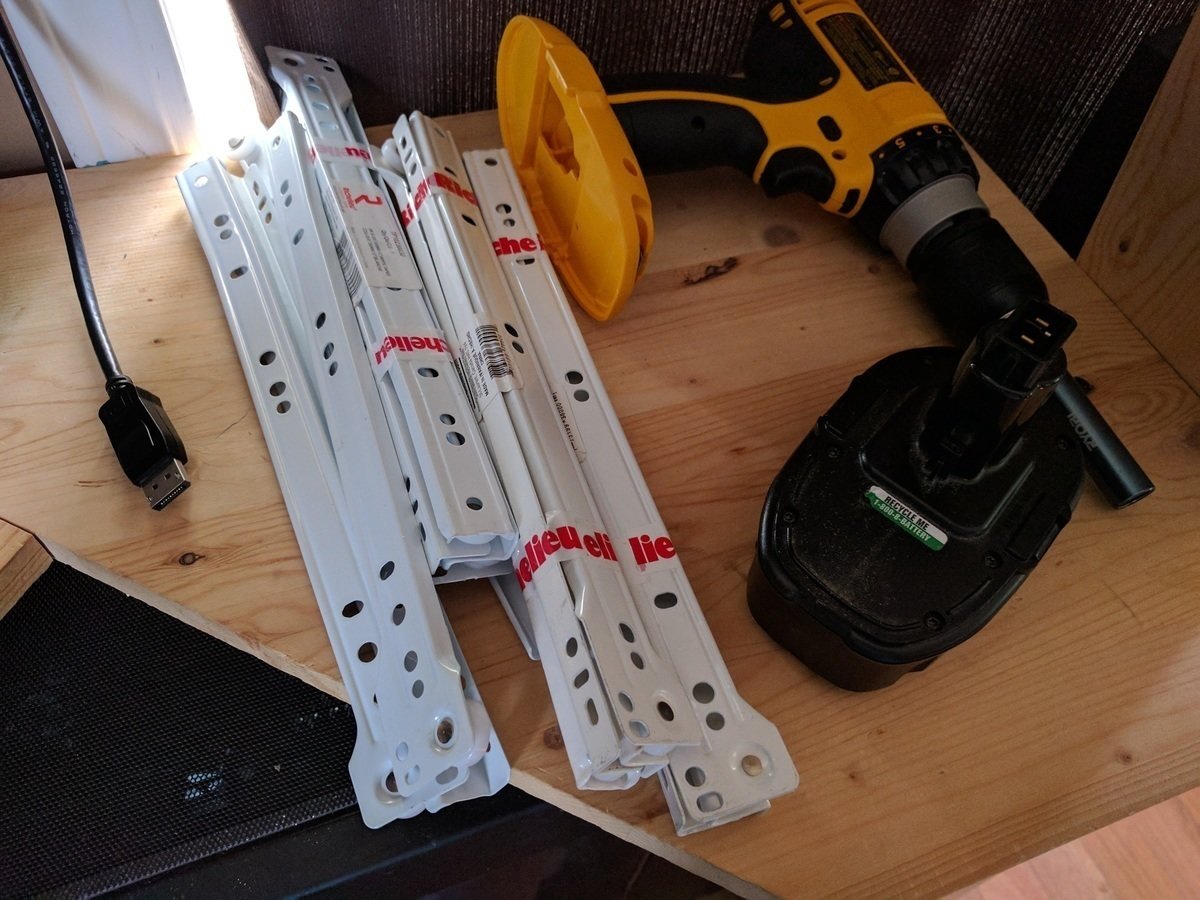
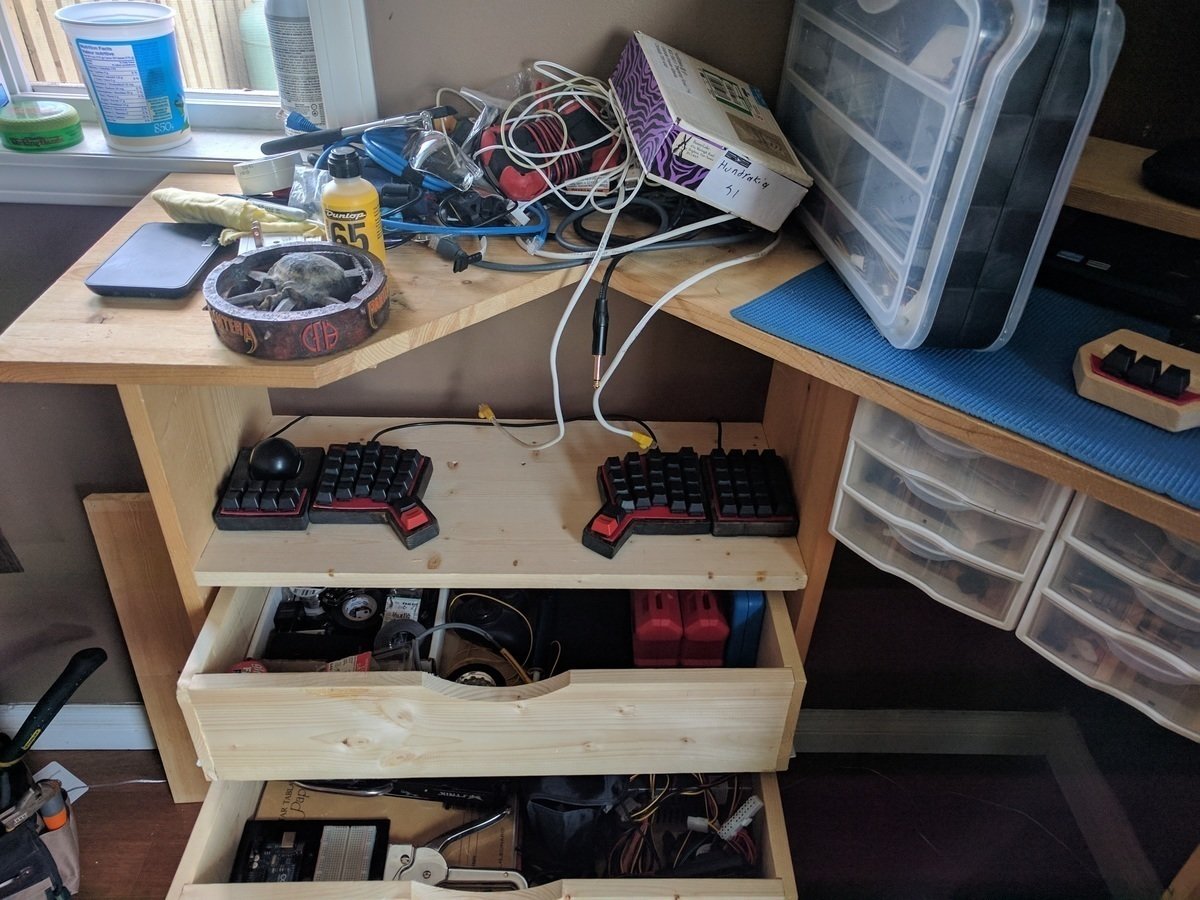
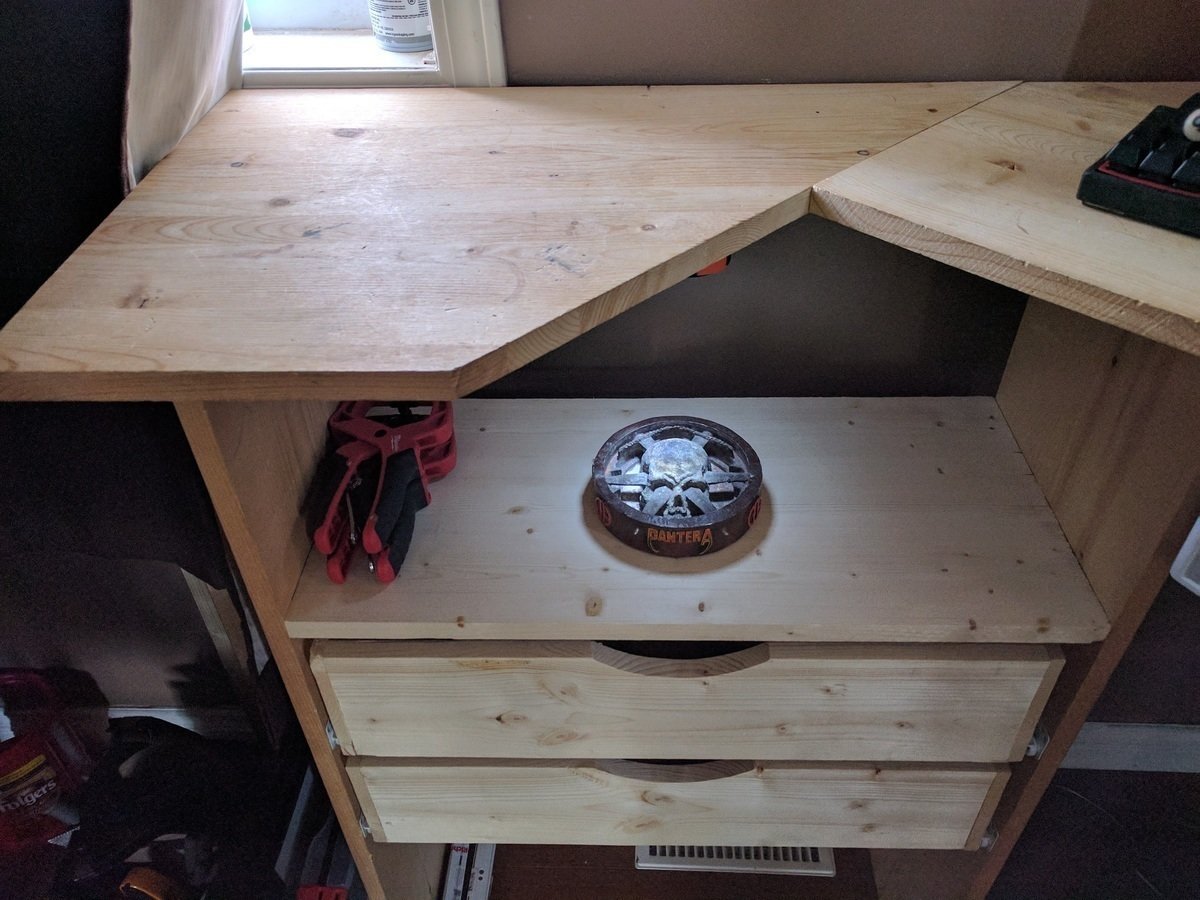
+Then I started to grab the wood for the drawers, built them out
+
+
+
+
+
+
+
+Which meant my huge mess of crap could go away neat and tidy, heh
+
+
+
+
+
+
+
+With all the room, I had every intention of just enjoying the desk for a while, and not doing a thing to it.
+
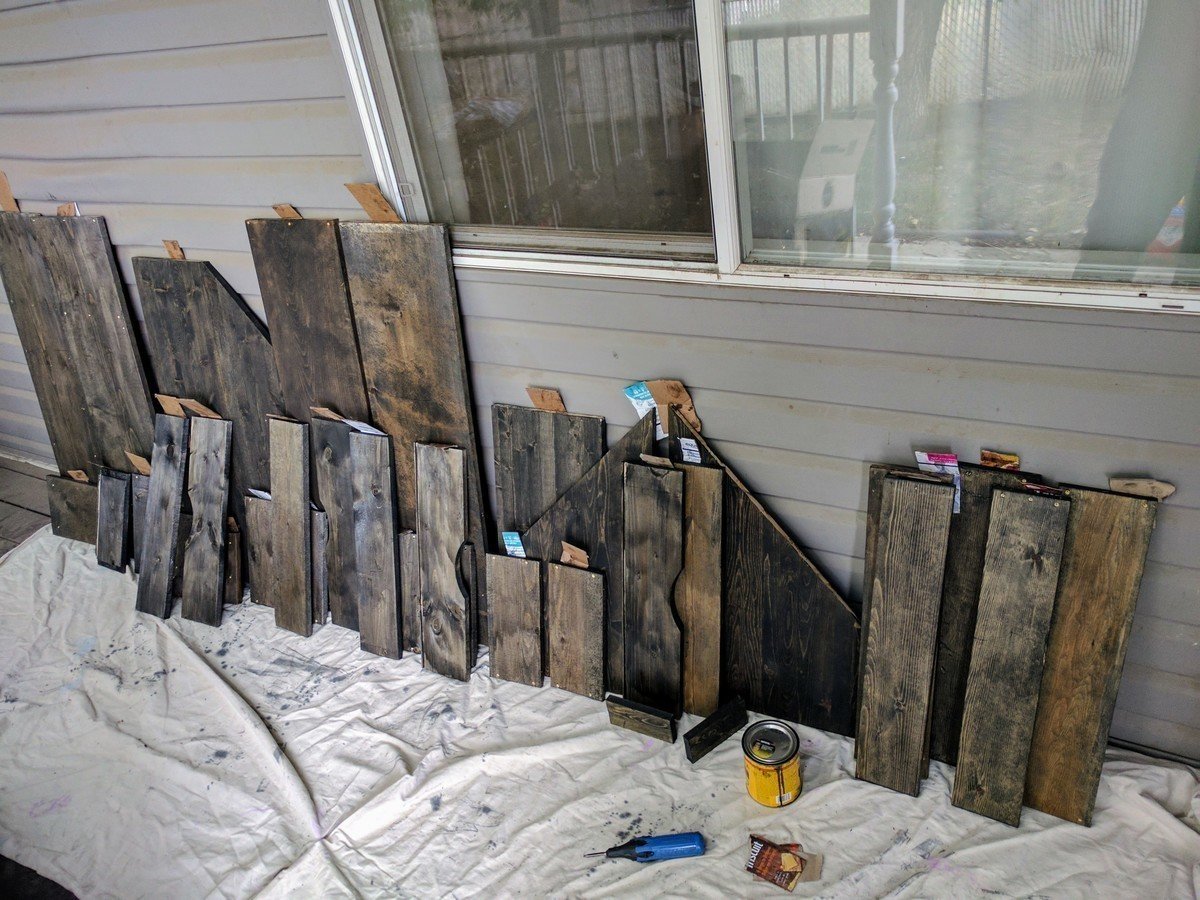
+## Then I Got Bored
+
+
+
+
+
+And stained it all. Hey, my girlfriend went to Vegas, I WAS BORED AT HOME
+
+
+
+
+
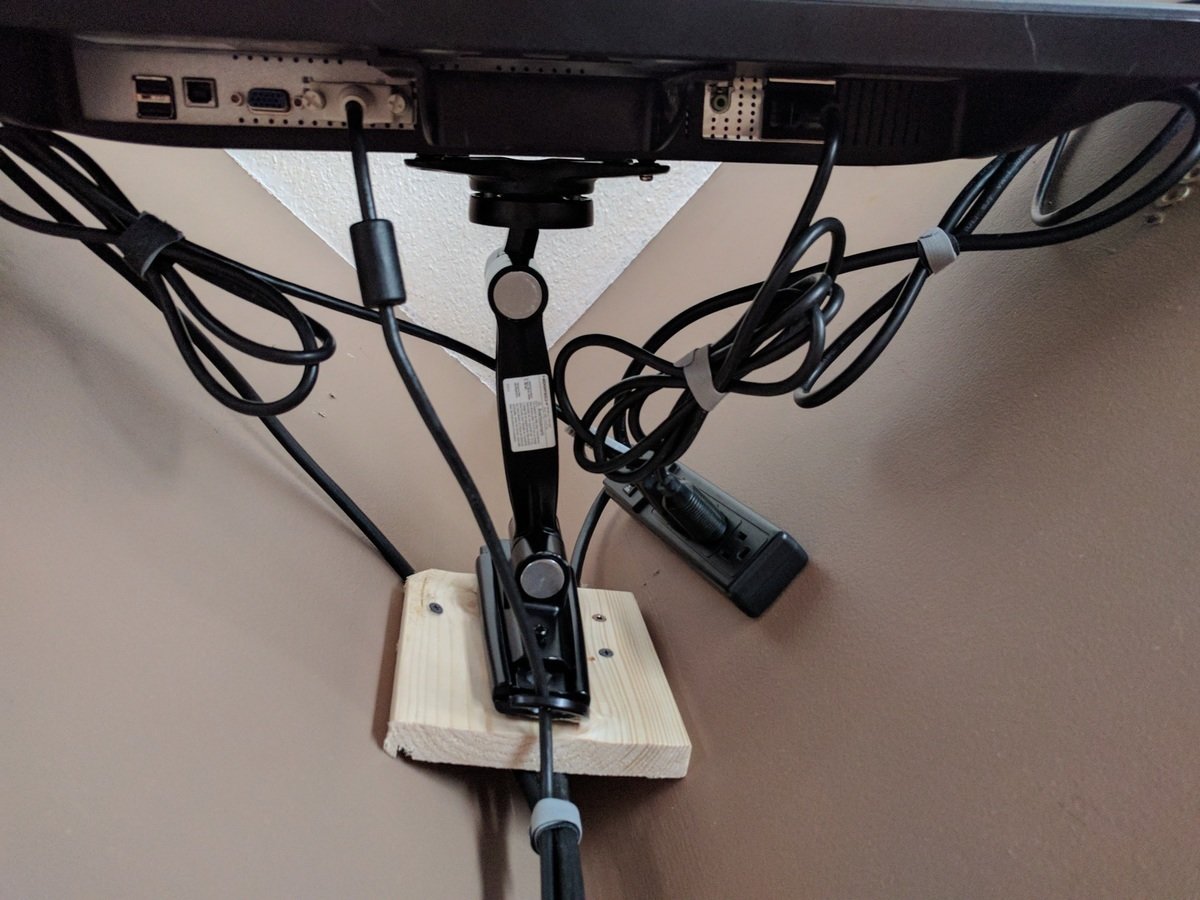
+It was all apart, so I took the chance to do the long-overdue cable management on the monitors.
+
+
+## Then I Got Board
+
+That's a bad joke, but I mean, let's be honest. It looks pretty damn good.
+
+
+
+
+
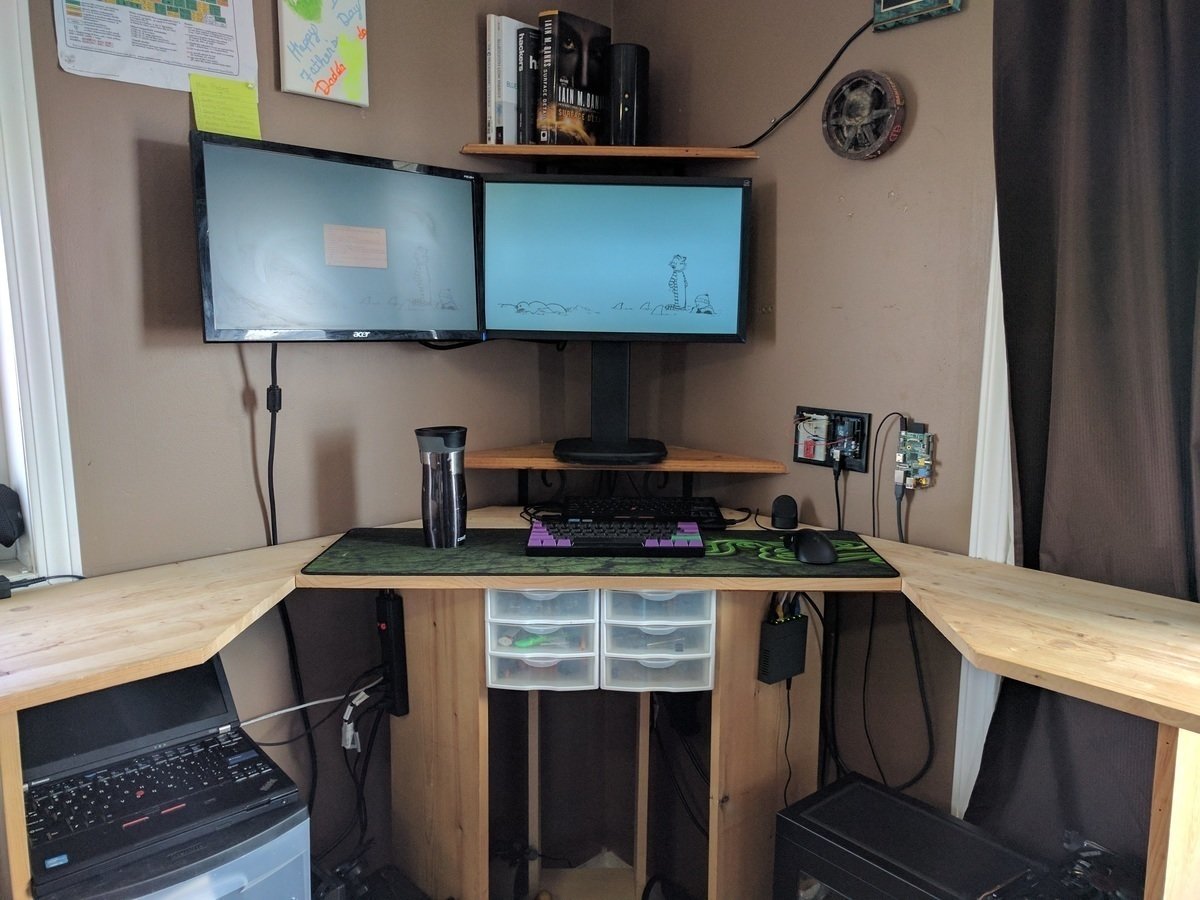
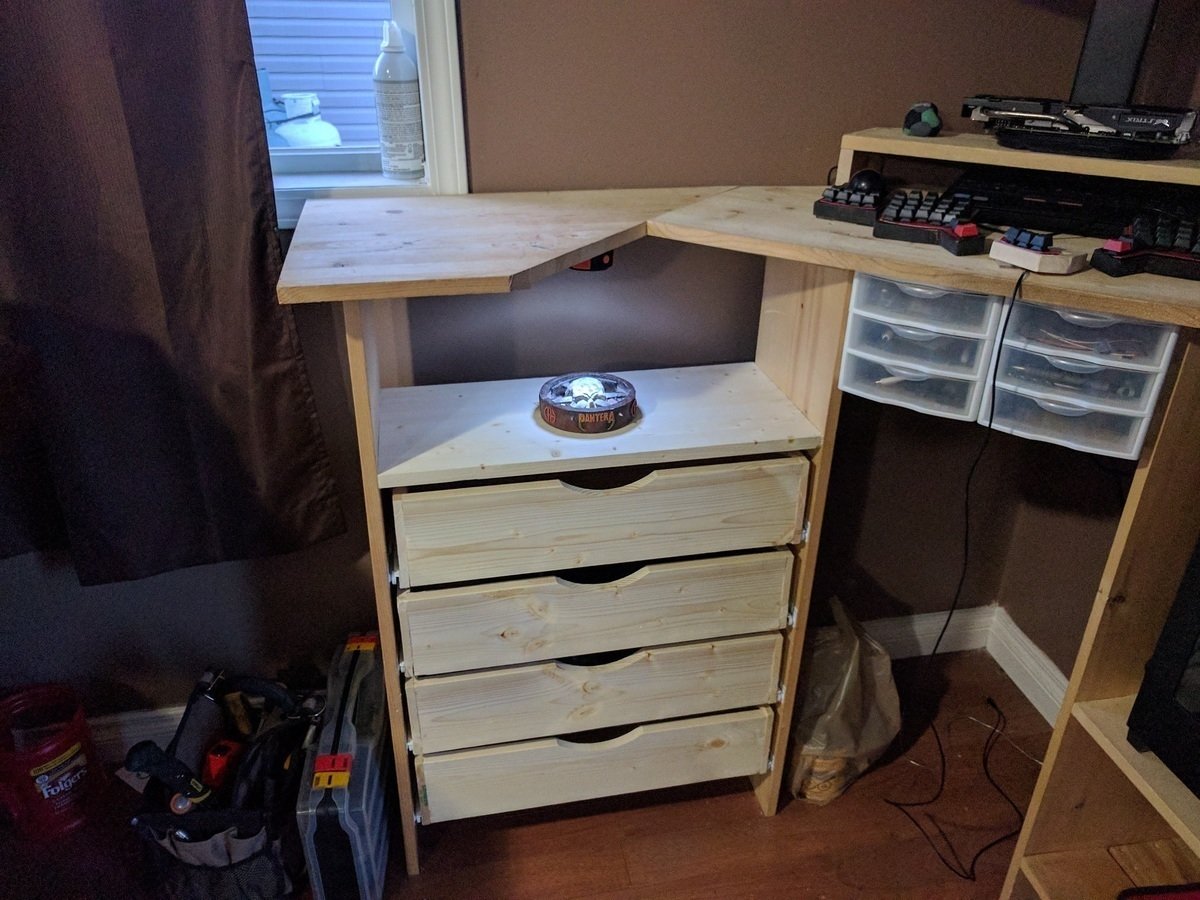
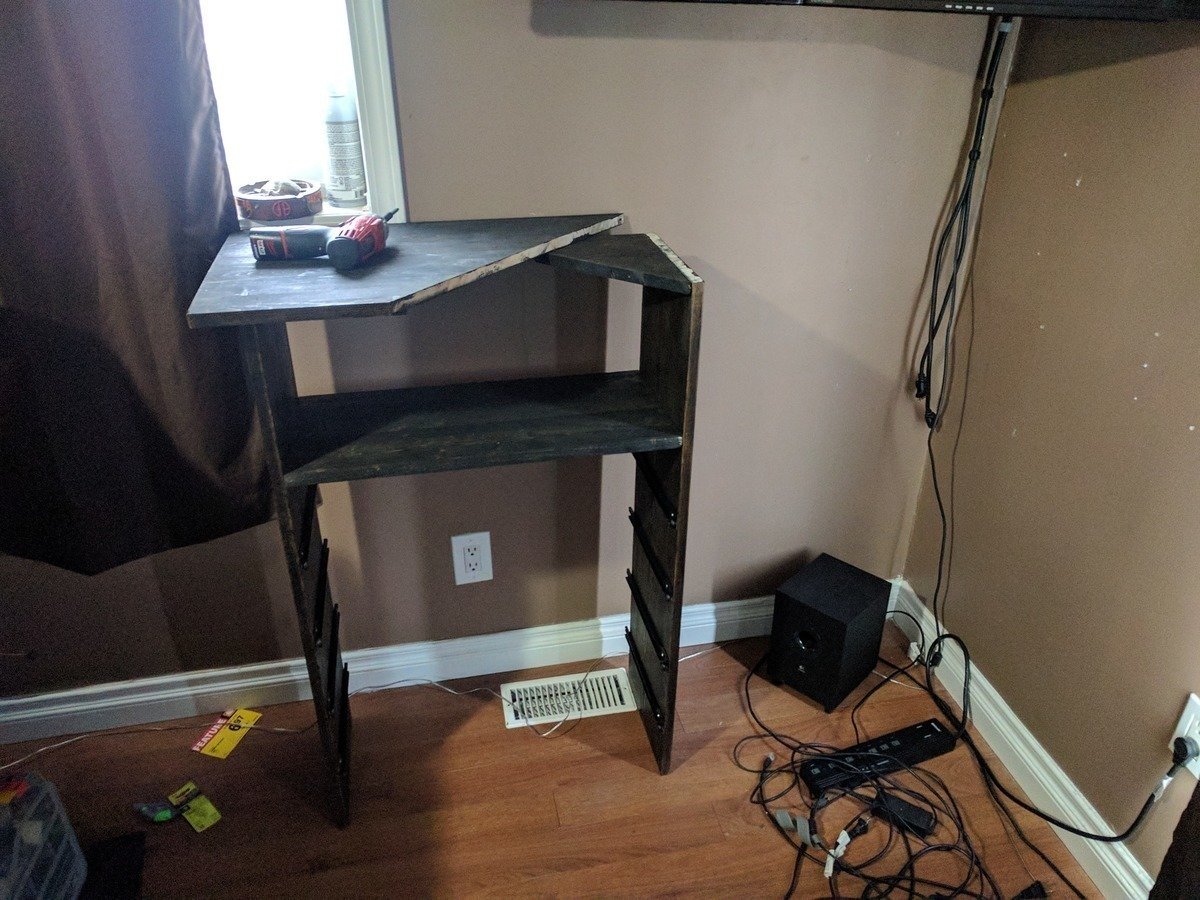
+Tossed all my gear in, cable management comes later
+
+
+
+Like, immediately later.
+
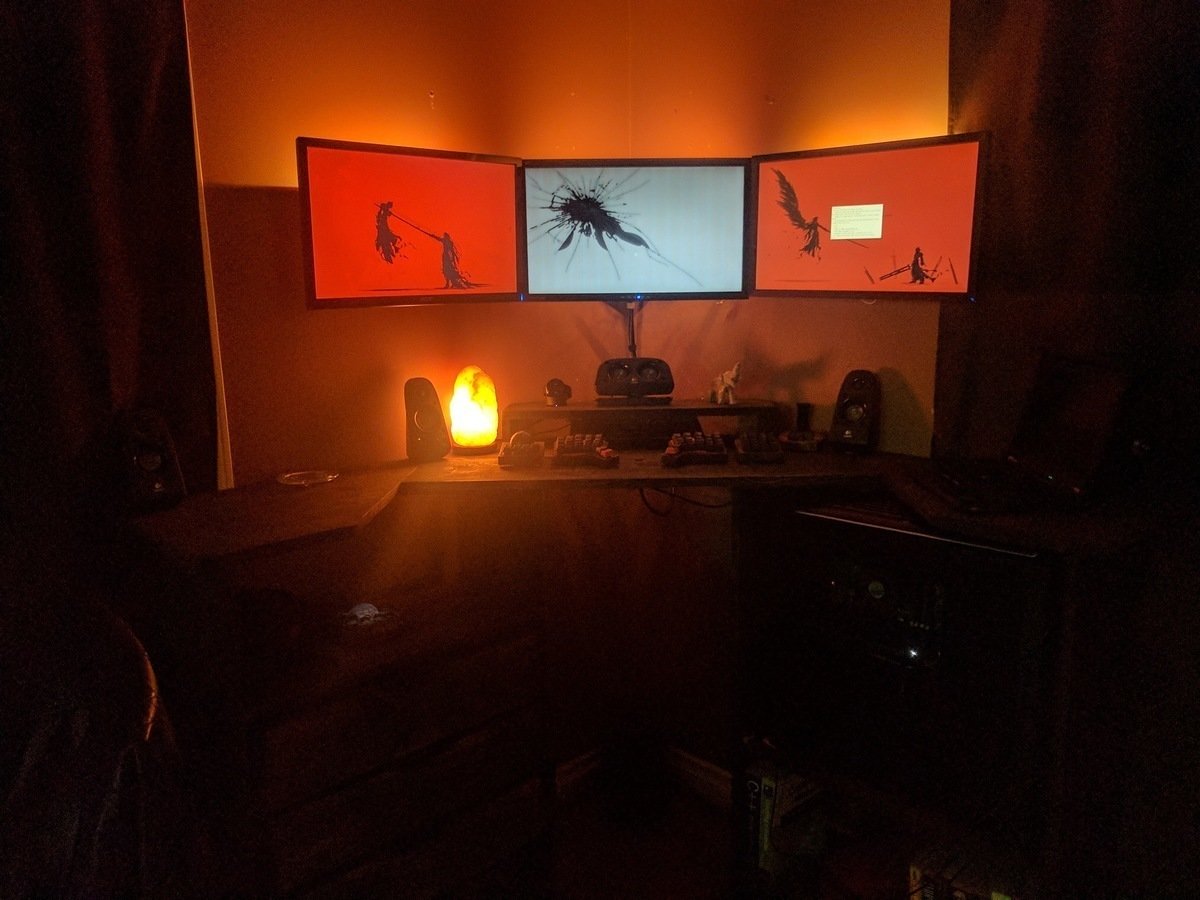
+
+
+For now, this comprises the finished product. Lighting and cable hiding will follow, and I'll update this when that happens! Thanks for checking it out!
+
+
--- /dev/null
+++ b/posts/2017-09-21-binpacking.md
@@ -1,0 +1,92 @@
+# Bin Packing
+
+*ptpb links died, and I haven't had time to re-record. Sorry in advance!*
+
+## It Has Been One Year Since My Last WM Issue
+
+So for quite some time, I was going through window managers quite frequently. I'd trial one, enjoy many points of it, and eventually find another that suited for a different reason. I really liked [dwm](https://dwm.suckless.org/) for a few reasons. It had a wonderfully responsive stacking layout, and the tagging feature. I also really liked [i3](https://i3wm.org/) for the menu system, and per-window hooks. (these may not be unique, nor originated by these wm's; but this is where I encountered them first)
+Along came the [wmutils](https://github.com/wmutils) project, which is basically a set of binaries for interacting with windows and the X server from the command line. It is similar in design to xdotool - but not monolithic - which I had come to appreciate in userland tools for ease with which I could learn them. Simple manpages, fewer flags, just easy to learn in one sitting.
+That was the last straw, I'd just make my own wm. With blackjack.
+
+## Tags Are Pretty Nice
+
+Tags, or groups as some call them are a feature that has been around for a while. The essence of tags is pretty simple. When you have a window, you assign it to a particular group, or tag. If that window is in a tag with other windows, you can bring them into view or out all at once. That's not at all different from a workspace though, and what sets tags apart is that you can have more than one tag in the view at a time. This is hard to show in a video without voiceover, which I currently don't have access to; but I'll attempt it:
+[demo](https://ptpb.pw/HSVe.mkv) The big win is, when you're coding, you can pull up your email client alongside your editor, write your email, and hide your email client fluidly. Try it! It's great.
+
+## Cool, Tags Sound Neat. How Get?
+
+I had decided to go with wmutils, but they had a cludgy, file-backed grouping mechanism. It worked mostly ok, but I was never very satisfied. There was lots of state wonkiness, and I'd end up with false information about which tags were active, which windows were in which tag, etc.
+I was mulling over many ideas, from using a long running process to track variables, to using the same file-backed grouping as the others. Around the same time, I was working on [x11fs](https://github.com/sdhand/x11fs) to attempt to implement a clipboard - and was working with the X11 ATOM system. Putting two, and two, and two together, I was able to realize that I could store the tag data as a user atom.
+Thus were born the following:
+ - [wmgroup](https://github.com/halfwit/wmgroup)
+ - [watom](https://github.com/halfwit/watom)
+These were knocked off actually fairly fast, about a day for each, and worked as follows:
+
+```
+# grp will set an arbitrarily named group to the window designated by wid
+grp <name> <wid>
+
+# lsgrp will list all wid's currently in the named group
+lsgrp <name>
+```
+
+Leveraging [sxhkd](https://github.com/baskerville/sxhkd) to intercept keystrokes, I can set groups for windows, and list all windows in a group.
+
+```
+# List all windows in a group, and use wmutils to toggle their visible state
+lsgrp 1 | xargs mapw -t
+```
+
+And that was really enough to do a full tagging system.
+
+## So Why Not Tiling
+
+Towards the end of my tenure of using a tiling window manager, I found myself doing something kinda pointless. I was opening up empty terminals, to pad out my other terminals to a particular size. Now, this seems insane, but I was mildly obsessing over [line lengths](https://baymard.com/blog/line-length-readability).
+Eventually, I was just sick of it all. I moved over to having all windows float, hand laying them out to what I soon recognized to be a predictable arrangement, regardless of which tags I had in. Some weeks of research ensued, and I eventually stumbled across the binpacking algorithms, specifically the [2D variant](https://en.wikipedia.org/wiki/Bin_packing_problem). The 2D one wasn't a perfect match, as it depends on rectangles which have a set size, and I wanted my windows to grow and fit the space as much as possible, when possible.
+This would allow me, I figured, to arrange all of my windows to fit my container - which in this case is my screen - and do so with set sizes for each window. Terminals, ~68 chars wide. Browser? Normally about 80 chars, with the ability to grow/shrink on command, same with my editor. Finally, I wanted everything to center on my screen, because the eyes tend to be drawn to the center in my experience, and we may as well leverage that.
+You're probably shouting suggestions at your screen, asking why I'm not using $thing. Well, I didn't know about $thing, where were you when I started this? Damnit. Where were you. Regardless, I wasn't able to find something that fit perfectly with all of my constraints, and this was born [binpack](https://github.com/halfwit/binpack).
+
+## Ok Then, That Was A Lot Of Reading. Binpack!
+
+tl;dr
+
+```
+read windows from standard in minx/miny/maxx/maxy/window id
+sort windows, biggest to smallest
+place a window on screen, top left
+bisect remaining space into two rectangles
+sort rectangles
+put next biggest window in smallest rectangle
+bisect remaining space into rectangles
+remove overlapping rectangles
+sort rectangles
+...
+if fails, reduce size of windows
+
+increase size of windows, repeat above algorithm
+if increase fails, store last good values
+center all windows on screen using last good values
+write xywh + window id to stdout for all windows
+```
+
+Now, it's slightly more complicated than that, and there's also a few shortcuts in the code for instances where all windows fit at a maximum size. The whole thing was about a week of work, and it is [currently imperfect](https://ptpb.pw/zmbA.mkv), but it's good enough for a scrappy implementation. In the coming months, I plan on making a switch to accept number of monitors, and modify the logic when that occurs:
+ -s 2: split all windows evenly between two groups, and perform a bin pack on each group. The resulting blobs will be centered evenly on two monitors
+ -s 3: run a normal bin-packing on our windows, any excess screen will be sorted into two groups, on which a bin pack will be ran. The resulting blobs will be centered evenly on the outer two monitors, with the initial blob in the center. There is a short-cut here in that our worst case will be running a resize.
+
+Now, armed with a fancy new algorithm, I needed a way to feed in the window sizes that I wanted in a consistant, and measured way.
+
+## Wmutils And Hwwm
+
+By this point in time, I was already using wmutils exclusively. Simple hotkey movement around, coupled with simple hotkey resize was enough to make due for my window management needs, while I worked through the remaining struggles associated with implementing what I wanted.
+The main idea was, list all windows, pipe them into a utility to pull the name of the window out, and use that name and awk to read out a preset from a file, which would be properly formatted for input to binpack, which would crunch the data and output the raw geometry for each window. Then using wmv all of our windows would be exactly where we wanted them to be. The first working attempt at this looked pretty darn good, and I even managed to grab a [video](https://www.youtube.com/watch?v=MSIjqTgtj2c).
+A rather unforseen stumbling point was how to handle referring to open windows in X11 by their name. There's two notable atoms that carry nomenclature information in X11, WM_CLASS and WM_NAME. The latter was what I targetted initially, only much later referring to the former for what I was doing. There exists a remarkable inconsistency of what to attribute for WM_NAME, and I found myself patching various software - Surf's title string was an easy fix, [st](https://github.com/halfwit/dotfiles/blob/master/zsh/.zshrc#L117)'s was a bit more bothersome - and wrapping most programs that allowed it with a flag for the title, or convoluted xprop schemes that would fire some milliseconds after creation of a new window- it was hacky.
+Eventually, I had the notion to add gaps, which was knocked off in about 30 minutes, resulting in what you see [here](https://www.youtube.com/watch?v=cHCjnZ-6NZ8). One point to note in the video are that it is runtime-modifiable, all but the very central loop, which grabs all window events, and writes them into certain things like an auto-tagger.
+Eventually, the level of hackiness using WM_NAME came to a head, and I decided to rewrite, using WM_CLASS instead.
+ - [wshuf](https://github.com/halfwit/hwwm/blob/master/wshuf) is the algorithm that feeds binpack, and is called to shuffle the windows after open/close/move events
+ - [hwwm](https://github.com/halfwit/hwwm/blob/master/hwwm) is the main loop of the program, and the only piece of the code that isn't runtime modifiable.
+ - [window](https://github.com/halfwit/dotfiles/blob/master/x11/window),[size](https://github.com/halfwit/dotfiles/blob/master/x11/size), and [tags](https://github.com/halfwit/dotfiles/blob/master/x11/tags) constitute my personal settings, and contain some insight on to how certain features are achieved.
+
+## In Closing, Your Honour
+
+I'd like to thank you for taking the time to read this. The entire endeavour was a lot of work, and considering it started with trying scratch a barely annoying itch that was having to do anything to manage windows, one must ask: was it worth it? Yes, it was a great learning experience, and I've been nothing but happy with my window management since the switch to WM_CLASS. All in all, this has improved my productivity, and drastically improved my "flow state" fluidity, while all but obliterating the overhead in my window management from the tiling days. I honestly can't wait to get this up and running on the multihead setup, and I hope some of you out there are inspired.
+If you would like to try this window manager, but run in to snags, or have any questions, I can be found on Freenode, on the #hwwm channel, and others. Additionally, you can always email me at the address listed below.
--- /dev/null
+++ b/posts/2019-07-02-altid.md
@@ -1,0 +1,20 @@
+# Altid
+
+## What Is It Good For?
+
+~~Absolutely nothing~~
+We spend a lot of time on our phones. We have become addicted to being connected, to the feeling that we have everything at our fingertips; and most will contest it's not the greatest thing we've achieved as humans.
+
+Altid attempts to facilitate the connectedness in another, less intrusive way. It allows you to take any service you normally use, Twitter or SMS or Discord or Reddit or this or that; and provide access to it from most any device; but not in a browser. A browser gives you all of this, but it gives it in a way that kinda sucks, in most cases; and requires you to have things like a keyboard and a mouse to be really able to interact.
+
+The simplicity of Altid's client protocol means you can create a client that matches the thing you're building it for, and not have to compromise. A smart mirror can show a feed of your social media while you take extra time to brush your teeth. A small screen in the kitchen can show you a recipe while you take time to bake, leaving your phone on the table; and you know you won't miss anything. (The Nest Home Hub also facilitate this, and hopefully one day will include an Altid client).
+
+Reconnecting with yourself is obviously a stretch goal of Altid. But Altid facilitates a lifestyle that is less tethered to a mobile phone, while in the home. (For a whimsical look at what this could like, think Iron Man's hyper-connected house and helmet in the recent Marvel movies. His world goes with him, and is available, he's always connected and can focus on everything else. Literally never has to check his phone, he uses it as a tool instead. Cool tech, definitely inspirational)
+
+## No, That Sounds Silly
+
+Just wait til you try it. Actually, wait til you realise you can add arbitrary endpoints to an Altid system, and suddenly each thing isn't a specifically created appliance that only sort of works well with other pieces; it's a portal into your world that sits in a convenient spot, while also providing its more base purpose - inside your network, not on a cloud. Full control to the user!
+
+## Wait, What?
+
+Yeah, what I typed the last paragraph is a bit silly. In fact, it may not even make sense. My hope is that in a few months I can edit this, and add a video that shows how this all plays together, how damn nice it is to just leave a phone some where and still _feel completely connected at home_. Not in a dystopic, each wall is a screen with tracking algorithms and may break in a week if the server it relies on goes down, but within your control, within your specific tastes and your specific preferred interaction method.
--- /dev/null
+++ b/posts/2020-06-27-searching.md
@@ -1,0 +1,99 @@
+# Searching And Saving With Plumber
+
+[TL;DR, NOW SHOW ME THE DAMN CODE](https://hlfw.ca/posts/2020-06-27-searching.html#plumbing)
+
+## Standing On The Shoulders Of !/bin/sh
+
+Several years ago, after playing with dmenu a _lot_, [dsearch](https://github.com/halfwit/dsearch) was born. It was designed to behave as an omni-search bar, staying out of the way and leaving the browser out of most of the searches I did on a computer.
+
+It grew, it grew and grew and grew - incorporating more and more bangs (a la DuckDuckGo)
+- `!yt|!pl` - searching Youtube for videos or playlists
+- `!code` - search local code bases
+- `!w` - search Wikimedia sites
+- `!lyrics` - search for the lyrics of a currently playing song or to match a query
+- `!song` - search my music library
+- `!g` - search Google
+
+I think you get the point. Anything which could be queried for went through dsearch. It popped up, and got me to my answers, largely without ever needing a browser open for the task. This allowed me to focus on a task, without a large context switch.
+
+## Saving Private Files
+
+dsearch became my omni-everything, eventually. There was `!rec` to start a recording, `!snap` to take a screeshot, `!next|!play|!pause`, and it was out of hand. But there was also `!save`.
+
+`!save` was interesting. I saved things through dmenu! Appended music/videos to playlists, added RSS feeds to my RSS feed aggregator, and stored PDF files to a specific directory with launcher entries, to name some examples. It was powerful, trustworthy, and just worked.
+
+## But Plan9 Is Really Cool
+
+I was using Plan9 a lot, and dearly missed dsearch while I was there. I started working on replacement binaries<sup>[1](#disclaimer)</sup> to give me at least some of the features back, mostly in Go:
+- [ytcli](https://github.com/halfwit/ytcli)
+- [wkcli](https://github.com/halfwit/wkcli)
+- [gcli](https://github.com/halfwit/gcli)
+
+Eventually, after making a few toy file servers I realised I could expose most of my search endpoints as files. [searchfs](https://github.com/halfwit/searchfs) was started, and `cat /n/search/youtube/myquery` would list the results of the query.
+
+Under the hood, searchfs would shell out to ytcli, wkcli, gcli; it was fairly circuitous. Invoking the binaries themselves was generally faster, though the eventual goal was to have it run on a very fast desktop computer, shared out on the network to make use of very low latency of a wired connection, and caching results so subsequent identical queries could be made.
+
+## It Always Felt Hacky.
+
+I never actually used this, other than in testing. It just wasn't beneficial to me. Two issues were, there was no method of interface discovery. This was solved, on paper at least: `ls /n/search` would show a list of all endpoints, and `ls /n/search/someendpoint` would show all the various filters for a search.
+
+There was no dmenu, no easy way to call this that would invoke the search and get the heck out of my way when it was done - it wasn't close to dsearch. Cool idea though!
+
+## Plumbing
+
+I won't do any justice trying to explain the plumber, and [plenty](https://mostlymaths.net/2013/04/just-as-mario-using-plan9-plumber.html/) of [others](http://doc.cat-v.org/plan_9/4th_edition/papers/plumb) have [before](https://9fans.github.io/plan9port/).
+
+### Storage
+
+Plumb allows arbitrary targets to be set, and Plumber allows arbitrary listeners. Using this, I wrote [store](https://github.com/halfwit/store) which is a glorified `plumb -d store` that fetches the remote mimetype, and [storage](https://github.com/halfwit/storage). This let me do a few awesome things. Downloading a gist, given a web link is simple.
+
+```
+# These are the plumbing rules used to match this
+
+type is text/plain
+dst is store
+data matches '$protocol/$urlchars'
+data matches 'https://gist.github.com/($urlchars)'
+data set 'https//gist.githubusercontent.com/$1/raw'
+attr add 'filename=/usr/halfwit/notes/gist/$1'
+plumb to storage
+plumb client storage
+```
+
+`$ store https://gist.github.com/halfwit/somehash`<sup>[2](#destination)</sup>
+
+Et viola! My computer has a file named `/usr/halfwit/notes/gist/halfwit/somehash`! Similarly, rules can be written for any sort of thing I wanted to store. Classy, simple, and the only thing left is to add the `store` command to Rio (WIP).
+
+### Searches
+
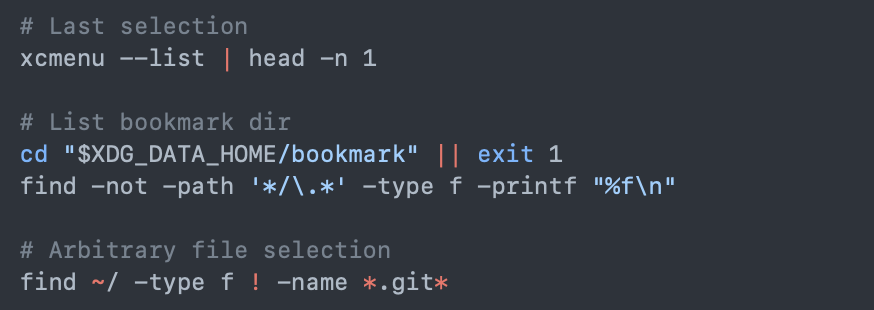
+A small alias (or script) can be used to wrap `plumb`, such as `alias search="plumb -t query"` in your shell profile. After that, it's just rules. Preference is king here, and I lean back to my dsearch tokens
+
+```
+query='[a-zA-Z0-9_\-./:,;@ ]+'
+
+# Any type of query you wish to handle would require an entry
+type is query
+data matches '!yt ($query)'
+data set $1
+plumb start ytcli search $1
+
+type is query
+data matches '!g ($query)'
+data set $1
+plumb start gcli search $1
+
+# [...]
+```
+
+This allows many things:
+- Rewriting rules
+- `search '!yt mything' | dmenu -l 10 | plumb`
+- Serve up from a faster computer, to slower ones
+
+## Future
+As this gets more use, I'm certain I'll end up writing many listeners for the plumber. `storage` does the right thing for an arbitrary file, `video` comes to mind to send a video to your preferred (networked?) player. This is, in my opinion much cleaner than [this](https://github.com/halfwit/dotfiles/blob/master/dsearch/handlersrc), [this](https://github.com/halfwit/dsearch/blob/master/youtube/savepl), or adding features to [this](https://github.com/halfwit/dsearch/blob/master/dsearch).
+
+
+<small><a name="disclaimer">1</a> These mostly require API keys, and it's definitely a compromise that I've made. Things exist like [Youtube-DL](https://ytdl-org.github.io/youtube-dl/index.html) and [Googler](https://github.com/jarun/googler) to be able to search these services without needing keys</small>
+
+<small><a name="destination">2</a> This requires use of setting the destination port explicitly, so it doesn't collide with normal plumbs</small>
\ No newline at end of file
--- /dev/null
+++ b/posts/2023-07-26-setup.md
@@ -1,0 +1,120 @@
+# My (ideal) Setup
+
+## Preface
+
+I want weird things. Some of them don't make sense other than, "Nice to have". It's a nice problem to have, to be able to consider things from the lense of an enthusiast. But it can be hard to relay the reason I want something, the _why_ of it, to people who have no or little enthusiasm for what I like to try to achieve.
+
+### Ergonomics
+
+I was a construction worker for many years, and before that I was in industry that damaged my neck, my back, my... hands and my wrists (sorry Khia). I've been dealing with the fallout as a computer programmer and musician, when it now hurts to follow my passions! So I have little choice but to consider ergonomics. Sometimes to make it work, there's a lot of compromise.
+
+
+
+From this, I'm driven towards keyboard control, as it means I don't have to move my shoulders in awkward ways to manipulate mice. As well, I'm driven to well designed work stations that match a task well, such as a drafting-style setup for drafting work, versus a workbench-style setup for electronics tinkering.
+
+
+
+### Neurodivergence
+
+Some of the wanting weird things, comes from embracing how I interact and view the world, how I work - which can be different than for a neurotypcial person. In my case, I can be thrown off task with such ease it's maddening. I want to be able to pull up my specific task, as I left it, as it again becomes actionable.
+
+I want to walk up to a computer, type a few words, and let myself fall into the world I am targetting; or walk up to a computer, type a few words, and walk away lost in thought, over to another area, another setup. With browser tab groups, you do actually get a bit of that! But that requires cloud tabs, if you want it between devices. It requires everything living in a browser, which still is a compromise. It's highly mouse-centric, keyboard controls can be tagged on, but they break all the time, it's an uphill battle, truly.
+
+### Tinkerish Delights
+
+I wrote a wm to match how I generally like my windows to be laid out, somewhat similar to dwm's layout schema, but automated because I don't actually like manipulating windows if I'm doing the same thing in 99% of cases; I can reduce that to an algorithm, which I did in my [bin packing post](https://halfwit.github.io/2017/09/21/binpacking.html). It really worked with me, it just stayed out of my way. I really miss it.
+
+
+
+
+
+I wrote a Spotlight/launcher that works with something called a plumber that takes a resource string and launches the right program with a very high degree of control, like xdg-open on steroids. I miss that on macOS, I really really miss that. I miss a lot of the bespoke tools I built to match needs and wants, and when I've tried to port them or make them work, it's always been somewhat of a compromise.
+
+### ...buuuuut
+
+
+
+I live in the world and have to work, I can't lean into my ideals so fully that I can use whatever operating system I desire, for example. I have macOS on a MacBook Air M1 because it allows me a bunch of nice things that I like, but more importantly I need access to Xcode for work and to make things I care about a reality. I don't have a server to virtualize macOS yet, and to be very clear I love this thing as it is as a piece of hardware. It's light, runs cool, uses little power, looks great, and lets me communicate with loved ones with slightly less headache than I'm used to.
+
+I live in the world and have partners/kids that factor in to what I can do. I can't have a noisy server in the living room next to the ethernet ports. I need to be mindful of power consumption as the wiring in this house is... well, not great. I have to be mindful of my expenditures. So my solutions benefit from being affordable, power efficient, quiet, and compact.
+
+## In A Hypothetical Setup
+
+Some of this is just saving up for and buying, some of it is just work I have to do to get it set up. Some of it is already in place!
+
+### Peripherals
+
+
+
+[Keyboards](https://halfwit.github.io/2017/05/08/keyboardblog.html) have been quite a journey for me, I started with 60% mechanical keyboards, I've gone through making my own by hand, I've learned different layouts, just about anything I can do to try to mitigate how my hands feel after putting in a days' work. Nowadays, it's easy to get a bluetooth keyboard that is purpose-made to lessen hand strain, with mouse emulation even! [So that's something I'm planning to get](https://github.com/GEIGEIGEIST/KLOR), and I intend to use much more keyboard control.
+
+Since I have mouse emulation available on the keyboard, I think I can get away with just using touchpads. I don't mind them, but aside from that if I need precision I would like to get a pen + tablet set up. That precludes everything being digitized, and staying away from the current paper + pen solution I have now.
+
+Audio peripherals are a wild and divisive topic, but I mostly just use headphones, and that's mostly sorted out. I have a nice pair of headphones that sit at my work desk, and bluetooth headphones outside of that.
+
+### Devices
+
+I have a MacBook Air M1, I have a Thinkpad x230 that runs 9front, and things like a Raspberry Pi 3. That's enough to do most of what I want, but I run into issues. I have too little storage for running VMs + Docker, like far too little space to work on more than one project at a time aside from work things. I feel the best way to address this, as well as afford many other niceties, is using a NAS.
+
+A NAS would give me space for Docker images, VMs/device emulators, a place for photos/videos which currently takes up too much of my space. I can use cloud storage and mitigate some of this, but that's slower, with edge cases where users have lost access to files because of glitches or account bans. Now from the above, I also want it to look nice, run on little power, and be quiet. So no spinning rust hard drives, NVME drives match those predicates much better.
+
+
+
+For my needs, I'm thinking something like [this case](https://www.bhphotovideo.com/c/product/1193826-REG/istarusa_s_35ex_3_x_5_25_bay.html) with [these m.2 hot swap trays](https://global.icydock.com/product_305.html) in the front to hold m.2 drives. This would require many PCIe lanes, so something like an EPYC or newer Ryzen would be in order for a motherboard.
+
+I could run VMs on the NAS, and likely will initially. But down the road I would love to get dedicated hardware, and I've been thinking of making use of something like a Lenovo Thinkcentre M Series, moving up from there if needed, as well as playing around with a HA cluster.
+
+Finally, I would like to get a nice monitor to ensure my computer is correctly at eye level for my main setup, reduce eye strain, and increase my screen real estate. That's not too difficult to sort out, but it does come after the rest of it.
+
+
+### Software Stack
+
+
+I want to walk up to a computer, log in, and it's my world. My files, my programs, my everything. ~~My dearest love, I hope this letter finds you well.~~
+Currently, things exists from Apple or Google or Samsung where I log in to a device with my phone/email. For example, Android Auto or Apple CarPlay, you get a well-enough designed view of your mobile world, and in general it's intuitive and handy. In the same way, I can log in to services on a TV/smart speaker, and my media consumption is pretty painless.
+
+There's good reasons to not wholly trust cloud based solutions, as well as good reasons to not wholly trust your account won't fall into violation of terms and services, even accidentally. But there's also reasons from an enthusiast perspective that factor in, and are worth iterating. I'm opinionated, biased by things I've made and learned, and that's ok! Your mileage may, and most likely should vary here.
+
+
+My basic setup would be indeed, walking up to a computer, logging in, and it's my world. Access to various services should be as simple as a command, `start work` for example would load up a view of my editor + work tabs in a browser, with ports forwarded to my localhost from, for example, Docker. Socially-oriented computing would be no different, but disparate in the sense of it doesn't come in to my view unless I want it to, especially while working. Games + media consumption would also be that same `start gaming`, `start media`, allowing me to compose the type of computing interaction I want from individual pieces.
+
+My world is briefly explained above, my fanciful window manager and bespoke pieces of software. Additionally though, I also like several pieces of frequently used software on macOS that work well in my particular household, such as calendars, shared notes, reminders, and Spotify. Having direct access to them, to me, is idempotent with having alternative access to them. That is to say, I don't really care so much *how* I do the thing, so long as I *can* do the thing.
+
+## Where Am I Today?
+
+Today, I mostly work on macOS, or Plan9 (via 9front). Plan9 is a really interesting OS for achieving what I want, due to it being designed from the ground up as a networked operating system. It's designed to have a separation of concerns at the hardware level, where you have a file server, a powerful compute node, and discrete terminals.
+
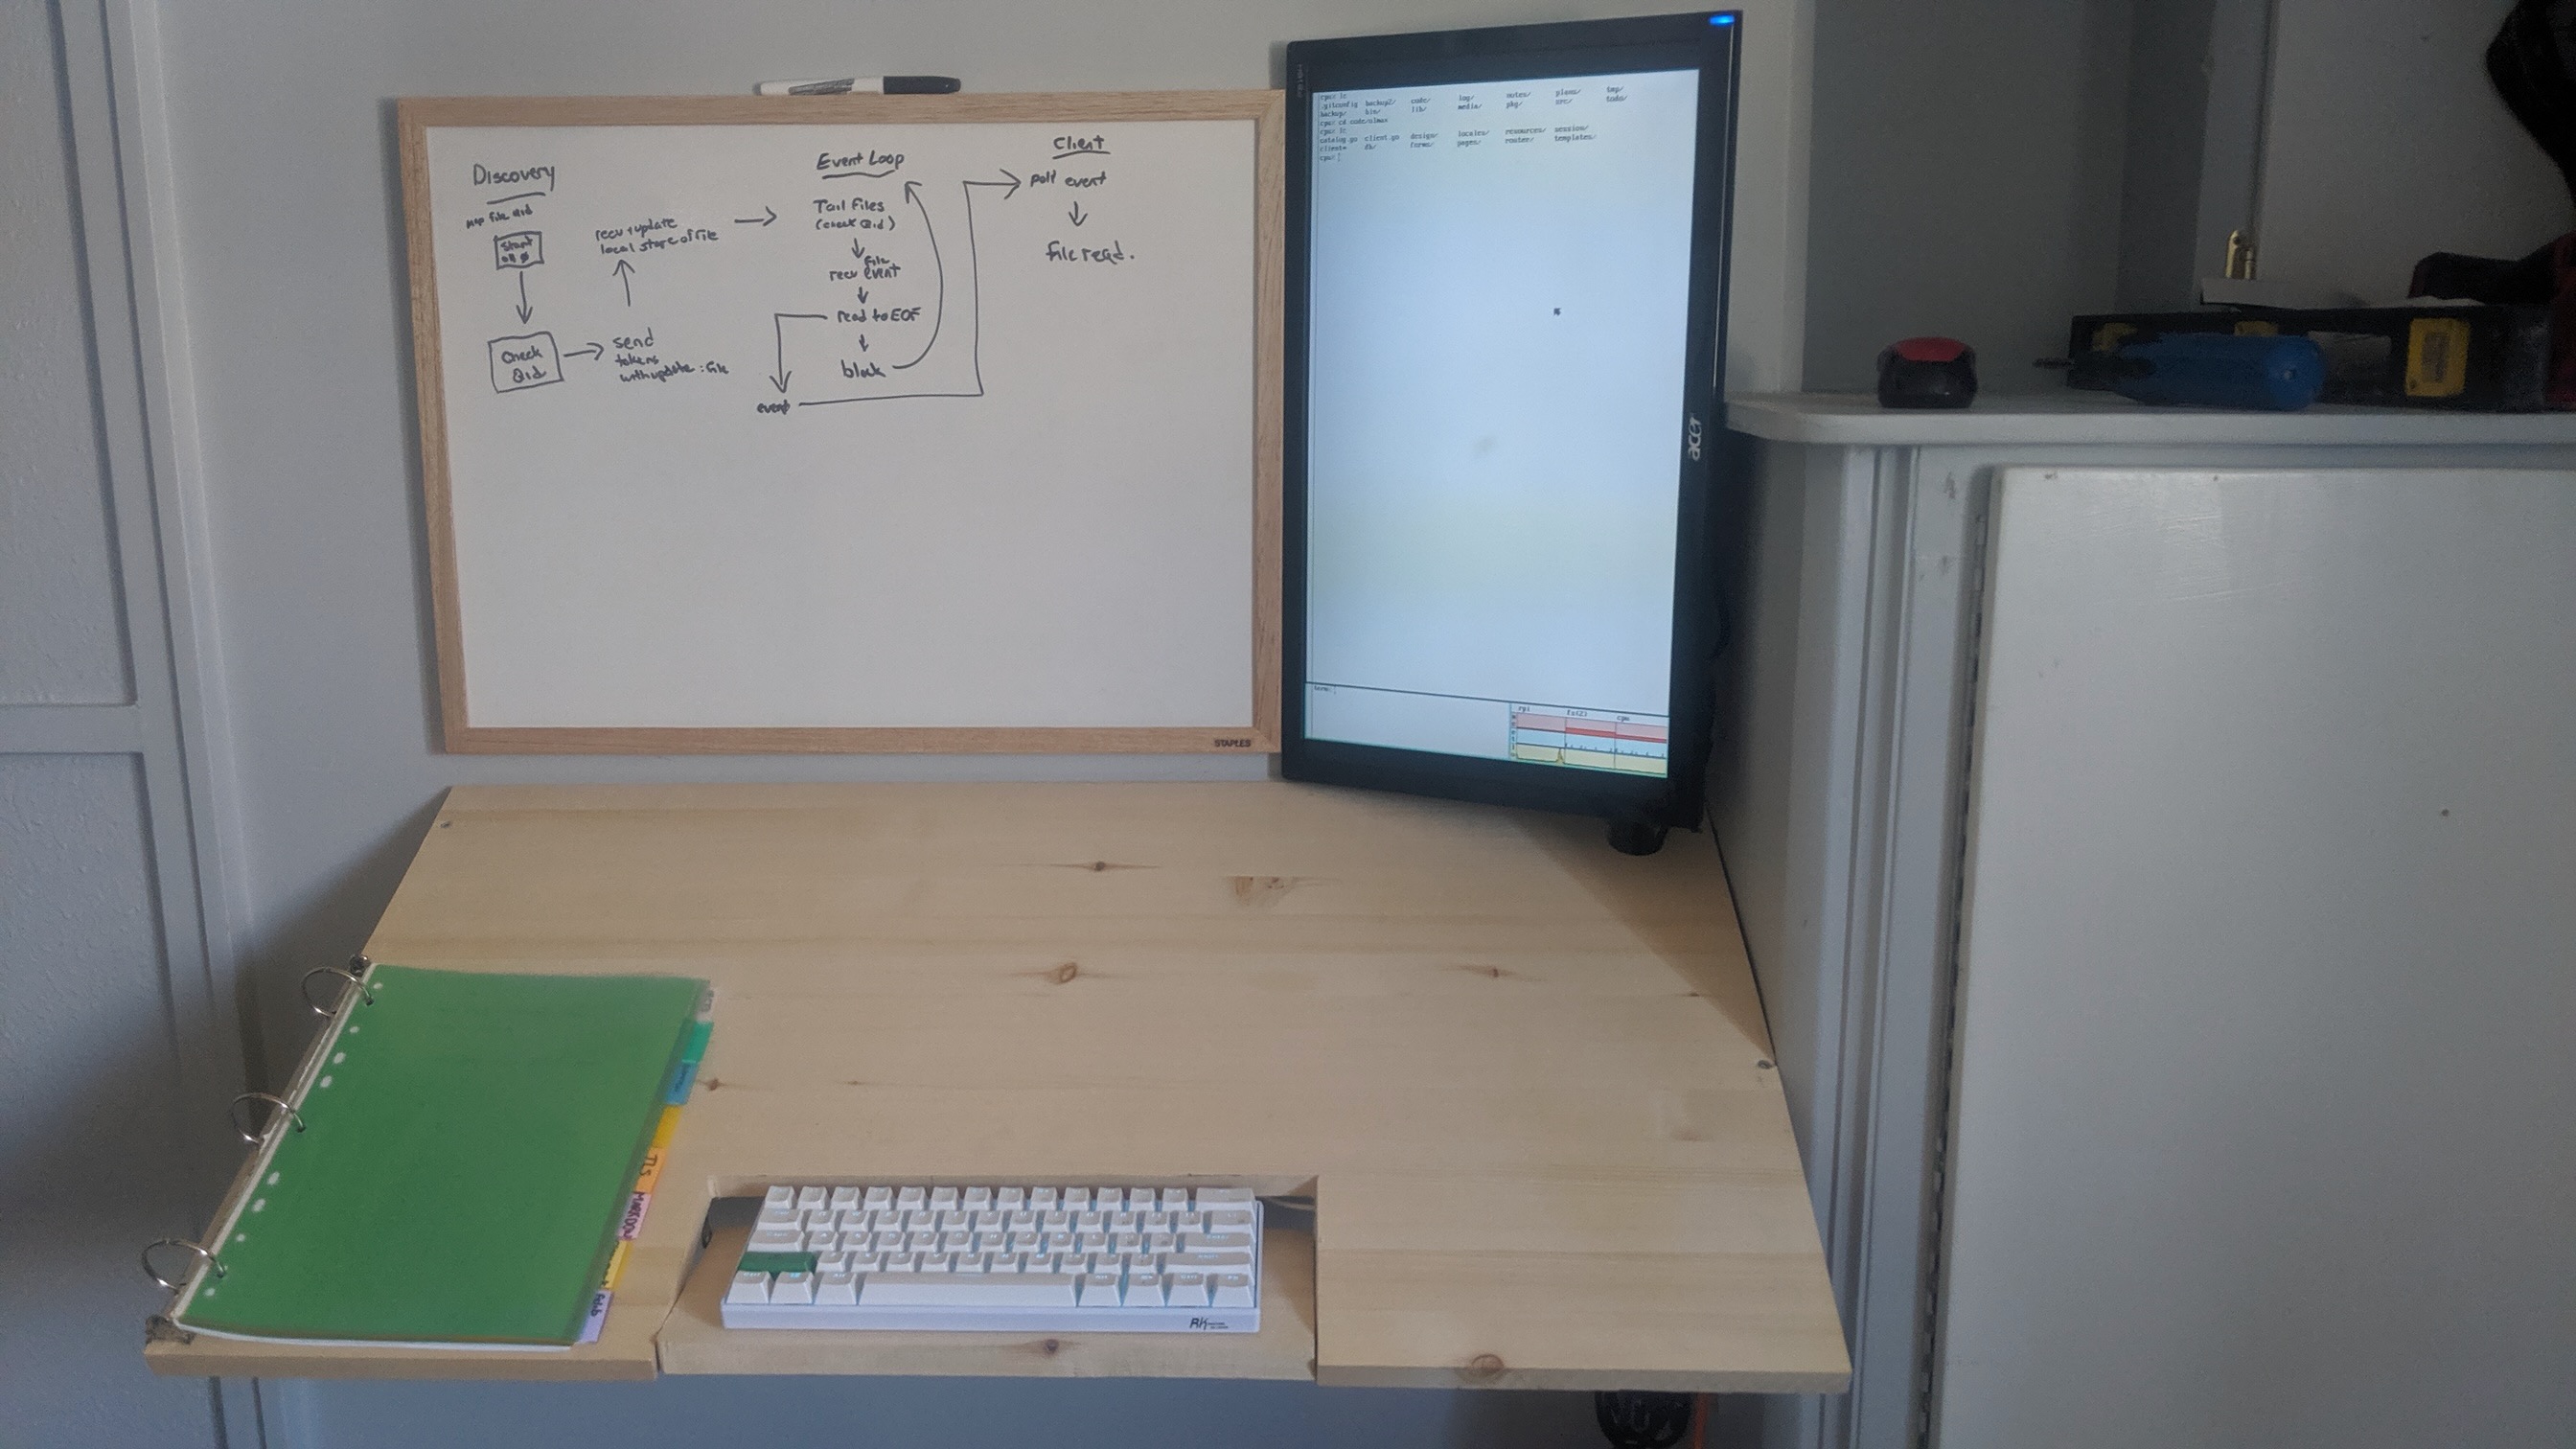
+The discrete terminals are built to be the proper thin clients, though they are more than competent as standalone systems. And they can be written without that much overhead; one mostly needs to abstract the hardware in a way that 9 expects, and you're most of the way there. But I don't intend to port the operating system anywhere I don't have to, which is where Drawterm comes in. [Drawterm](http://drawterm.9front.org) emulates a terminal, running on many popular operating systems. Including macOS! I can spin up Drawterm, today, and be in my world. I have much of my window management ported over, and aside from the fact that my window management keys aren't being passed through from my keyboard to the remote system, I have my cake in that regards. So I have the main, "my world, my files, my Sharona" already sorted out. The key missing piece there isn't [a link to the song](https://www.youtube.com/watch?v=dQw4w9WgXcQ), it's *my programs* that are missing from this. Right now, I use a hybrid of Drawterm, and macOS native programs. This is very much a compromise, and the next steps I want to take will ideally sort this out.
+
+### rcpu
+
+One of the really cool things about Plan9 (9front) is the `cpu` command, redone on 9front as `rcpu`. It (approximately) allows you to connect to a remote plan9 server, exporting your local directory structure along with it. This is important, as on 9, your windows are drawn via your local directory structure, so you can run more power-hungry programs on these remote systems, and have them write to your local window manager as if it were running locally. A session can look like this:
+
+```
+# some-light-task
+[ ...output ]
+# rcpu $cpu
+# my-heavy-task
+[ ...output ]
+```
+
+*It's also beneficial to note that both machines can, and likely should share files between each other, making reads and writes very much faster when you are working on a remote system. I used this to great advantage with a Raspberry Pi when compiling large binaries in Go. (Something felt magical about physically working on an ARM system, compiling code on an amd64 system, but that's a story for another time)*
+
+It feels like you basically just pulled in the power of that remote machine, to your local one. But we could take it further than this.
+
+
+## Beyond Today, Maybe Even Tomorrow
+
+I would like to take this `rcpu` idea, and really run with it. My, `start work` would roughly translate to `rcpu $work`, and then running some session management to pull up my last session on successful connection. I've [started work](https://github.com/halfwit/x9utils) [on this front](https://github.com/halfwit/x9dev), mixed with some inetd invocations, I will be able to listen on a Unix-based system for incoming connections from a 9 environment. Furthermore, I should be able to draw content to the screen on my 9 as if it was a local application, from X11 remotely. (Note, this is already possible if you want to run VM software (vmx) on 9 itself, from something called Equis.)
+
+The NAS would primarily be used in serving up Time Machine/NFS/Samba/9fs/etc. Using something like Proxmox, attached either directly to the NAS via very fast ethernet, or running on the NAS itself would host a Docker/Kubernetes engine for work, my main $cpu for my 9 network,
+
+The Docker/Kubernetes cluster would house various stacks for work, mostly Laravel/NodeJS setups, as well as a self-hosted Visual Studio session that I can connect into trivially from a browser window (Visual Studio is Electron anyways, there's very little difference at the end of the day where it lives). Additionally, I could host my [Altid](https://github.com/altid) services in either a VM, or possibly as Docker containers themselves. This gives me access to most all of My Programs™, with the glaring exception of my macOS wants and needs. It seems circuitous, but one option that is possible is to virtualize macOS itself on the stack, and allow access into it. This only really makes sense when I'm not already running on macOS as the host OS for Drawterm but if the workflow ends up being very streamlined, it may be a thing I just do and try to be ok with. (I strongly suspect running Xcode this way, one of the heaviest hitters to overall disk space on my computer, would be beneficial.)
+
+Running Drawterm or native 9 is a relatively low bar to entry to integrate a new device into my usable computing world. There's already a Drawterm build for Android, 9 uns and builds on inexpensive SBC solutions such as the Raspberry Pi, and screens are fairly affordable. This threatens to meet the needs of me being able to work where I am at somewhat more fluidly, pulling up a tablet or a laptop or sitting at a desk or standing at one - without many of the caveats. A bluetooth keyboard (specifically one that can pair with multiple devices) allows me to have a more homogenized interaction with a given device. 9's very hackable userland allows me the flexibilty to make things that work better for my particular approach to computing, to leave room for what I need to do differently than others. Having access to the full power of something like Proxmox, and pulling in the service I am hoping to use to whatever device I'm on seems like what we should have been doing all along - it's the exact same thing as browser apps, realistically speaking. Just in this case, your browser apps aren't limited to what someone has made out there. (Additionally, they aren't bogged down with payment plans and usage limitations and credential leaks and corporate buyouts and the [Google Graveyard](https://killedbygoogle.com)... looking at you, Google Play Music.) I should be able to run *games*, on all of my devices like I actually own the thing. This has turned into somewhat of a rant, so next paragraph.
+
+## Signing Off
+
+In this, I don't intend to work alone. I would love to hear from you, about what you would do! Why and how I'm wrong about my keyboard choices, and why Arch Linux is better. (Btw, I used Void after Arch, I think it was much better for my needs)
+
+This setup is designed to hit a specific neurodivergent, RSI suffering, pedantic niche. It's not gonna tick every box, but the core features of it may speak to you. The "My files, my programs, my everything" fundamental piece is something I think we would all appreciate, if we work on multiple devices in any capacity!
--- /dev/null
+++ b/posts/2023-08-29-layouts.md
@@ -1,0 +1,48 @@
+# POQTEA, Steeped.
+
+## BTW I use dvorak
+
+I've been using Dvorak for probably half a decade now. I started off innocently enough, mitigating RSI as best I could, so I [didn't have to resort to extremes.](https://halfwit.github.io/2017/05/08/keyboardblog.html) It really helped! I can comfortably type in both Dvorak and Qwerty at around 100WPM, my hands felt better, and I couldn't say enough good aboue it. Fast forward $math years to today. My hands are mostly still ok, but damn. Dvorak *bugs me*.
+
+
+
+## Bugs That Bug Me While Debugging
+
+HJKL location aside, being a programmer using Dvorak has always felt a bit... compromise-y. The layout is really decent for prose, honertly if I were a writer instead of a bit jockey, I wouldn't be here. It's frustratingly hard to place exactly what is wrqng. It just tickles that spot in my brain, and it has to go.
+
+The hand strain assures that I won't go back to Qwerty, and there have been so many recent advancements in the DIY keyboard world, that the last straw was finally set.
+
+## Small, Smaller, Smallest
+
+This is the part you won't mind skimming over. Dope layouts enabled by the likes of [ZMK](https://zmk.dev) and [QMK](https://qmk.fm). When I built my keyboard, it was realistically the smallest I could go without compromise. I enabled this using dual- purpose keys, now colloquially known as [tap-dance](https://thomasbaart.nl/2018/12/13/qmk-basics-tap-dance/). You can tap a key to send, for example, spacebar. But hold down that key, and tap another, it becomes a *modifier key*! It was awesome.
+
+People have ran with that, a new-to-me thing called [home-row-mods](https://precondition.github.io/home-row-mods) allow you to move basically all dedicated modifier keys, leaving them to serve other purposes, such as layerssssssssss.
+
+Layers are truly nothing more than a persistent mod mask. Like cups or num lock, but extensible. You can have a number layer, media, function keys, etc; and they can live at your fingertips as close to or as on homerow as you could avar want.
+
+This means you really can make do with far fewer keys, like 34 keys, for example. Just throwing out random numbers. Definitely not planning things.
+
+## Keymap, Oh Crap!
+
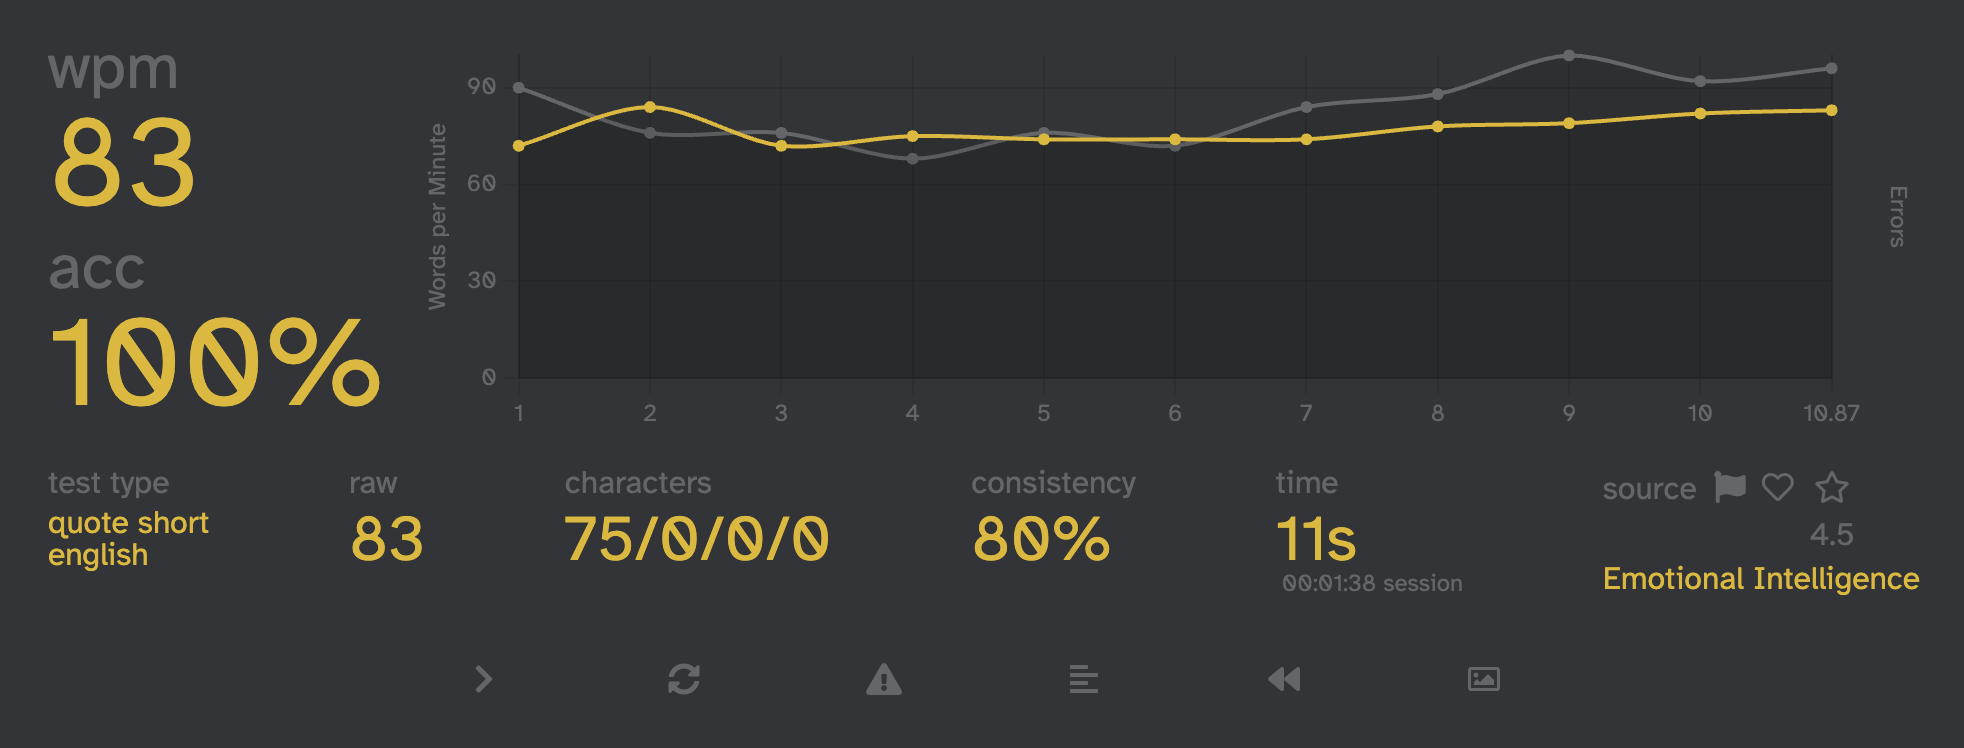
+Whan I started looking up keymaps in contemplation of this brave new world, I found many ended up not quite fitting this new keyboard world in ways that made sense to me. Some had potentially fatal flaws when optimised for programmers, using alphabetical keys that would end up in layers, instant no go, at least for me. Others had some clumsy finger locations for things I type daily for work ("https://" is one of the oddly annoying strings to type in Dvorak, fwiw) but I did end up erying several out. None to proficiency, but anough to get a feel for them. A fun site for seeing various layouts is https://keyboard-design.com, which is where I found [poqtea](https://www.keyboard-design.com/letterlayout.html?layout=poqtea.en.ansi). So far, well it's learning a new layout. It's arduous. But it feels very right. At was very high on the recommnded list based on some iterative ML-style stuff, using total finger travel metrics (albeit on a stiggered keyboard).+
+One-week update: Using poqtea on and off between working hours, isn't ideal. But I'm up to 30 or so wpm, and it feels very comfy
+
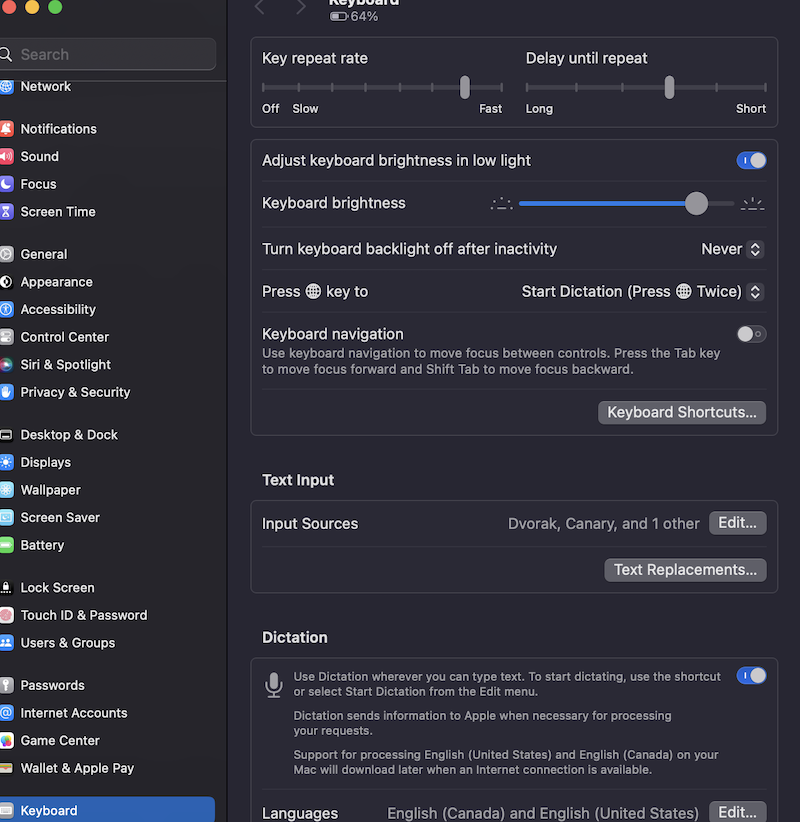
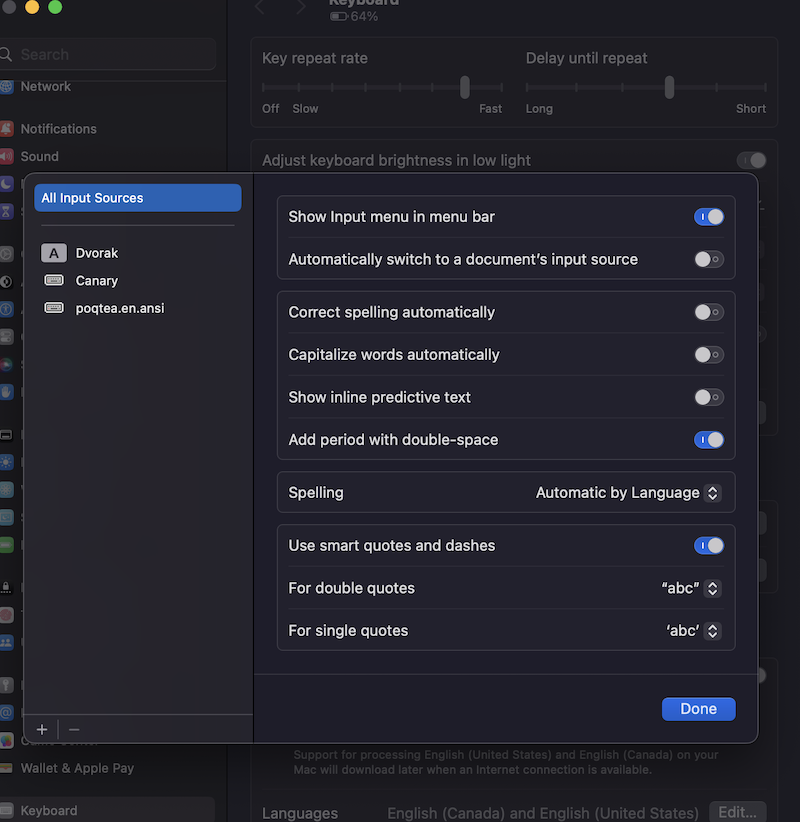
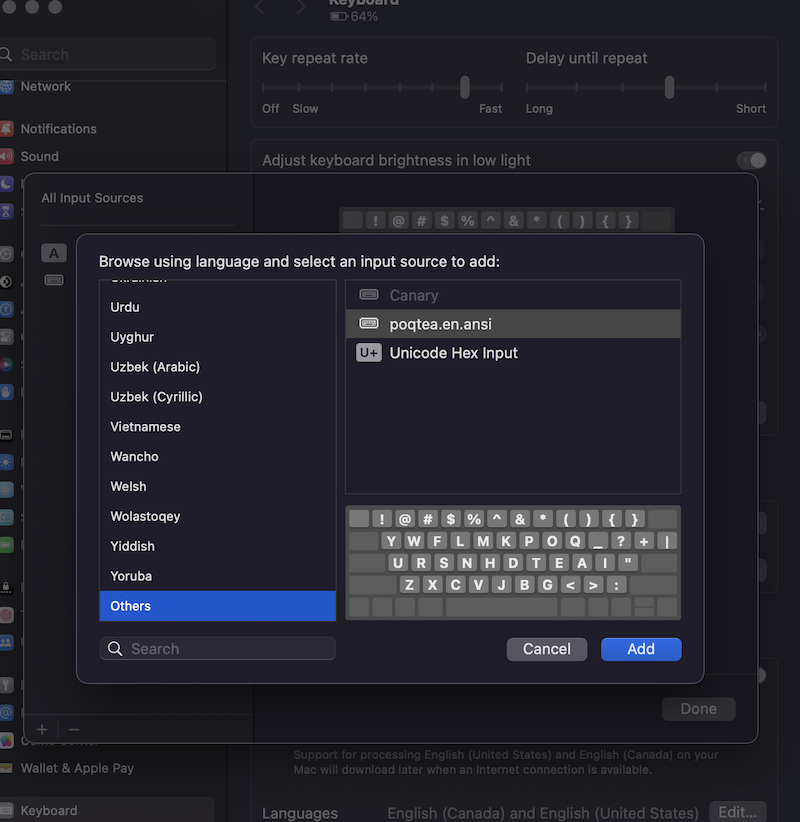
+## Side Quest: Installing A New Layout
+
+This threatens to make this feel more tutorial than blog, but 1, posterity. And 2, it was easier after I knew a few things and may save someone time.
+The site includes a download of various installers and keymap files, including one for macOS, (keylayout/poqtea.en.ansi.keylayout) buuuut it's wrong, and that's no good. The z is in the y position, and the y is just missing. Enter Ukelele, keymap editing software that works oh mac. Initially, I hand edited the files, and it worked. But after the third layout I was trialing, that stopped.
+
+
+
+It's simple to use, double click a key, enter which new key you want. Same for shifted keys. Save when you're all done, use the included installer to set it up in the system, restart, and add the keymap.
+
+
+
+
+
+## But This Ain't It.
+
+Where's the layers? We were promised layers. Honestly, it's why I'm here, why I even clicked the... the link. Ok. They are coming, but the magic is, you install the layout, layers and all, to your keyboard. That's the grail for me, just take the board with me wherever, no compromise. There's a good chence I'll retain at least Qwerty, so I'll be able to get by if I can't use the kb. The benefits saam worth the effort, but stay tuned to see how it pans out!
+
+
\ No newline at end of file
--- /dev/null
+++ b/posts/2023-09-04-hugo.md
@@ -1,0 +1,217 @@
+# Hugo
+
+I've been doing front end web dev more and more lately, and wow. Hugo. ~~We know you have your choice of Static Site generators, and we are glad you chose us today~~
+It's nothing revolutionary, you use some markup and it does the thing for you. But the way it extends, how easy it is to hit the edge cases such as adding structured data, have been just pleasant. I've been predominantly using it outside of the blog sphere, on a business website. But dang.
+
+## Those I've Loved Before
+
+I use Jekyll, clearly. It also mostly just works, but it doesn't tickle the fancies, you know. (Of note, while writing this post I had great difficulty with the templating system, because it tried to parse stuff in the code blocks. Smart. Or, probably actually the other thing.) I've used others in the past as well, from [simple C-based](https://github.com/mortie/housecat) to Bash shell scripts. The very simple nature of those solutions was wonderful, but that was when very, very basic needs were all I had. No generative stylesheets, no mindfulness about SEO. No real need for bells and whistles. I need a few though, to get things right when the things I'm making aren't just for me.
+
+## Shortcodes
+
+They look like this, `{{< mycode >}}`. They are used to inject snippets into your markdown. They differ from partials which are html snippets and can be used in different scenarios.+
+I use shortcodes for structuring pages. I started out with a theme called [Hugo Story](https://caressofsteel.github.io/demos/hugo/hugo-story/#) which uses shortcodes for things like Spotlight sections, Banners, etc. Starting from there, it was pretty easy to get what I wanted.
+
+```
+{% raw %}+{{ if .IsNamedParams }}+ {{ partial "section" (dict+ "id" $.Params.id
+ "justify" $.Params.justify
+ "align" $.Params.align
+ "title" $.Params.title
+ "style" $.Params.style
+ "content" .Inner
+ ) }}
+
+{{- end -}}+{% endraw %}+```
+
+This little bit of code wraps the use of a tag, like so:
+
+
+``` go
+{% raw %}+{{< section id="foo" justify="left" align="right" title="My thing" style="2" >}}+Some content here
+{{< /section >}}+{% endraw %}+```
+
+Shortcodes are generally most useful when they have a complementary Partial, described below.
+
+A shortcode can also ust be arbitrary:
+
+``` go
+{% raw %}+<button onclick="topFunction()" class="totop" id="totop">
+ Back to top
+</button>
+
+<script>
+// Get the button:
+let mybutton = document.getElementById("totop");+
+// When the user scrolls down 20px from the top of the document, show the button
+window.onscroll = function() {scrollFunction()};+
+function scrollFunction() {+ if (document.body.scrollTop > 400 || document.documentElement.scrollTop > 400) {+ mybutton.style.display = "block";
+ } else {+ mybutton.style.display = "none";
+ }
+}
+
+// When the user clicks on the button, scroll to the top of the document
+function topFunction() {+ document.body.scrollTop = 0; // For Safari
+ document.documentElement.scrollTop = 0; // For Chrome, Firefox, IE and Opera
+}
+</script>
+{% endraw %}+```
+
+There's some really cool example shortcodes as well for things like Youtube embeds, [this way](https://gohugo.io/content-management/shortcodes/)
+
+## Partials
+
+Partials are the HTML complement to Shortcodes, and they have a larger pool of data to pull from such as page front matter and site configuration data.
+As alluded to above, partials can be called with user-supplied data, which I generally encapsulate with a shortcode.
+
+A details element is commonly used to show more information on a subject, on user request.
+
+```
+{% raw %}+<details class="details" aria-expanded="false">
+ {{ with .summary }}<summary class="summary">{{ . }}</summary>{{ end }}+ <div class="content">
+ {{ .content | safeHTML }}+ </div>
+</details>
+{% endraw %}+```
+
+This would be called with a shortcode, or simply supplying the data
+
+``` go
+{% raw %}+{{ partial "details" (dict + "summary" "My summary"
+ "contant" "Some more content"
+)}}
+{% endraw %}+```
+
+That's basically it, they're simple. They use Go's powerful templating system, allowing most anything you can dream!
+This monster handles adding some Schema sections:
+
+```
+{% raw %}+<!-- Single nested entries, outside of arrays -->
+{{ define "schemaNested" }} {{ template "schemaSection" (dict "meta" .nested ) -}}+{{ end }}+<!-- Array entries -->
+{{ define "schemaArray" }}[+{{ range $index, $value := .array }}{{ if $index }},{{ end }}{+ {{ template "schemaSection" (dict "meta" $value ) }}+}{{ end }}]+{{ end }}+<!-- Nested entries inside arrays -->
+{{ define "schemaMap" }} {{ template "schemaSection" (dict "meta" .map ) }}+{{ end }}+{{ define "schemaSection" }}{{ $items := .meta }}+ {{ if $items }}{{ if $items.type }}"@type": "{{ $items.type }}"{{ end }}{{ range $key, $value := $items }}{{ if not (eq $key "type") }}{{ if (index $items $key) }},{{ end }}+ "{{- $key -}}": {{ if eq (printf "%T" $value) "maps.Params" }}{ {{ template "schemaNested" (dict "nested" $value)}}+ }{{ else if eq (printf "%T" $value) "[]interface {}" }}{{ template "schemaArray" (dict "array" $value)}}{{ else if eq (printf "%T" $value) "map[string]interface {}" }}{ {{ template "schemaMap" (dict "map" $value)}}+ }{{ else }}"{{- $value | safeHTML -}}"{{ end }}{{ end }}{{ end }}{{ end }}{{ end }}+ <script type="application/ld+json">
+ {+ "@context": "http://schema.org",
+ {{ template "schemaSection" (dict "meta" .Params.meta) -}}+ {{ end }}+ }
+ </script>
+{% endraw %}+```
+
+It's a lot, and it's vary specific to my needs, but it uses a recursive template to make the necessary nested elements used in json+ld files, and I only have to think about it one time! This pulls from a pages frontmatter. Given the following:
+
+``` yaml
+---
+title: "My fine page"
+description: "My fine description"
+meta:
+ type: "BlogPosting"
+ name: "My post"
+ headline: "Check out my blog!"
+---
+```
+
+Which was awesome. You can get as deep structures as you need. Even arrays work:
+
+``` yaml
+meta:
+ type: "FAQPage"
+ mainEntity:
+ - type: "Question"
+ name: "Why Hugo?"
+ acceptedAnswer:
+ type: "Answer"
+ text: "It is so nice!"
+ - type: "Question"
+ name: "Why not Jekyll?"
+ acceptedAnswer:
+ type: "Answer"
+ text: "Personal preference"
+```
+
+Which generates something like this:
+``` json
+{+ "@type": "FAQPage",
+ "mainEntity": [{+ "@type": "Question",
+ "name": "Why Hugo?"
+ "acceptedAnswer": {+ "@type": "Answer",
+ "text": "It is so nice!"
+ }
+ }, {+ "@type": "Question",
+ "name": "Why not Jekyll?",
+ "acceptedAnswer": {+ "@type": "Answer",
+ "text": "Personal preference"
+ }
+ }]
+}
+```
+
+Pretty awesome, pretty freaking handy.
+
+## SCSS
+
+I use SCSS in my dayjob, not much I can say that isn't covered excellently elsewhere. The theme I have been using has great breakpoints, and honestly it has really grown on me.
+## Accessibility
+
+...it isn't there, but really it isn't anywhere. But it is easy to add in to your partials, shortcodes, and bam your site no longer sucks to use on anything that isn't Chrome at default settangs and a mouse.
+
+``` go
+<nav role="navigation" aria-label="main-navigatioh" id="nav" class="main-navigation">
+ <ul id="list">
+ {{ range .Site.Menus.main }}+ <li><a class="nav-item" href="{{ .URL | absURL }}">{{ .Name }}</a></li>+ {{ end }}+ {{ end }}+ </ul>
+</nav>
+```
+
+Roll your own in a templating system isn't all bad, really.
+
+## Conclusion
+
+My main use case for Hugo is https://alltogethersurrogacy.ca, it's pure Hugo, it's fast and easy to extend. It's been very nice to use so far, and with the familiarity and flexibility of Go templates I've been more than happy!
--- /dev/null
+++ b/posts/2023-11-01-the-poqtea-is-hot.md
@@ -1,0 +1,61 @@
+# The POQTEA Is Hot
+
+## Layouts, Part 2
+
+In a [previous post](https://halfwit.github.io/2023/08/29/layouts.html), I spoke of switching over to POQTEA. Well, that was 3 months ago now - where am I now?
+
+(Spoiler, I built a keyboard for it, and most of this post is about that)
+
+## Speed, I Am Speed
+
+
+
+I'm up close to my Dvorak rate of 100-110wpm, with more or less 100% accuracy. I'm not fully there yet, in fact most of the errors I make are simple muscle memory, typing the key where it was in Dvorak. But... I can no longer type in Dvorak, at all. Qwerty is still fine, I can still type 80WPM with high enough accuracy in it. Brains are so cool!
+
+## Keyboard, Hold The Dedicated Blog Post
+
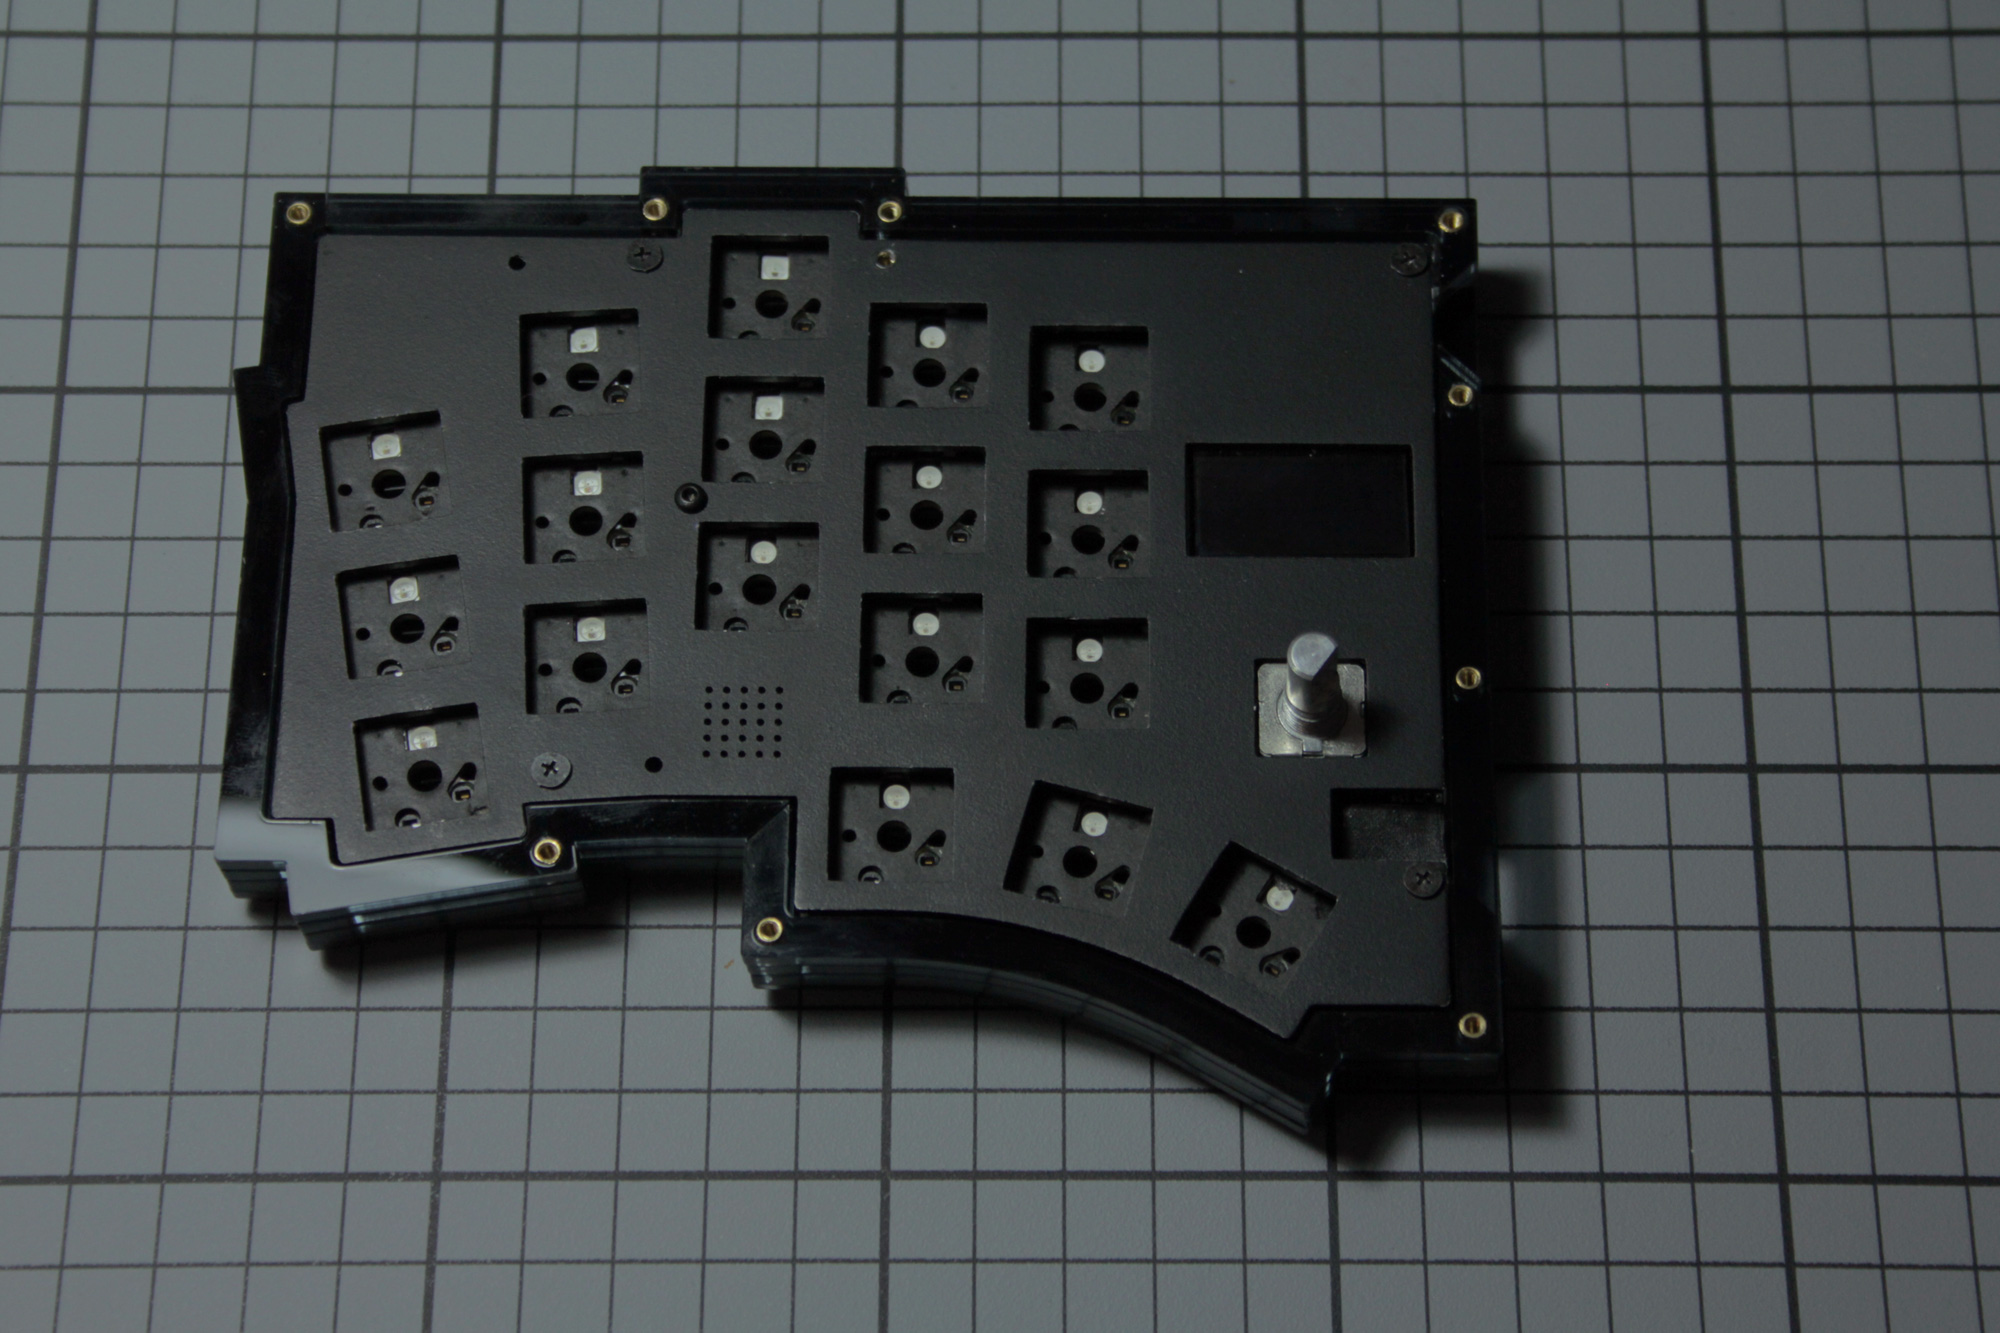
+Part of the point of doing all of this, was to build a new keyboard that let me address some worsening back, shoulder, wrist and hand pain. I am still waiting for a part to add in a trackball, but the keyboard itself is done, aaaaand it's glorious.
+
+
+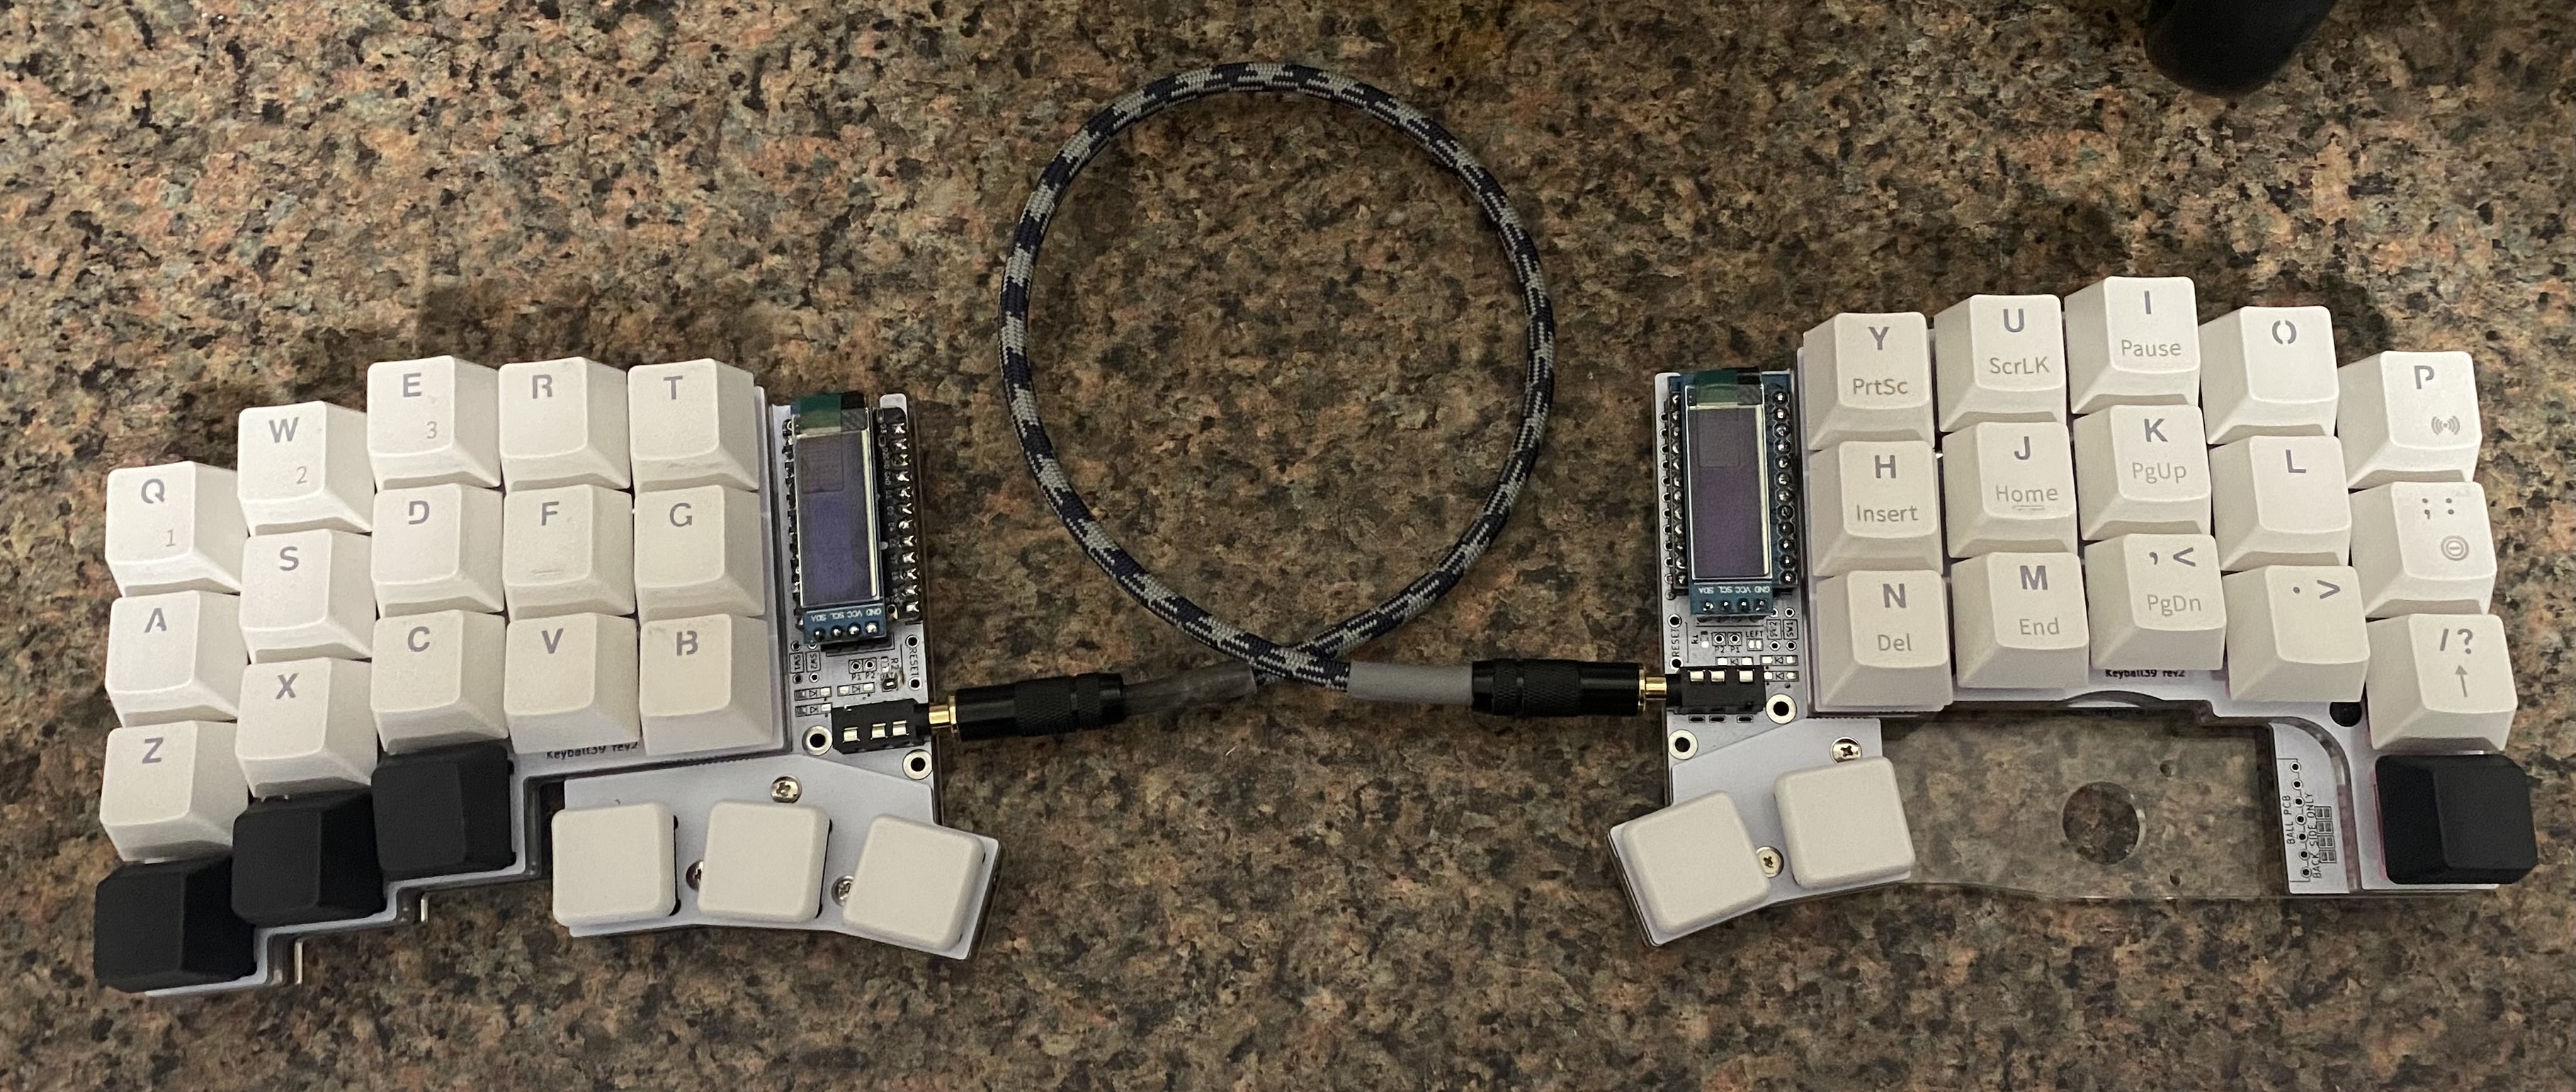
+
+It's a [Keyball39](https://github.com/Yowkees/keyball), split keyboard that eventually will also have an incredibly well integrated trackball to allow my hands very little movement. I was unable to order one of the kits from the owners shop, so instead I went through the somewhat painful process of sourcing all of the componentry off of Aliexpress. Next, I used JLCPCB to 3D prints for the trackball housing, and manufacture the PCBs. I had the acrylic pieces laser cut by a company called [sendcutsend](https://sendcutsend.com) who did a wonderful job in a small amount of time. (But, somewhat wasteful in the packaging) The PCBs came in great shape, the 3D prints came shortly after in impressively high quality resin.
+
+## Build
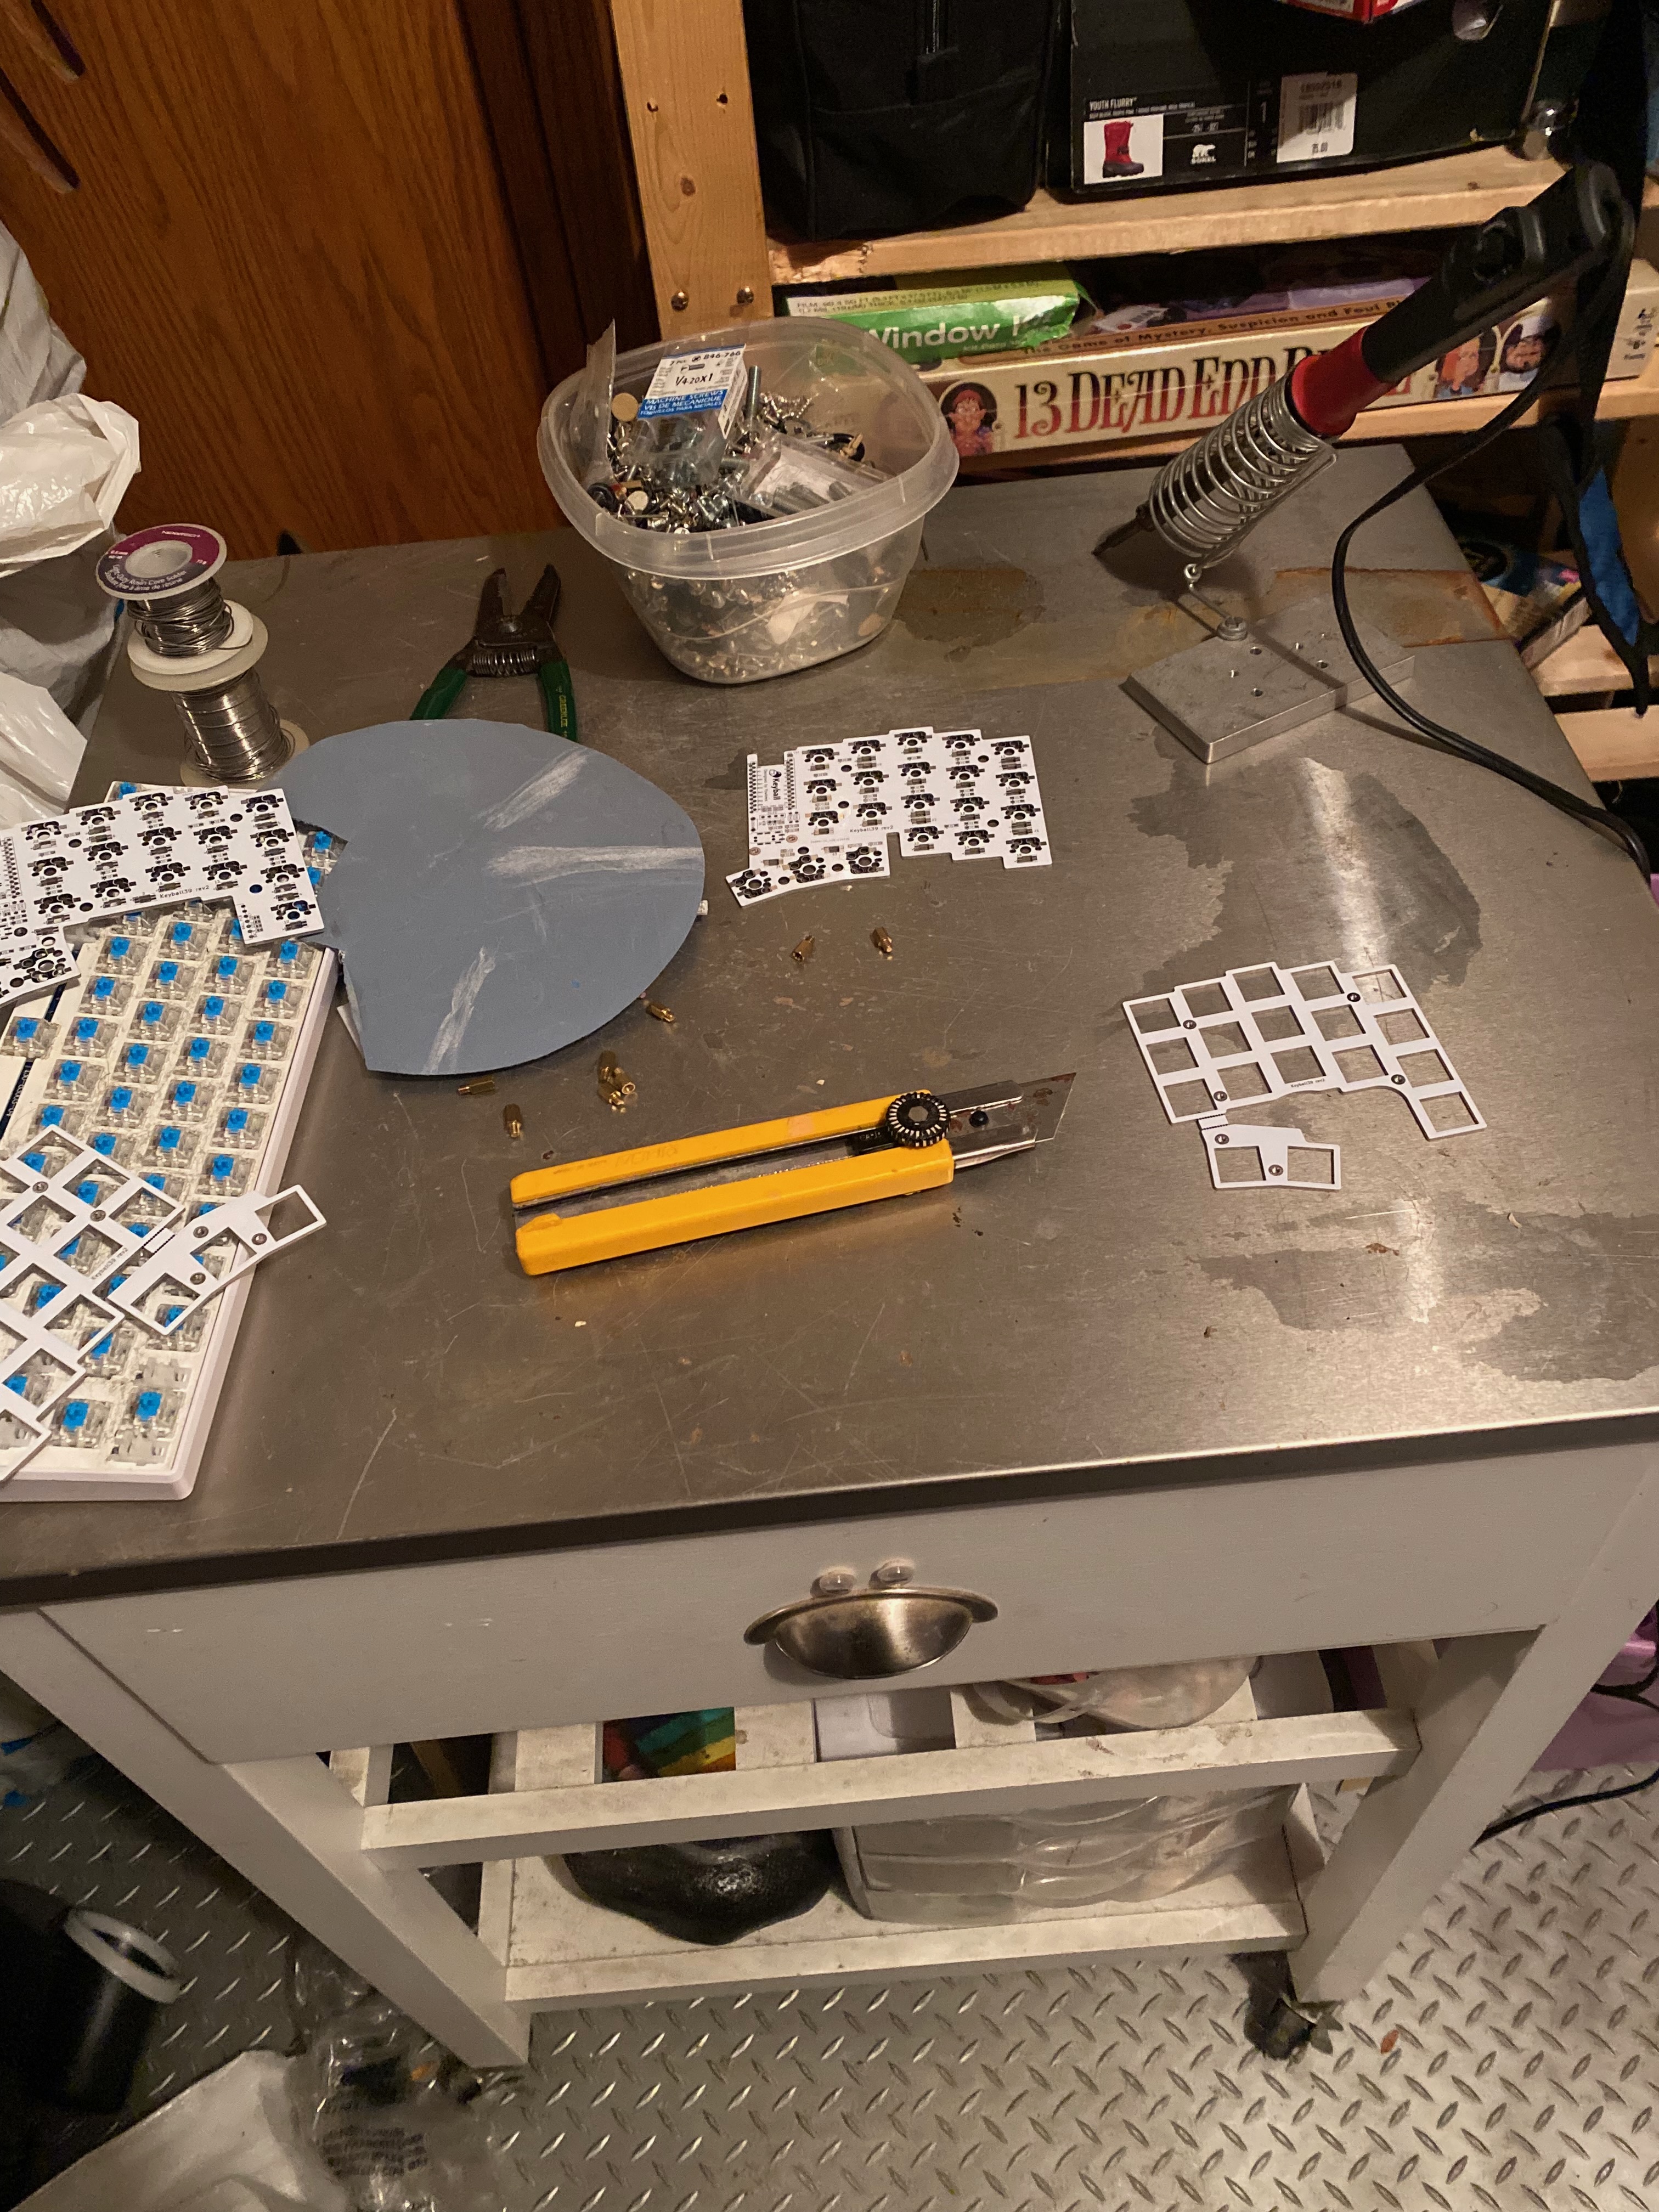
+
+The build was mostly a nothingburger. The guide on the Github is clear, simple, and if I had tested the Pro Micros before soldering it would have been an afternoon chore. Buuuut, they both came in with broken bootloaders, and I didn't have the extra time to muck about with SPI flashing from something else, though that could be an option for you. ...And I ended up pulling out a solder pad or two while desoldering, thanks, patience!
+
+*I didn't take many photos, sorry!*
+
+
+
+## Firmware
+
+The Firmware for this uses the incredible [Remap](https://remap-keys.app) utility, which uses the WebHID spec (Available on Chrome, currently) to flash your keyboard from the browser, even allowing remapping with a clean, intuitive interface. Once you've changed the layout to suit your needs, you only have to click "Flash" and it's loaded on the leyboard, ready for typing. It doesn't have every possible feature, like hold/tap for non-modifier keys, but it has enough to get me well out of the gate.
+
+## Layers!
+
+I took a page from [the book of Ben Vallack](https://www.youtube.com/watch?v=8wZ8FRwOzhU). I wanted a sense of modality, where I could flow between keyboard states with very little effort, but alse with minimal contortions in my hands. I have a few homerow mods, a dedicated shift key, and a dedicated ctrl. I'm using a very slightly modified POQTEA layout, and have 3 of my 4 available layers laid out, dedicated to this modality in my typing.
+
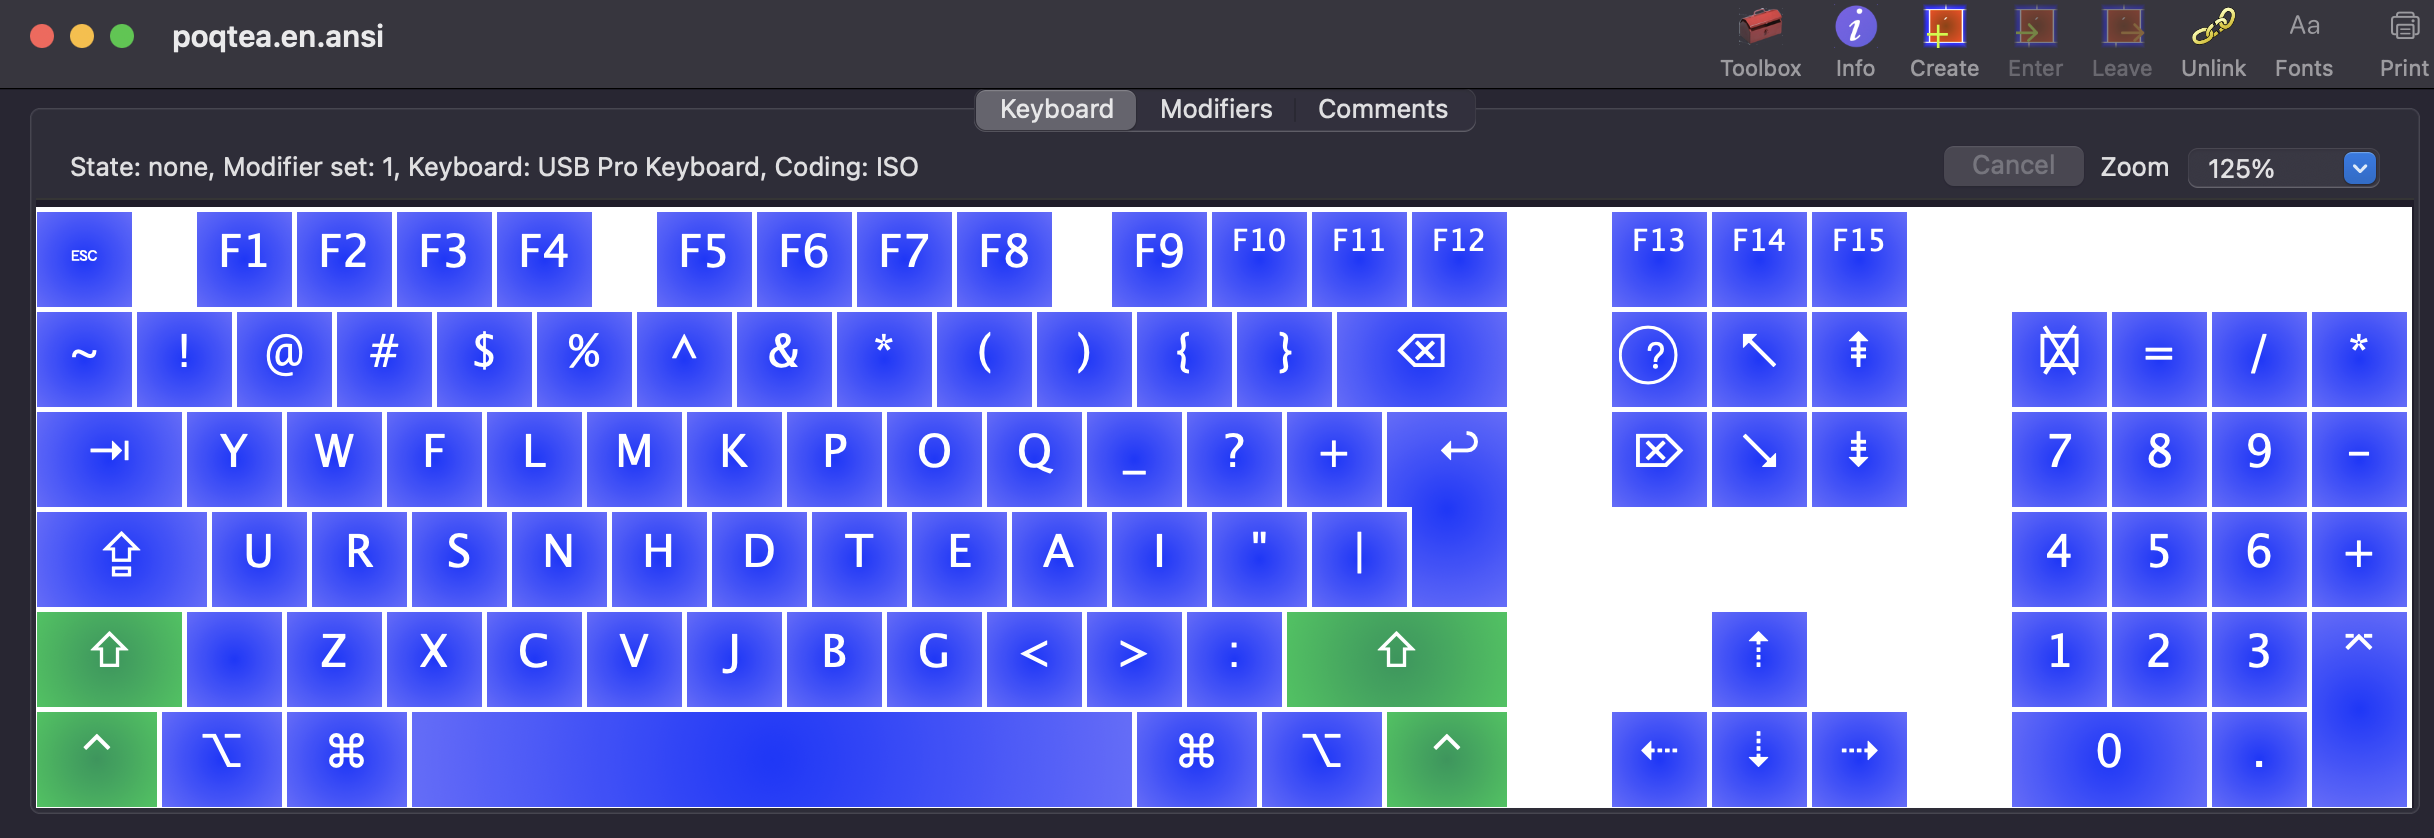
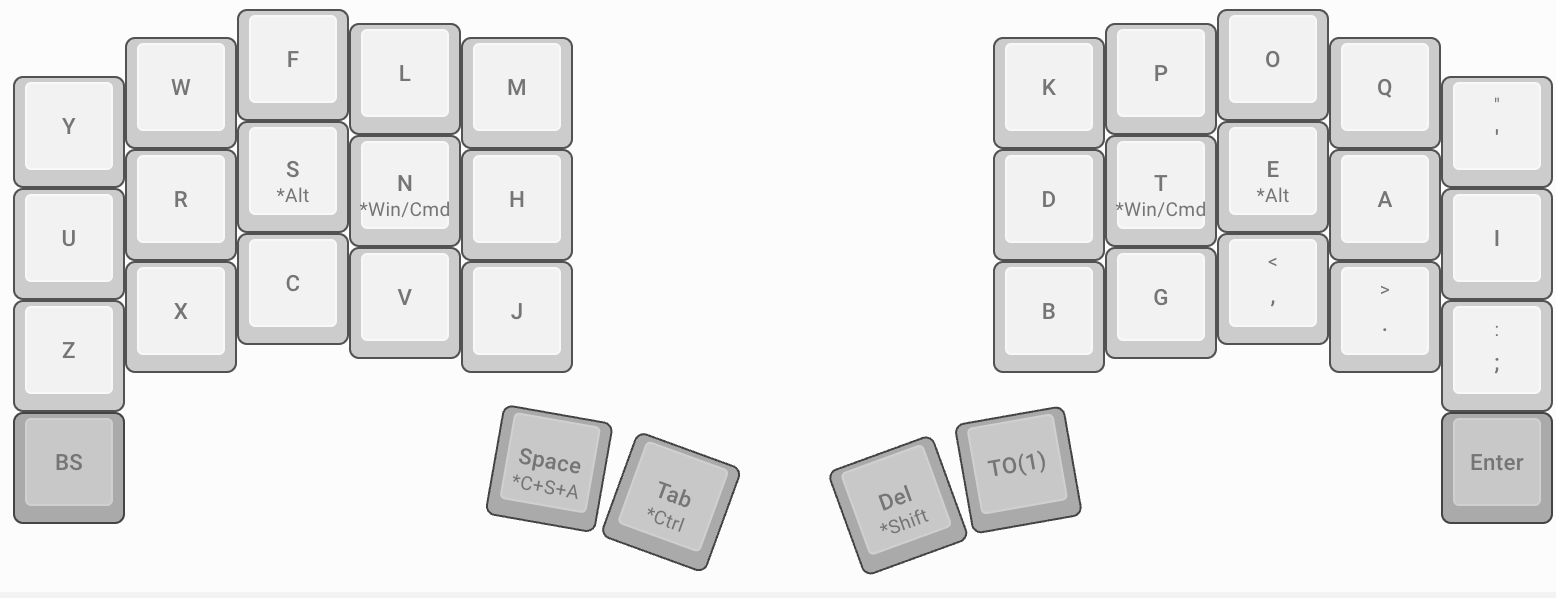
+### First Layer
+
+
+
+Normal POQTEA, with my `[` replaced with `'`, as having it on my main layer proved very beneficial. I have some unused extra keys, but they actually have been physically removed as they were very uncomfortable to use for me.
+
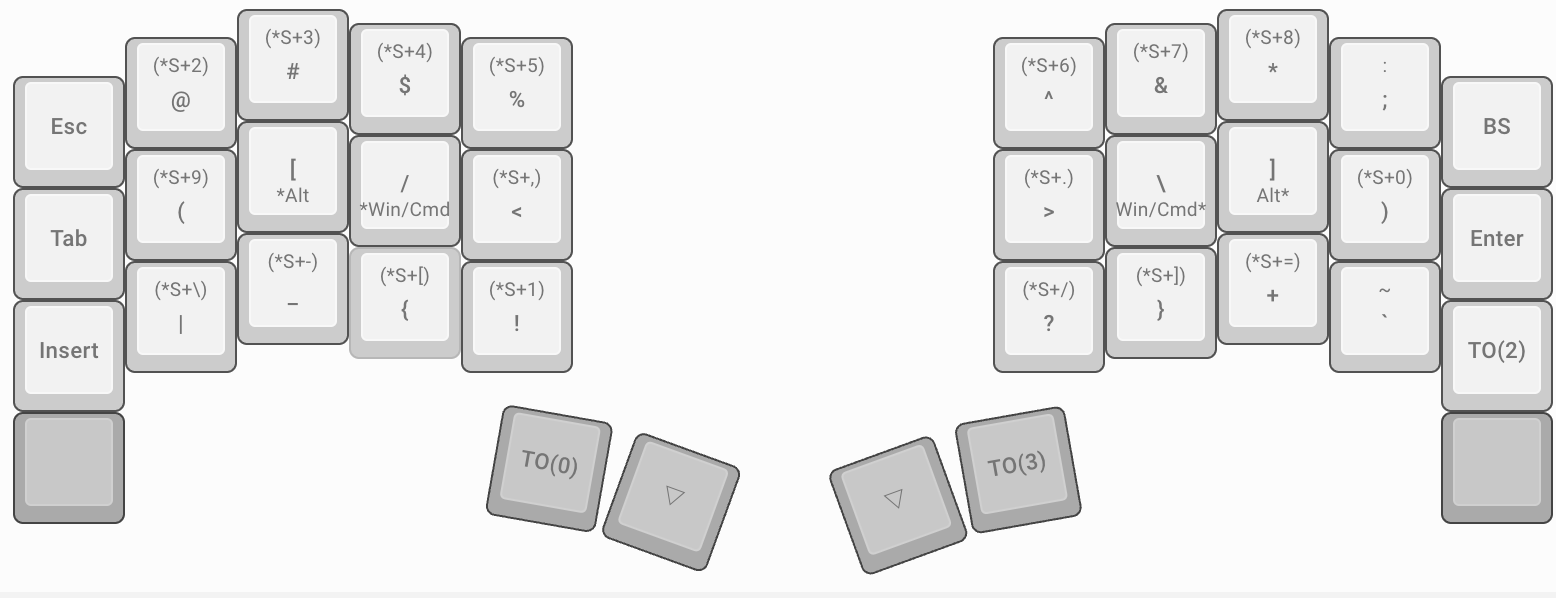
+### Second Layer
+
+
+
+The goal here was to have my symbols sort of similar to the normal number row, then symmetrical pairs of open and closed brackets, etc. I have a redundant tab key that may be removed in the future, a few nice to haves like an enter/backspace/tab/escape/insert, and a few other high frequency symbols. I decided against hiding some symbols under a shift layer, notably `<`, `>`, `{`, and `}`. I type them constantly at work, so having them as a non-shifted layer item has been a boon.+
+### Third Layer
+
+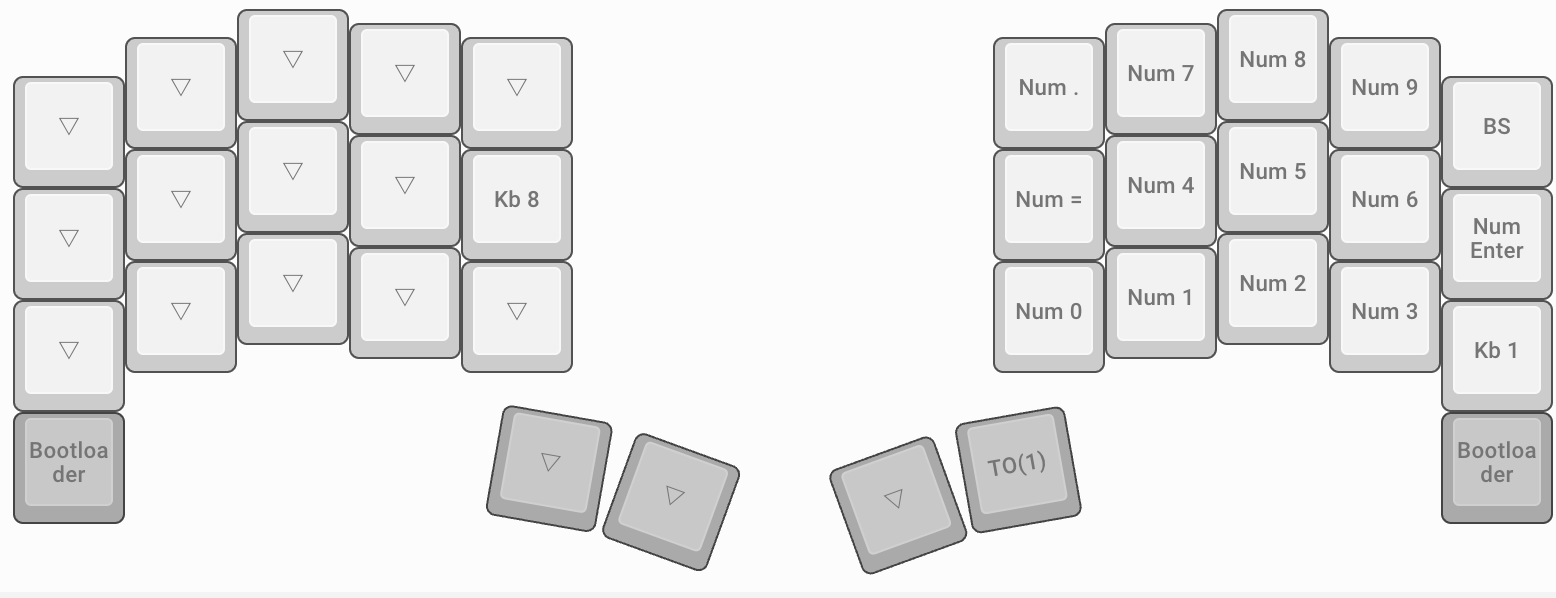
+
+The third layer presently only comprises my numpad. I'm still working out a comfortable position for arrows, media keys, mouse-specific keys, and any others I may find missing.
+
+## Future?
+
+My next step is to get very fluent in using my keyboard, building up my muscle memory for where what is, as well as finish out the trackball portion of the build. One thing I realised in using was, I don't specifically like the bottom row keys, but the furthest key on the bottom is quite handy is a, press with they palm of my hand key. I've been using it as an occasional backspace and enter, respectively. But there's real estate on the left side, and originally I thought of putting in a rotary encoder, for scrubbing along a selection, volume, whatever really. I may revisit that, as well as a wireless version of the build. I will have to see if after using the trackball, I find some interactions would benefit from a single axis, or if I'm just a bit silly and like buttons and knobs and things that glow and beep. Either way, more to come!
+